Dryfast DM100 Instruction Manual - Page 4
Browse online or download pdf Instruction Manual for Measuring Instruments Dryfast DM100. Dryfast DM100 17 pages. Moisture meter

EN
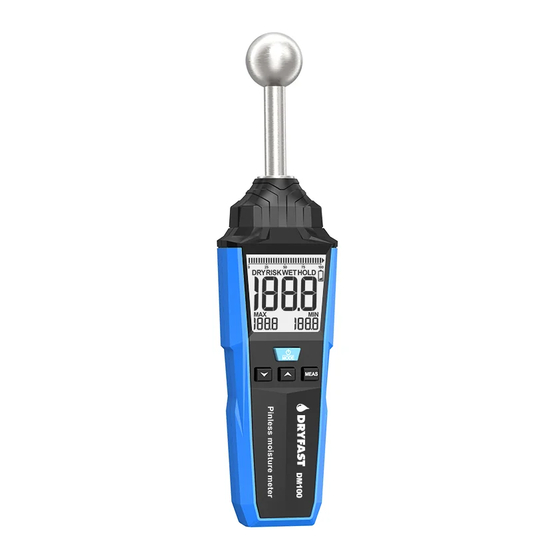
Use
On / off button
Arrow down
Arrow up
Turn on/off: Short press the on/off button key to turn on the
•
unit and long press for 2 seconds to turn it off .
•
Hold the ball head of the humidity sensor at right angles to
the surface . The display shows the measured value .
•
Move the product to measure a larger surface, and the LCD
screen should display the current measured value and the
maximum and minimum measured values .
•
If necessary, press the MEAS key to lock the value on the
display and ''HOLD'' appears on the display .
•
Press the MEAS key in the ''HOLD'' mode to exit the ''HOLD''
mode and perform further measurement .
After measurement, long press on/off button to turn off the
•
product . If not turned off, it will automatically turn off after
30 minutes .
•
To cancel the automatic shutdown function, press the MEAS
key to turn on the unit in the shutdown state . The screen
shows ''APO'' to cancel the automatic shutdown function .
This function cannot be saved and needs to be reset after
manual shutdown .
•
Set the limit value: The measurement unit also displays
three non-digital measurement formats: ''DRY'', ''RISK'' and
''WET'' .
•
When the humidity reaches ''RISK'' or ''WET'', the measuring
unit beeps during measurement . In the ''WET'' range, the
measuring unit beeps urgently .
•
By default, a humidity reading of <30 will display ''DRY''; 30
-60 will display ''RISK''; and a reading above 60 will display
''WET'' .
•
Different materials have different moisture tolerance .
Please refer to ''humidity limit ranges'' (page 5 ) for further
information .
Note
The back of the product is equipped with M6 screw interface . It is
used to fix it to suitable test equipment, so that the interference of
hand-held measurement on the spherical sensor can be reduced .
Set the limit value
When the ''RISK'' symbol flashes, press the arrow down key
•
or the arrow up key to adjust the lower limit for ''RISK'' . The
value can be set from 0 to 50 . The factory default setting is
30 . Press the MODE key to confirm your selection .
When the ''WET'' symbol flashes, press the arrow down key
•
or the arrow up key to adjust the lower limit for ''WET'' . The
value can be set from 51 to 100 . The factory default setting
is 60 .
4
•
Press the MODE key to confirm your selection . The LC-dis-
play switches back to the initial mode (''HOLD'') . The limit
values of ''RISK'' and ''WET'' are set and stored .
•
Press the MEAS key to enter the measurement mode .
Replacing batteries
1 .
Turn off the product power
2 .
Use a screwdriver to remove screws of the battery cover on
the back of the product
3 .
Remove the battery cover and remove the old battery .
Remove the old battery
4 .
Replace wit new 1 .5V X 3AAA batteries
5 .
Install the battery cover and tighten the fixing screws .
Maintenance and cleaning
Clean the device with a damp, soft and lint-free cloth . Make sure
no moisture gets into the housing . Do not use sprays, solvents,
alcohol-based cleaners or abrasives, only water to moisten the
cloth .
Storage
When not in use, observe the following storage conditions:
•
Dry and protected from moisture and heat .
•
In a place protected from dust and direct sunlight .
Warranty
The user is responsible for the measurement results of this
product .
Under no circumstances do we accept any responsibility for
damage caused by the application of the measurement results .
