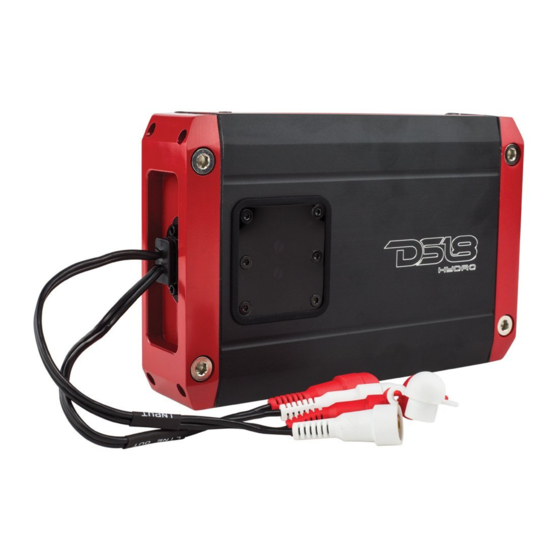
DS18 NXL1 100.1D Owner's Manual - Page 6
Browse online or download pdf Owner's Manual for Marine Equipment DS18 NXL1 100.1D. DS18 NXL1 100.1D 18 pages. Marine amplifier

3. Connect the power wire to the battery using a
fuse capable of the total current load of all amplifi-
ers connected Don' t install the fuse yet. Wait until
the end. Locate the fuse as close as possible to the
battery If the fuse is further than 18 inches (wire
length) from the battery you should reevaluate the
wire and fuse placement.
4. Find the closest clear metal area to the amp for a
ground. Sand, grind or scrape all paint and under-
coating from the body and screw the ground
securely in place.
It is advisable to test the ground with an ohmme-
ter between the ground cable and the negative
battery cable to ensure a good low resistance
connection. Some alloys used in modern cars do
not offer the best ground. If you believe this is the
case - first consult with the vehicle manufacturer.
5. Run the speaker wire to the speakers. It is
advised that you leave some extra wire at this
point. You can fix it later.
6. If you haven't done so already, mount the amp
now.
7. Connect the power and ground to the amplifier.
Only after this step - you should install the fuse
at the battery.
8. Connect the remote wire from the head unit to
the amplifier. Now is a good time to turn on the
amp for the first time. Make sure it turns on prop-
erly and does not go into protection mode.
9. Connect the speaker wires to the amp and
speakers (make sure the amp is off first). Make sure
the polarity(+add-)is correct.
10. Connect the RCA S to the amp.
11. Double check the amplifier controls at this time.
Make sure everything is set correctly for your
system.
12. Now you`re ready to play it for the first time. It
is best to leave the gain all the way down at first.
Start with the head unit volume low and work your
way up.
13. Now you can tune the amp. Take your time and
make only one adjustment at a time. It may take
some time to get the system fully adjusted. During
this time the amp is drawing current from the bat-
tery. You should check the battery voltage from
time to time and re-charge it if it gets low. That's it.
You're done. Now have fun!
3. Conecte el cable de alimentación a la batería usando
un fusible capaz de la carga de corriente total de todos
los amplificadores conectados. No instale el fusible
todavía. Espere hasta que el final localice el fusible lo
más cerca posible de la batería. Si el fusible está a más
de 18 pulgadas (longitud del cable) de la batería, debe
reevaluar la ubicación del cable y el fusible.
4. Encuentre el área de metal libre más cercana al
amplificador para usarla como tierra. Raspe toda la
pintura y la capa base del cuerpo y atornille la tierra de
forma segura en su lugar.
Es recomendable probar la tierra con un ohmímetro
entre el cable de tierra y el cable negativo de la batería
para asegurar una buena conexión de baja resistencia.
Algunas aleaciones utilizadas en los automóviles mod-
ernos no ofrecen el mejor terreno. Si cree que este es el
caso, consulte primero con el fabricante del vehículo.
5. Pase el cable del altavoz a los altavoces. Se recomien-
da que deje un poco de cable adicional en este punto.
Puedes arreglarlo más tarde.
6. Si aún no lo ha hecho, monte el amplificador ahora.
7. Conecte el poder y la tierra al amplificador.
Solo después de este paso, debe instalar el fusible en la
batería.
8. Conecte el cable remoto de la unidad principal al
amplificador. Ahora es un buen momento para encender
el amplificador por primera vez. Asegúrese de que se
encienda correctamente y no entre en modo de protec-
ción.
9. Conecte los cables de los altavoces al amplificador y
los altavoces (asegúrese de que el amplificador esté
apagado primero). Asegúrese de que la polaridad (+ add-)
sea correcta.
10. Conecte el RCA al amplificador.
11. Verifique dos veces los controles del amplificador en
este momento. Asegúrese de que todo esté configurado
correctamente para su sistema.
12. Ahora estás listo para probarlo por primera vez. Es
mejor dejar la ganancia al mínimo al principio. Comience
con el volumen de la unidad principal bajo y vaya subien-
do.
13. Ahora puede sintonizar el amplificador. Tómese su
tiempo y haga solo un ajuste a la vez. Puede llevar algún
tiempo ajustar el sistema por completo. Durante este
tiempo, el amplificador está consumiendo corriente de la
batería. Debe verificar el voltaje de la batería de vez en
cuando y volver a cargarla si está baja, eso es todo. Ya
terminaste. ¡Diviértete ahora!
5
