Concourse SMART WHEELS User Instruction Manual - Page 7
Browse online or download pdf User Instruction Manual for Scooter Concourse SMART WHEELS. Concourse SMART WHEELS 11 pages. Remote pairing procedure
Also for Concourse SMART WHEELS: User Instruction Manual (16 pages), User Instruction Manual (20 pages), Fitting Instructions Manual (12 pages), Quick Start Manual (3 pages)
6.0
REMOVING YOUR SMART WHEELS
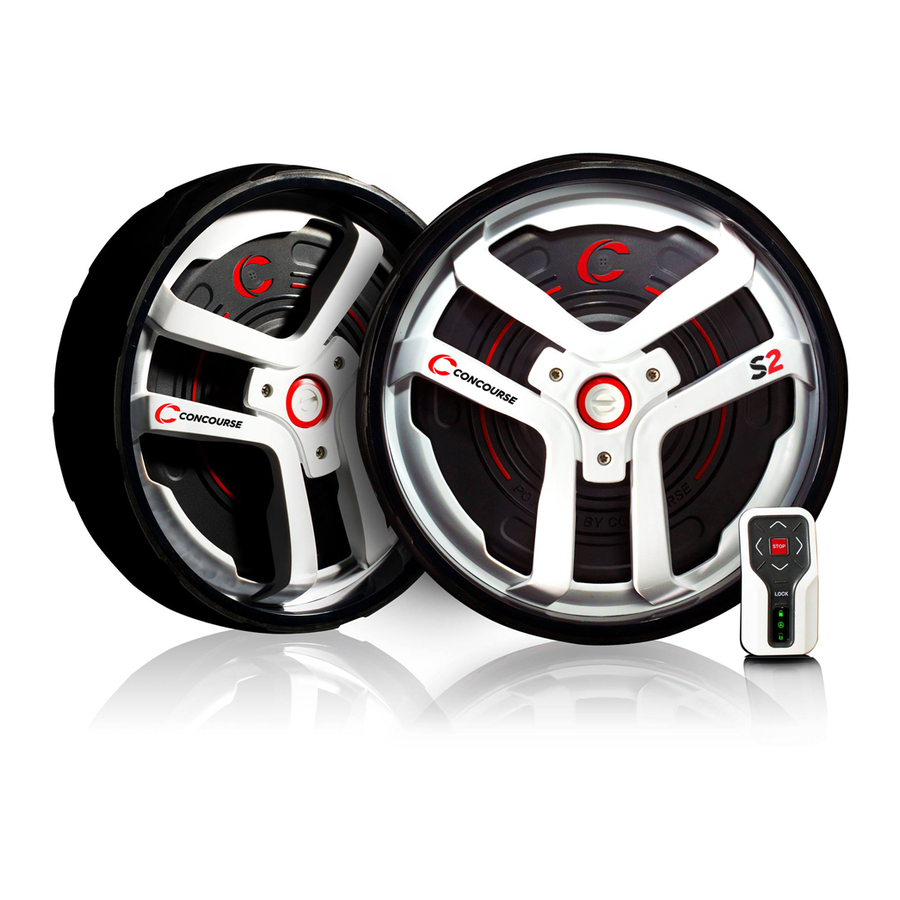
6.1 You can release each of the Smart Wheels by locating the
button in the middle of the outside facing side of the Smart
Wheel .
6.2 To completely remove the Smart Wheels from your buggy,
depress and hold down the button in the middle of the
outsideof the wheel and guide the wheel off it's axle
completely .
7.0
REMOTE CONTROL MOUNT
7.1 To attach your remote control mount to your Buggy Handle
use the Allen key provided in the kit .
7.2 Fix the Mount on the centre of your push buggy handle
so you can reach the controls using either your left or
right thumb .
7.3 Undo the mounting bracket, position the mount around the
handle and then finger tighten the screws so they thread
cleanly back into the mount .
7.4 Once positioned suitably, moderately tighten the mounting
screws so that the remote control mount is securely in
position .
8.0
REMOTE CONTROL OVERVIEW
LEFT:
Steer to the left
STOP:
Stop
concoursegolf.com
NOTE: Please ensure when doing so that the buggy is safely
balanced and supported to avoid it toppling over.
CBM3 MOUNT
UP:
Increase forward speed
RIGHT
Steer to the right
DOWN:
Slow down / Reverse speed
LOCK:
Initialise / Shut Down / Lock
12
12
User Instruction Manual | Version 6.0
8.1
INITIALISING THE WHEELS (TURNING ON)
1
2
INITIALISING
3
4
INITIALISING
5
6
WHEELS LOW ON CHARGE
REMOTE LOW ON CHARGE
8.2
TURNING OFF THE WHEELS
7
8
9
concoursegolf.com
8 .1 To initialise the system, press and hold
the lock button until the Blue Lock LED
illuminates (1) . This should be followed
by a Blue Wheel LED (2) and then a
Green Remote LED (3) .
INITIALISING
If both the wheels and remote are
sufficiently charged you should then
have all Green LEDs illuminate (4) .
INITIALISED / READY
If the wheels are low on charge you will
get a Red Wheel LED (5) instead and if
the remote is low on charge you will
get a Red Remote LED (6) .
8 .2 To turn off the wheels, press and hold
10
the lock button until you see all Green
LEDs (7) . This should then be followed
by a sequence of all Red LEDs (8), all
Green LEDs (9), all Red LEDs (10) then all
off . They will also turn off if there is no
input for 30 mins .
13
13
User Instruction Manual | Version 6.0
User Instruction Manual | Version 1.7