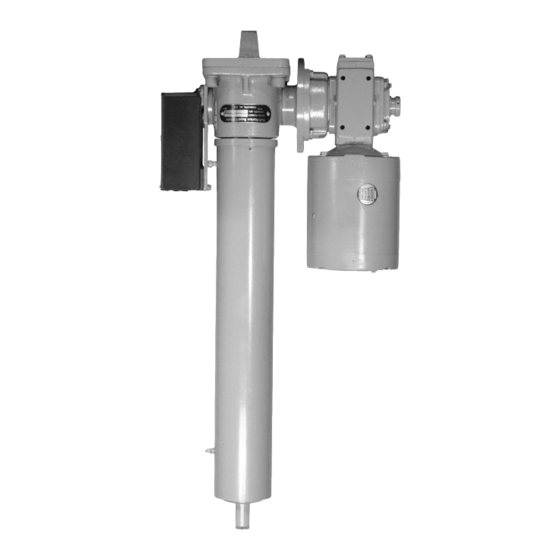
Duff-Norton SuperCylinder Series Installation, Operation And Maintenance Instructions - Page 4
Browse online or download pdf Installation, Operation And Maintenance Instructions for Controller Duff-Norton SuperCylinder Series. Duff-Norton SuperCylinder Series 12 pages. Linear actuators

The Duff-Norton SuperCylinder can be used in an unlim-
ited number of positions and applications. Consequently,
installation procedures will vary depending on the envi-
ronment.
2-1. Inspection
Check the SuperCylinder for any shipping damage. Be
sure that motor fan does not rub fan shroud. Look for any
attached hardware, including a gearbox vent plug (reducer
models only).
2-2. Clevis Pins
The SuperCylinder should be attached with steel clevis
pins that are a close fit in the clevis holes. Holes are
slightly oversized to accommodate pins that are the exact
nominal size. Duff-Norton recommends the use of pins
with hardness of at least Rockwell C-28. Socket head
cap screws or SAE grade 5 screws may be used, if their
length is such that the threaded portion is not placed in
shear.
Use of an anti-sieze compound or extreme pressure
grease on the clevis pins will reduce wear and possible
noise. Clevis pins may be drilled and fitted with grease
fittings to simplify relubrication. For extreme service, mount
the clevis pins on outboard bearings.
2-3. Orientation
1. The application will usually dictate the orientation
of the SuperCylinder. In applications exposed to
dripping water or dirt, pointing the tube down is
prefered, to reduce the entry of foreign material.
2. All major components of the SuperCylinder (motor,
reducer, limit switch) can be rotated in 90° incre-
ments to provide clearances where needed. In
addition the actuator worm can be flipped end-for-
end to change reducer mounting side. Non-standard
orientations will be factory provided when requested.
Refer to SuperCylinder catalog.
3. Factory orientation of the outer tube grease plug
and vent plug is random (tube is screwed down
tight). When required, the outer tube set screws
can be loosened and the tube rotated up to one
turn to relocate the grease fitting.
2-4. Vent plugs
The pumping action of the tube extension and retraction,
as well as temperature changes, require that the
SuperCylinder tube and the motor reducer gearbox (if
used) be vented to atmosphere.
1. Reducer venting: The motor gear reducer (if used)
has a number of pipe plugs at various locations.
The reducer is shipped filled with oil and with solid
pipe plugs in every location. One of these plugs
4
Section II
Installation
should be replaced with the vented plug shipped
with the unit. In general, the plug nearest the top of
the reducer should be replaced with the vent plug.
Failure to vent the gearbox will lead to loss of oil
and premature gearbox failure.
2. SuperCylinder tube venting: This vent is critical in
preventing blown out seals and/or water entry into
the actuator. Depending on the orientation of the
SuperCylinder and the relubrication schedule, ex-
cess grease may occaisionally be pumped out of
this vent. This is normal and necessary.
3. Replumbing of vents in wet locations:
SuperCylinder is subject to wet conditions, vents
should be repositioned to prevent water entry. The
exact technique will depend on orientation and de-
gree of moisture.
The reducer vent has a hex key socket. Any water that
stands in this recess will enter the reducer and cause
bearing failure. The tube vent has a hood; however, if any
water is collecting on this vent, the high volume of air pass-
ing through the vent can suck water into the actuator. A
street elbow can be used to cause either vent to point
down. Another option is to replace the vent with a hose
barb fitting and attach several inches of vinyl tubing, se-
cured in a downward position. Use a tubing large enough
to avoid capillary suction in the tube.
2-5. Wiring
Wiring of motor, brake, and/or limit switch should be done
according to the wiring diagrams supplied with those com-
ponents. All wiring should be according to local and
national electrical codes. Motor controls should be prop-
erly sized to provide adequate motor overload protection.
See motor nameplate as to any internal motor protection.
Three phase motors must be trial connected to check for
proper phasing relative to controls and limit switches.
Wiring connections to the SuperCylinder must be made
with flexible conduit or cable to allow for movement of the
actuator during its operation.
2-6. Limit Switch Adjustment
Limit switches (if fitted) are not factory set and must be
adjusted to prevent jamming and damage to the actuator
and/or mating equipment.
1. Before setting limit switches, the installer should
make certain that the actuator has sufficient travel
in both directions to produce the range of travel re-
quired by the installation. If there is any question
about this, the rod end clevis pin should be discon-
nected and the rod rotated by hand, in each
direction, to its internal stops. The length of ex-
tended rod can be measured in these two extremes
and the measurements used for reference while
setting limit switches.
If
