Audiolab ICE-4000 User Manual - Page 4
Browse online or download pdf User Manual for Amplifier Audiolab ICE-4000. Audiolab ICE-4000 9 pages.

3. CONTROLS AND FUNCTIONS
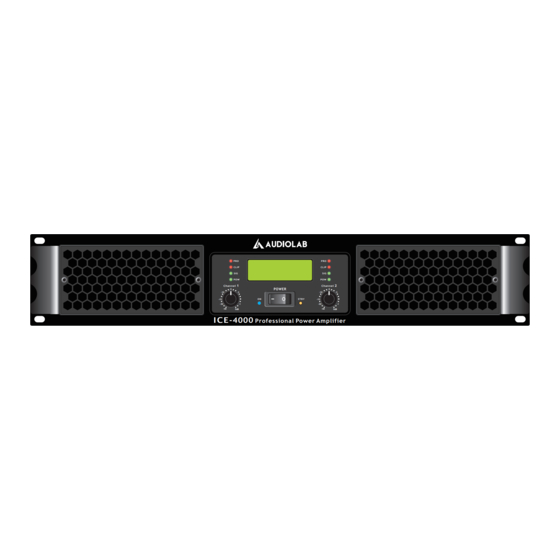
Front panel
1. POWER switch and indicator Press to tog-
gle the power on or off. The POWER indicator
lights up green when the power is ON.
1). Position I: ON (Green LED indicator).
2). Position O: STBY / OFF (Orange LED).
2. Power source indicator POWER indicator
light up when unit is turn on the power ampli-
fier is connect with power and will be running
works within 3-5 seconds.
3. Power source indicator Volume control
knobs Each control knob adjusts the volume
of the corresponding channel from -00 dB to
0 dB.
4. SIGNAL indicator Lights up green when the
corresponding channel's output level exceeds
5 Vrms (equivalent to 3 W into an 8Ω load, or 6
W into a 4Ω load).
5. CLIP indicator Lights up red when the output
signal distortion on the corresponding chan-
nel rises above 1%-indicating that "Clipping"
has occurred because the signal level is too
high.
6. Protect indicator Lights up red to indicate
that protection is in effect. Specifically, lights
up if the heat sink overheats, or if a DC voltage
is detected at the amplifier outputs. Also lights
P. 4
AUDIOLAB ICE SERIES
up for about 5 seconds at time of power-on,
as the amp gets ready to operate. To pro-
vide protection, the unit will not output any
sound from the speakers while this indicator
is lit up. When start-up is completed or the
problem is corrected, the indicator goes off
and normal operation resumes.
7. LCD display LCD display working state of the
power amplifier
A. display input supply voltage.
B. power amplifier working temperature
display.
C. power amplifier level display.
D. fan work status display.
8. The amplifier uses forced-air cooling. The
cooling fans draw air in from the front and
exhaust it through the rear. Please be sure
that you do not block the air intakes or ex-
haust vents.
9. Install the security cover When install
19'inch (2RU) rack mounting, please use the
#10 or 6mm screws from amplifier.
