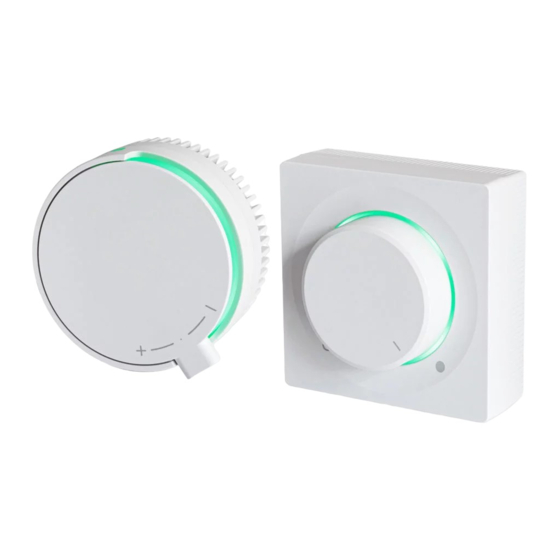
Darco ERO-32MN-2 Instruction Manual - Page 5
Browse online or download pdf Instruction Manual for Controller Darco ERO-32MN-2. Darco ERO-32MN-2 8 pages. Electronic motor speed controller

ELECTRONIC MOTOR SPEED CONTROLLER
USAGE
ERO-32MN-1 and ERO-32MN-2 controllers are designed for motor speed ste-
ering of devices equipped with brushless (BLDC type) motors produced by
DARCO and as regulated 0-5 V DC / 0-10 V DC general purpose voltage sources.
Controllers are designed for surface and under surface mounting.
SAFETY REQUIREMENTS
1. Plugging the controller to electrical power should be made only by a qualified
elec trician.
2. Every time, before mounting, conservation etc. - unplug the device from
electrical power.
3. Avoid installing device in places where high temperatures (above 60°C) may
occur.
4. Do not install the controller in areas with large humidity or in places that can be
flooded with water.
5. Do not place device in places with highly flammable substances.
6. This appliance is not intended for use by persons (including children) with
reduced phy sical, sensual or mental capabilities or with lack of experience
and knowledge about it.
MOUNTING
I
Pull the knob out (fig.1 pos.1).
II
Unscrew nut (fig.1 pos.2) and remove the front panel (fig.1 pos.3).
III Unscrew two screws (fig.1 pos.4) fixing the cover of the electronic system
(fig.1 pos.6).
IV Mount surface-mounted box (fig.1 pos.7) with two mounting studs (fig.1
pos.8), skip in the case of under surface mounting.
V Connect cables to the controller according to information in "Connection"
section of this manual.
VI Place the cover of the electronic system (fig.1 pos.6) in box (fig.1 pos.7) and
screw two screws (fig.1 pos.4).
VII Mount the front panel (fig.1 pos.3) and the screw nut (fig.1 pos.2).
VIII Turn the potentiometer (fig.1 pos.5) to the extreme le position.
IX Slide knob (fig.1 pos.2) into the potentiometer (fig.1 pos.5).
Figure 1. Regulators construction
ERO-32MN-1 AND ERO-32MN-2
TECHNICAL PARAMETERS
type
voltage [V DC]
nominal power [W]
max current [mA]
max R output load [mA]
IP protcetion class
ambient temperature [°C]
humidity [%]
measurements [mm]
weight [g]
CONNECTION
1. Devices produced by DARCO.
Controller has 4-pin connector (fig.1 pos.9) to connect steered device cable. Joint
should be made with the usage of 4-wire cable (cord -type) of 4 x 0,5 mm
section. Figure 2 show the way controller and steered devices can be connected.
Figure 2. Electrical wiring diagram for devices produced by DARCO.
2. Devices produced by other producers.
ERO-32MN-1 and ERO-32MN-2 controllers have 4-pin connector (fig.1 pos.9) to
connec power and steered device cable. Joint should be made with the usage
of 2-wire cable (cord-type) of 2 x 0,5 mm
controller and power and steered devices can be connected.
Figure 3. Electrical wiring diagram for devices produced by other
producers.
START-UP AND OPERATION
Before switching the controller on, it is necessary to select the device to be
steered. Selection is made with the usage of two PK1 and PK2 coding switches
(fig.1 pos.9) that are to be set in accordance to the information in table No 1.
LED light (fig.1 pos.1) is confirming the type of device chosen (in sequence: color
green, red and yellow).
CAUTION!
Setting of code switches needs to be made when no voltage power is
present. Incorrect configuration of device steered may cause its improper
working or can even result in damaging it.
Speed adjustment or setting voltage of steered device is made manually, with the
usage of a knob (fig.1 pos.1). Turning it all the way le makes the controller go in
standby mode.
The controller is equipped with a current light sensor which can adjust the intensi-
ty of knob backlights to external conditions.
ERO-32-MN-1
20-24
IP40
-20 - +60
0 - 80
84 x 84 x 49
130
Device produced by DARCO
cable 4x0,5 mm
2
cord lenght max 50 m
cross section. Figure 3 shows the way
2
cable 2x0,5 mm
cable 2x0,5 mm
2
cord lenght max 50 m
cord lenght max 50 m
EN
ERO-32-MN-2
0,6
40
5
85 x 85 x 44
150
cross
2
Device other producers
2
