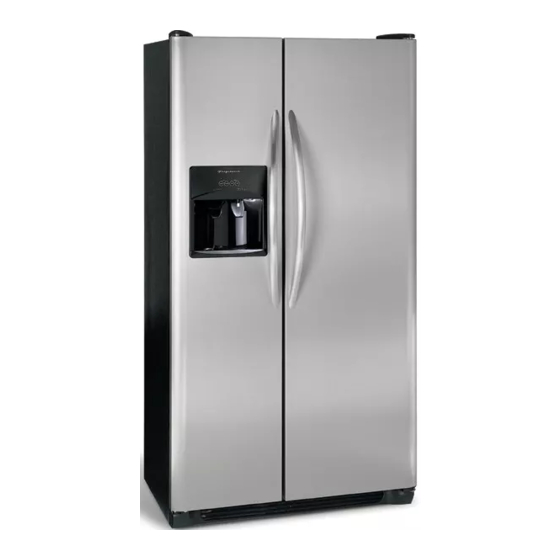
Frigidaire Professional PHS69EJSS Install Manual
Browse online or download pdf Install Manual for Refrigerator Frigidaire Professional PHS69EJSS. Frigidaire Professional PHS69EJSS 2 pages. Frigidaire fls26z2gk: install guide

TO BE REMOVED BY THE CUSTOMER AFTER INSTALLATION IS COMPLETE
INSTALLATION CHECKOFF LIST
Doors
Handles are secure and tight
Door seals completely to cabinet on all sides
Freezer door is level across the top
Leveling
Refrigerator is level, side to side and tilted 1/4" (6mm) front to back
Toe grille is properly attached to refrigerator
Cabinet is setting solid on all corners
Electrical Power
House power turned on
Refrigerator plugged in
Ice Maker
House water supply connected to refrigerator
No water leaks present at all connections - recheck in 24 hours
Ice Maker is turned ON.
Ice & Water Dispenser operates correctly
Front filter must be flush with filter housing (some models)
Final Checks
Shipping material removed
Fresh Food and Freezer controls set
Crisper Humidity controls set
Registration Card sent in
1
2
SHIPPING MATERIAL
1 PIECE OF FOAM
OR CARDBOARD
2 WIRE TIES
(All wire baskets
will have 2 wire
ties)
Remove Shipping material. (Features may vary per model.)
3
WATER SUPPLY
Plastic Water Tubing
Connect water supply - check for water leaks.
to Ice Maker
Steel
Clamp
Fill Tube
Turn icemaker OFF if water supply is not
Brass
connected immediately. Connecting to a
Compression
Nut
reverse osmosis system is not recommended.
Copper water line
from household water supply
(Include enough tubing in loop to allow
moving refrigerator out for cleaning.)
4
INSTALLATION CLEARANCES
Allow the following clearances for ease of installation, proper air circulation, and
plumbing and electrical connections:
•
Sides & Top..........3/8"
•
Back.......................1"
NO
NO
NOTE
TE
TE
TE
NO
NO
TE
If you are installing your refrigerator beside a wall, leave 1/2" minimum between
hinges and wall to allow for the door to swing open.
HAND TRUCKING
• Load refrigerator from side of cabinet only.
• Do not run retaining straps over handles.
• Do not over-tighten retaining straps.
• Never use refrigerator handles to move the
refrigerator.
• Remove tape from doors only after unit is in
place.
1 PIECE OF TAPE
1 PIECE OF TAPE OR
2 BLUE SHIPPING CLIPS
1 PIECE OF TAPE
SHELF SPACER WITH TOE GRILLE
1 PIECE OF TAPE
3 PIECES OF TAPE
1 PIECE OF TAPE
qÜÉ=ï~íÉê=î~äîÉ
eçìëÉ
çå=íÜÉ=Ä~Åâ=çÑ
éäìãÄáåÖ
íÜÉ=êÉÑêáÖÉê~íçê
äáåÉ
ïáää=`äáÅâL_ìòò=áÑ
íÜÉ=ï~íÉê=î~äîÉ
t~íÉêäáåÉ=Üççâìé
áë=ÅäçëÉÇK
íÜÉ=ï~íÉê=î~äîÉ=áë
çéÉå=~åÇ=íÜÉêÉ
WATER SUPPLY
Refer to your Owner's Use and Care Manual for
additional information about your refrigerator.
5
LEVELING AND ADJUSTING
All four corners of refrigerator must rest firmly on a solid floor. Your
refrigerator has adjustable rollers to help level it and to adjust the doors.
To level cabinet or change door height:
1. Remove toe grille.
2. Use a screwdriver, 3/8" wrench, or nutdriver to adjust the
rollers. To raise cabinet or door, turn screw clockwise. To
lower cabinet or door, turn screw counterclockwise.
Toe Grille
6
When changing control settings, wait 24 hours before making additional adjustments.
7
ICEMAKER
Ensure icemaker to turned ON. Check to see that the Ice & Water Dispenser is operating
correctly. (See Automatic Ice & Water Dispenser Features in Use & Care Manual .)
8
If you need to remove the doors to get your refrigerator in the house, please See
Door Removal Instructions in your Use & Care Manual.
_É=ÅÉêí~áå
~êÉ=åç=äÉ~âëK
9
√
See "Normal Operating Sights & Sounds" in the Use & Care Manual
so you understand the sounds you may hear once your refrigerator is
running.
√
Please read entire Use & Care Manual to become aware of important
safety instructions and to become familiar with your new refrigerator.
√
Send in Registration card to register your refrigerator.
√
Congratulations! You are ready to enjoy your new refrigerator.
IF YOU ARE DISSATISFIED WITH THE
INSTALLATION, PLEASE CALL THE STORE
Adjustable Front Roller
(some models)
CONTROLS
OFF
Wire
Signal Arm
TO REMOVE DOORS (if necessary)
YOU PURCHASED IT FROM.
OR
ON
OFF
ON
P/N: 241811501
