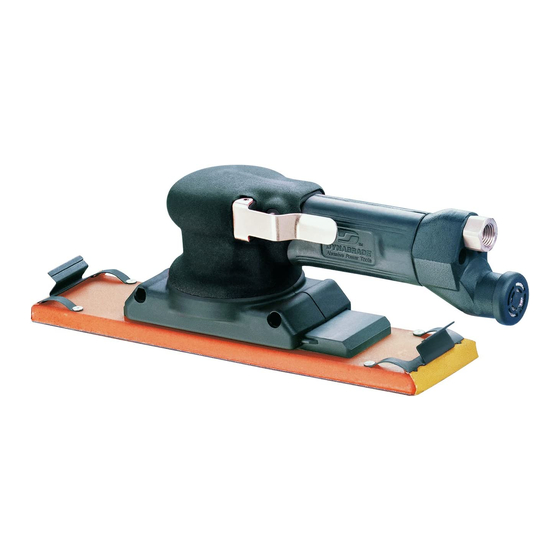
Dynabrade 51350 Important Operating, Maintenance And Safety Instructions - Page 4
Browse online or download pdf Important Operating, Maintenance And Safety Instructions for Sander Dynabrade 51350. Dynabrade 51350 4 pages. Dynaline file board sander

Disassembly/Assembly Instructions –
7. Secure motor housing in vice, using 57092 Collar or padded jaws. Spread 2-3 drops of pneumatic tool oil around the housing bore for ease of insertion
of motor assembly. Slide motor assembly into secured housing.
Note: Be certain line-up pin enters the hole in the bottom of the housing.
8. Tighten lock ring with 56058 Lock Ring Tool to 28 N•m/250 in. - lbs.
Gearbox Reassembly:
1. Place 57428 Sliders in gearbox halves.
2. Install 57429 Felt Seals into gear housing halves. Using Dynabrade's 95542 Gear Grease (or equivalent), grease entire slider including, transfer pinion
holes and groves.
3. Grease slide board gear pack and bearing pocket. Grease 57445 Bearing. Place bearing on 57430 Cam Assembly. Grease counterweight gear packs.
4. Place counterweight over 57430 Cam Assembly with tool inverted and exhaust at six o'clock. Place cam assembly bearing at three o'clock. Take one
gear box halve and slide it onto the housing groves.
5. Place transfer pinion on counter weight gear rack, sliding pinion shaft partially into mated hole on slider. Repeat for second shaft.
Important: Make sure counter weight is positioned dead center of cam assembly when transfer pinions are installed. This ensures correct timing.
6. Making sure needle bearing is still located at three o'clock, place slide board railing into groove on slider while aligning needle bearing into bearing
channel on slider board.
7. Place other gearbox half onto grooves of motor housing, making sure all parts align. Press both gear box halves together.
8. Install 95842 Screws and 95841 Nuts and tighten. Reinstall Pad.
Valve And Speed Regulator Disassembly/Assembly:
1. Secure housing in vice using 57092 Collar or padded jaw.
2. Remove 56076 Valve plug. Remove the 95523 O-Ring.
3. Remove 54192 Spring, and 56029 Valve Stem with O-Ring.
4. Install new 95523 O-Ring onto 56076 Valve Plug, and new 01020 O-Ring onto 56029 Valve Stem.
5. Place valve stem into housing, alone with 54192 Spring.
6. Install 56076 Valve Plug and new 95523 O-Ring.
Tool Assembly is complete. Please allow 30 minutes for adhesives to cure before operating tool.
Important: Motor should now be tested for proper operation at 90 PSIG. If motor does not operate properly or operates at a higher RPM than marked on the
tool, the tool should be serviced to correct the cause before use. Before operating, place 2-3 drops of Dynabrade Air Lube (P/N 95842) directly into air inlet
with throttle lever depressed. Operate tool for 30 seconds to determine if tool is operating properly and to allow lubricating oils to properly penetrate motor
Loctite
®
is a registered trademark of Loctite Corp.
Grease and Grease Gun
•
Multi-purpose grease for all types of bearing, cams, gears.
•
High film strength; excellent resistance to water, steam, etc.
•
Workable range 0°F to 300°F.
95541: Push-type grease gun.
95542: 10oz. (283.5g) tube.
Visit our Web Site: www.dynabrade.com
DYNABRADE, INC., 8989 Sheridan Drive • Clarence, NY 14031-1490 • Phone: (716) 631-0100 • Fax: 716-631-2073 • International Fax: 716-631-2524
DYNABRADE EUROPE S.àr.l.,
© DYNABRADE, INC., 2000
Optional Accessories
Zone Artisanale • L-5485 Wormeldange—Haut, Luxembourg • Telephone: 352 76 84 94 1 • Fax: 352 76 84 95 1
PRINTED IN USA
Dynaline Sander (continued)
96531 Motor Tune-Up Kit:
•
96046 Motor Repair Kit:
Includes special tools for proper
disassembly/assembly of the machine.
Email: [email protected]
Includes assorted parts to help maintain
and repair motor.
DYNABRADE
Rev.1_PD00.85_12/00
®
