Autopot AQUAvalve5 SpringPot 60 Pot XL Simple Care Manuallines - Page 2
Browse online or download pdf Simple Care Manuallines for Lawn and Garden Equipment Autopot AQUAvalve5 SpringPot 60 Pot XL. Autopot AQUAvalve5 SpringPot 60 Pot XL 2 pages.

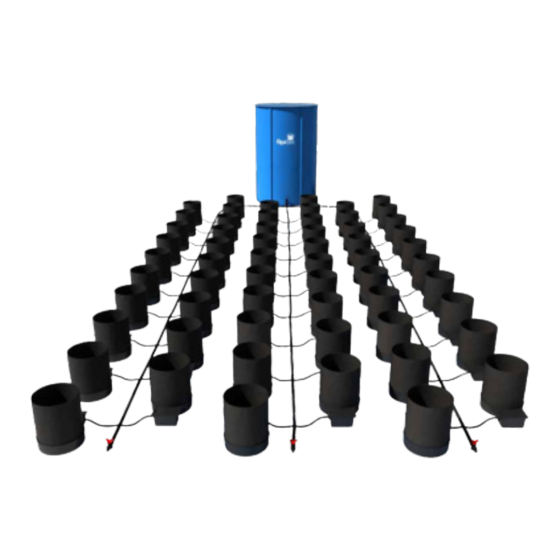
SpringPot 60 System contents
• 1x 10⁵ gal FlexiTank
• 30x 1/2" - 3/8" cross connector
• 60x 1Pot XL tray and lid
• 1x 1/2" cross connector
• 60x 5 gal SpringPot
• 82ft of 1/2" pipe
• 60x AQUAvalve5
• 98ft of 3/8" pipe
• 1x 1/2" tank adapter and filter
• 60x PotSock Round
• 3x 1/2" in-line tap
Suggested layouts
105 gal
FlexiTank
Elevate tank 6"
from floor to
maintain gravity
pressure
AQUAvalve5
1/2" click-fit tank adaptor & filter
¼3/8" pipe
1/2" pipe
•
Please note that multiple SpringPots may increase room humidity due to the exposed surfaces of the fabric pots.
•
Pot up your plants, water through, then allow your plants to establish in the pots for a period of 7 to 10 days before
turning your system on. This will encourage a stronger and healthier root system.
•
Always raise your reservoir to a minimum of 6" above the highest AQUAvalve5 and re-fill the reservoir when there is
approximately a 1/3 of the solution left - NEVER ALLOW THE RESERVOIR TO RUN EMPTY.
•
For best results, we recommend mineral fertilisers. Do not use organic fertilisers, as they have a tendency to block
small pipe work.
•
Clean all substrate from the bottom and sides of the pots before placing in each tray. This will ensure your system is
clean from the start.
•
Always use free draining substrates, for example: soil/perlite, coco/perlite, soil/clay pebbles, coco/clay pebbles,
rockwool/clay pebbles.
[email protected] I www.autopot-usa.com I +(1) 562 612 4182
Plan views
and options
System requires minimum
105 gal FlexiTank (supplied)
1/2" – ¼3/8" cross connector
1/2" cross connector
1/2" in-line tap
Advice
SpringPot 60 dimensions
11"
15.2"
5 gal
pot
1
Fit the PotSock Round
over the base of
each SpringPot
3
Remove collar.
Push 3/8" pipe through
collar
and
attach
AQUAvalve5 nozzle.
Rescrew collar - DON'T
overturn... when you feel
it grip STOP.
5
Position tray so it is
level.
7
According to the size of your system connect your
3/8" / 1/2" pipe to relevant fitting or reservoir...
Using your front instruction sheet, repeat the module set up instructions for the number of trays.
Allow your plants to establish for 7-10 days before turning system on
Advice
If you require any guidance email - [email protected]
SpringPot 60 System
setup instructions
105 gal
FlexiTank
26.8"
2
Fill SpringPot with
medium and pot
up plants.
Water through pot
and allow to drain
outside the tray.
4
Connect AQUAvalve5
to
so 'half moon' is on T
section in the tray.
6
Cut 3/8" / 1/2" pipe to
appropriate length
8
Place SpringPot in the
tray, make sure it is
CLEAN!
Place lid over valve
onto tray.
