Galls ST160 SIREN Installation And Operating Instructions Manual - Page 3
Browse online or download pdf Installation And Operating Instructions Manual for Amplifier Galls ST160 SIREN. Galls ST160 SIREN 12 pages. Siren amplifier
Also for Galls ST160 SIREN: Installation And Operating Instructions Manual (7 pages)
General Description
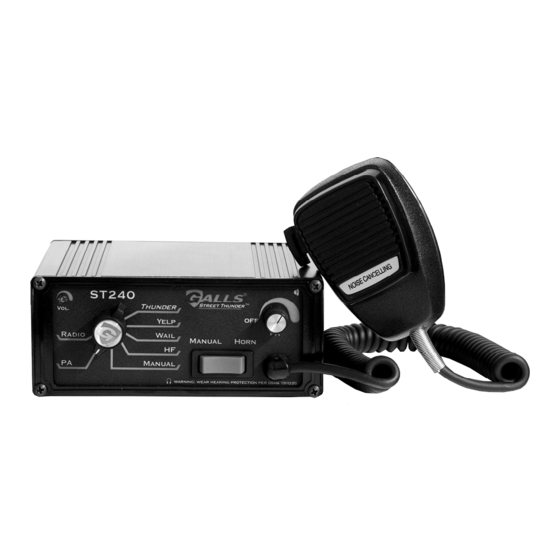
The ST240 Siren Amplifier is a premium 200W unit designed for dual 100W speaker
use. The primary operating modes are Thunder, Yelp, Wail, Hands Free, Manual, PA,
and Radio. A Noise Canceling PA Override and push-button Horn Override are
available in all modes. A manual push-button is provided for push-on/push-off tone
toggle operation in the Thunder, Yelp, and Wail modes. It also allows manual siren
control in the Manual or PA modes. Any siren tone can be re-programmed to a
more desired tone. Another feature allows cycling through Wail, Yelp, Thunder, and
Standby by providing a signal to the horn ring auxiliary wire when the function switch
is in the Hands Free (HF) position. A Park Kill option is provided for connection to a
door switch, etc. to disable the siren when exiting the vehicle. Radio and PA volume
controls are provided on the front panel. The front panel is backlighted with LED's
for night visibility. This compact unit utilizes short circuit, high voltage, low voltage,
and reverse polarity protection systems for maximum service life.
Installation Notes
Proper installation of the unit is essential for years of safe, reliable operation. Please
read all instruction before installing the unit. Failure to follow these instructions can
cause serious damage to the unit or vehicle and may void warranties.
Qualifications - The installer must have a firm knowledge of basic electricity, vehicle
electrical systems and emergency equipment.
Keep These Instructions - Keep these instructions in the vehicle or other safe place
for future reference. Advise the vehicle operator of the location.
Unpacking - Inspect contents for shipping damage. If found, alert carrier
immediately. Contents should include unit with microphone, mounting bracket w/
hardware, microphone bracket with 2 screws, wiring connector, and these
instructions. Contact your supplier immediately if any components are missing.
Mounting Tips
• Mount in a location with adequate ventilation to prevent overheating.
• Devices should be mounted only in locations listed in SAE standard J1849.
• Controls should be placed within convenient reach of the driver.
• Assure clearances before drilling in vehicle.
• Sound levels produced by attached speakers can cause permanent hearing loss.
• Never operate this unit without adequate hearing protection for you and others
in the area. (OSHA 1910.95)
• Consider wire routing and access to connections.
• Install mounting bracket to vehicle using 1/4" hardware (not supplied).
-1-