Green Blue GB542 Manual - Page 2
Browse online or download pdf Manual for Weather Station Green Blue GB542. Green Blue GB542 9 pages. Radio-controlled weather station
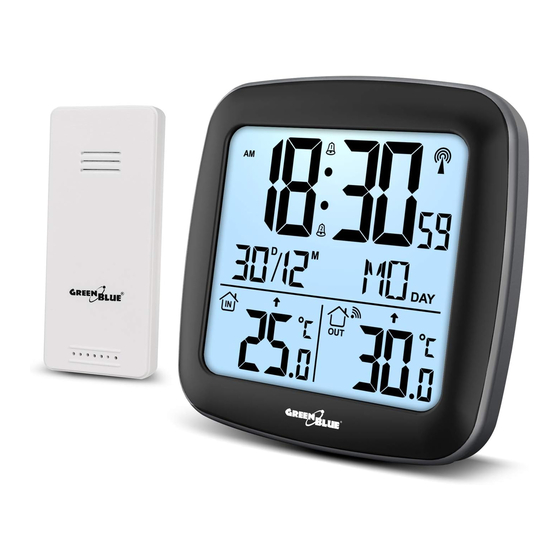
• After receiver has created a connection to the outdoor remote sensor, it will then b enters
the Radio controlled mode.
Manual time setting: • Press and hold down the "SET" button for 2 seconds, the 12/24
hour mode display starts to flash. Now use "UP" button to set the correct 12/24 hour
mode. • Press "SET" to confirm your setting, the Language display starts to flash. Now use
"UP" button to set the correct Language. • Press "SET" to confirm your setting, the Time
zones start to flash, Now use "UP" button to set a correct time zone.
• Press "SET" to confirm your setting, the Hour display starts to flash. Now use "UP"
button to set the correct hour. • Press "SET" to confirm your setting, the Minute displays
starts to flash. Now use "UP" button to set the correct minute. • Press "SET" to confirm
your setting, the Second displays starts to flash. Now use "UP" button to set the zero
Second. • Press "SET" to confirm your setting, the Year display 2015 starts to flash. Now
use "UP" button to set the correct year. • Press "SET" to confirm your setting, the Month
display starts to flash. Now use "UP" button to set the correct month. • Press "SET" to
confirm your setting, the Date display starts to flash. Now use "UP" button to set the
correct date. • Press "SET" to confirm your setting and to end the setting procedures,
enter the clock mode.
F.Y.I.: After 30 seconds without pressing any button, the clock switches automatically from
Set Mode to Normal Time Mode. • If the set time zone is not zero, the time of the set time
zone can be viewed by Press down the "SET" button in Normal Time Mode.
Setting the daily alarms: This Clock possesses 2 daily alarms. To view the set alarm
times, under the clock mode, press once ALARM button, LCD display the "A1" icon. press
once ALARM button again, LCD display the "A2" icon. • Press and hold down the ALARM
button for 2 seconds until Alarm Time flashing icon is displayed. Now use the "UP" button
to select the alarm time you require and briefly press the ALARM button to set this Alarm
time. • The Hour display of the Alarm "A1" starts to flash. Use the "UP" button to set the
required hour. Press ALARM button to confirm your setting • The Minute display of the
Alarm time starts to flash. Use the "UP" button to set the required minute. Press ALARM
button to confirm your setting and to end the setting procedure about "A1".
• The Hour display of the Alarm "A2" starts to flash. Use the "UP" button to set the
required hour. Press ALARM button to confirm your setting
• The Minute display of the Alarm time starts to flash. Use the "UP" button to set the
required minute. Press ALARM button to confirm your setting and to end the setting
procedure about "A2". • To activate or deactivate the daily alarms, briefly press the "UP"
button once in Normal Time Mode.
F.Y.I.: After 30 seconds without pressing any button the clock switches automatically from
setting mode to Normal clock mode. • The alarm will sound for 2 minutes if you do not
deactivate it by pressing any button. In this case the alarm will be repeated automatically
after 24 hours.
- 02 -
• Rising alarm sound (crescendo, duration: 2 minutes) changes the volume 4 times whilst
the alarm signal is heard.
Automatic SNOOZE function: To activate the automatic snooze function: While the alarm
is sounding, touch the "Zz" button to activate the snooze function. When the snooze
function is activated, the "Zz" symbol appears in the display. • This operation moves the
alarm back by 5 minutes and the alarm will restart at this time. • If you press other keys
besides "Zz" button during the noise, you will stop the noise directly. • If you press any key
in the process of snooze, you will stop snooze this time directly.
°C/°F temperature display: • Press and hold down the "MEM" button for 2 seconds, the
°C or °F display starts to flash. Now use "UP" button to set the correct company.
Check the maximum and minimum values of temperature : • Press once "MEM" button
to check the maximum and minimum values of temperature. • The maximum minimum
value is reset at 0 o'clock every day. • When viewing the maximum and minimum values,
you can press the "UP" button to clear the memory and re-record it. re-record it.
Reception of the RCC signal: • The clock automatically starts the DCF signal search on
the batteries are changed. The radio mast symbol starts to flash. • At 2:00am the Radio
Controlled clock automatically carries out a synchronization procedure with the DCF signal
to correct any deviations to the exact time. If this synchronization attempt is unsuccessful
(The radio mast symbol disappears from the display), the system will automatically attempt
another synchronization at the next full hour. This procedure is repeated automatically up to
5 times. • If no signal is received within seven minutes, then the DCF signal search stops
(the radio mast symbol disappears) and starts again the next full hour.
F.Y.I.: If the clock cannot receive the DCF signal (because the distance is too great to
receive a signal from the transmitter in Germany), you have the option of setting the time
manually as mentioned above. As soon as the reception of the DCF signal is possible, then
the clock is readjusted automatically. • We recommend a minimum distance of 2.5 meters
(8.2 Feet) to all sources of interference, such as televisions or computer monitors, Radio
reception is weaker in rooms with concrete walls and in offices. In such extreme
circumstances, place the system close to the window. • When receives the Daylight Saving
Time, "DST" symbol will be shown top of the seconds.
Receiving Outdoor temperature and RCC signals: To start manual DCF signal reception and
Outdoor temperature touch and hold the " Zz" button 3 second.
-03-