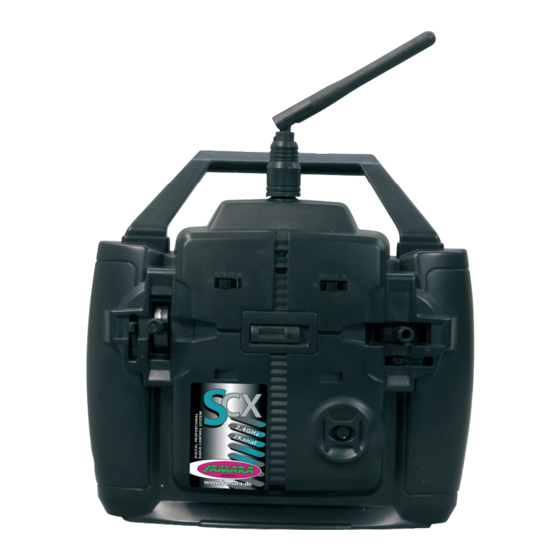
Jamara 061172 Instruction - Page 2
Browse online or download pdf Instruction for Transmitter Jamara 061172. Jamara 061172 4 pages. 2,4 ghz
Also for Jamara 061172: Instruction (4 pages), Instruction (4 pages), Instruction (4 pages)

FR - Emetteur
1
Antenne
2
Poignée
3
LED d'alimentation
4
Inversion de sens de rotation du
servo CH1
5
Manche de commande
6
Trim de manche de commande
7
Touche de synchronisation
8
Interrupteur On/Off
9
Manche des gaz
10 Trim du manche des gaz
11
Inversion de sens de rotation
du servo CH2
12 LED d'état
Compartiment de piles
Au dos de l'émetteur se trouve le compartiment
des piles. Pour l'ouverture du compartiment il
faut appuyer sur le couvercle aux endroits no-
tés 'push' et de le faire glisser. Lors de la mise
en place des piles veillez respecter la bonne
polarité.
Récepteur
Le récepteur permet le branchement direct de
deux servos.
Affectation des sorties du récepteur:
Canal 1
direction
Canal 2
Gaz
Bind/Canal 3
câble de synchronisation
Synchronisation du récepteur
Comme pour chaque système 2,4GHz il faut également synchroniser votre émetteur SCX 2,4GHz
avec le récepteur. Ce procédez est vital, sans effectuer le processus décrit ci-dessous votre ensem-
ble ne fonctionnera pas. De ce fait procédez comme suit :
1. branchez le câble de synchronisation sur la sortie 3 de votre récepteur. Ensuite alimentez votre
récepteur. La LED d'état du récepteur clignote.
2. maintenez la touche de synchronisation de votre émetteur appuyée et allumez celui-ci. L'émetteur
passe en mode synchronisation ou Binding
3. Dès que le processus de synchronisation est terminé la LED d'état du récepteur brillent.
4. Eteignez l'émetteur et le récepteur.
5. Enlevez le câble de synchronisation.
Remarque importante
La radiocommande ne fonctionne pas avec la touche de synchronisation appuyée. De plus, assurez
vous que l'ensemble ne reste pas trop longtemps en mode synchronisation.
Réglages
Avant d'utiliser votre modèle, vérifiez soigneusement si les servos bougent dans le bon sens. Si cela
ne devait pas être le cas, inversez le sens de rotation du servo concerné en manipulant le commuta-
teur sur la partie avant de l'émetteur. Ensuite réglez pour toutes les fonctions la position de neutre en
ajustant mécaniquement les tringles de commandes. Les leviers de commandes des différents ser-
vos doivent êtres en position centrale ainsi que les trims de l'émetteur. Il ne faut effectuer que de
petites corrections avec les trims. Pour l'utilisation d'un moteur thermique il est conseillé d'ajuster
parfaitement la tringle de commande du carburateur. Les servos ne doivent pas entrer en butée
mécanique en fin de course.
Séquence de mise en marche
1.
Branchez tous les composants du système de réception
2.
Mettez en marche l'émetteur
3.
Branchez l'accu de réception/BEC avec le récepteur
4.
Vérifiez que la LED de l'émetteur et du récepteur s'allument en permanence
5.
Le système est actif et peut être utilisé
Séquence d'arrêt
1.
Débranchez l'accu de réception
2.
Eteignez l'émetteur
2
12
11
10
9
8
1
2
3
4
5
6
7
Binding
As with all 2,4 GHz systems the transmitter and the receiver must be bound together and this process is
vital. Before the system is bound together it will not function and therefore cannot be used and so the
following steps must be followed before you attempt to operate the system:
1.
Fit the binding plug to socket 3 on the receiver and connect the power supply.
The receiver LED will begin to blink:
2.
Press and hold down the binding button on the transmitter and switch the power on.
This will put the transmitter into binding mode.
3.
Once the binding process has finished the LED will shine.
4.
Switch the transmitter and receiver off.
5.
Remove the binding plug.
Important Information
The system will not function whilst the binding button is pressed. Also, the system should not be left in
binding mode for long periods of time.
Settings
Before you operate your model carefully check that the servo operate in the correct direction.
If they do not rotate in the correct direction use the servo reverse switches located on the front of
the transmitter to change the direction. The servo neutral positions should then be set by moving the
servo arms until they are at exactly 90
with the trim central. The trim should only be used to make
0
fine adjustments when operating the model. If you are using this system with an Internal Combus-
tion engine make sure that the linkage cannot bind in either the full throttle or tick-over positions.
Switching On
1.
Connect all of the components together.
2.
Switch ion the transmitter.
3.
Connect the power supply to the receiver and switch on if required.
4.
Check that all of the LEDs are correctly illuminated.
5.
The system is now switched on and ready to operate.
Switching Off
1.
Switch off and unplug the receiver power supply.
2.
Switch off the transmitter.
GB - Transmitter
1
Antenna
2
Handle
3
Power LED
4
Servo Reverse CH 1
5
Left/Right Stick
6
Left/Right Trim
7
Binding Button
8
ON/OFF Switch
9
Throttle Stick
10 Throttle Trim
11
Servo Reverse CH 2
12 Indicator LED
Battery Hatch
The battery hatch is located on the rear side
of the transmitter and to open it simply push
down on the position marked ‚Push' and slide
the cover away. When fitting the batteries al-
ways be very careful not to short circuit them
by observing the correct polarity.
Receiver
2 Servos can be connected directly to the re-
ceiver.
Receiver Channel Allocation:
Channel 1:
Steering
Channel 2:
Throttle
Binding Channel 3:
Binding Cable
