Bernzomatic ST500 Instruction Manual - Page 3
Browse online or download pdf Instruction Manual for Soldering Gun Bernzomatic ST500. Bernzomatic ST500 4 pages. Butane microtorch
REFILLING OPERATION
1. Use only Bernzomatic Butane fuel when refilling torch.
2. Ensure that the torch is extinguished before refilling.
3. Allow sufficient time for torch to cool to room temperature before refilling the torch with fuel.
4. Refill torch in a well-ventilated area free of fire or other sources of ignition and away from
people.
5. Never smoke while refilling the torch.
6. Hold the torch with the FILL VALVE (A) up.
7. Invert fuel canister and insert the fuel canister tip into the FILL VALVE (A).
8. Push the fuel canister and torch together to allow fuel to flow into the torch fuel tank. Torch
should be filled in about 10 seconds.
9. Stop refilling once the fuel begins to overflow.
10. Wait 3 minutes to allow fuel gas to stabilize before igniting the torch.
LIGHTING AND OPERATION
Intermittent use mode
1. Turn FLAME ADJUSTMENT KNOB (B) approximately halfway between (1) and (4) position.
2. Press the SAFETY LOCK (C) button down and slide the IGNITION SWITCH (D) away from burner tip.
3. Release IGNITION SWITCH (D) to extinguish torch.
Continuous use mode
1. Turn FLAME ADJUSTMENT KNOB (B) approximately halfway between (1) and (4) position.
2. Press the SAFETY LOCK (C) button down and slide the ignition switch away from burner tip.
3. Slide CONTINUOUS FLAME LOCK (E) to "CONT" position to lock the IGNITION SWITCH (D) in the on position.
4. Release IGNITION SWITCH (D).
5. Slide the CONTINUOUS FLAME LOCK (E) to "OFF" position to extinguish the torch.
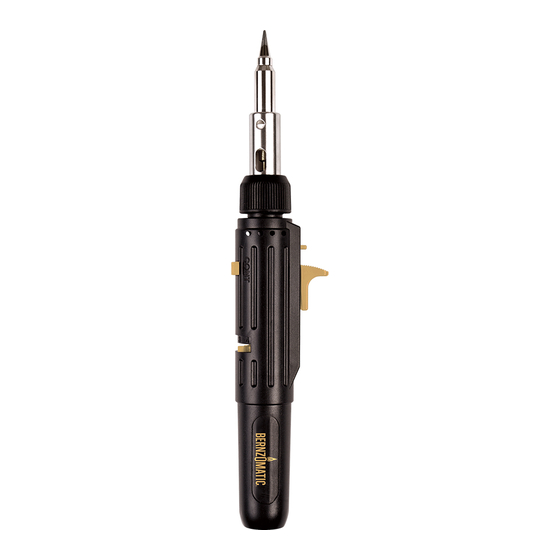
ST1000 shown for reference
Adjust flame
1. Slide FLAME ADJUSTMENT KNOB (B) to "1" for small flame.
2. Slide FLAME ADJUSTMENT KNOB (B) to "4" for large flame.
Use as soldering iron
1. Torch is factory set for use as a soldering iron and can be used immediately.
2. Loosen LOCK NUT (F) and adjust the EXHAUST PORT (J) so that hot air escapes in
a safe direction and does not damage work surface.
3. Tighten LOCK NUT (F) with firm pressure.
4. Ignite torch as shown above.
Use as a hot air blower
1. Assemble for use as soldering iron.
2. Remove the TIP (K) from the SOLDERING TIP ASSEMBLY (H) by rotating the TIP (K)
counterclockwise.
3. Torch is now ready for hot air blower operation.
4. Ignite torch as shown above.
DO NOT DISCARD THESE WARNINGS AND INSTRUCTIONS
200 Old Wilson Bridge Road
Columbus, OH USA 43085
worthingtoncylinders.com | bernzomatic.com
(866) 928-2657
Push
down
to fill
06/24/15