JamHub TourBus Owner's Manual - Page 5
Browse online or download pdf Owner's Manual for Music Mixer JamHub TourBus. JamHub TourBus 12 pages.
Also for JamHub TourBus: Owner's Manual (12 pages)
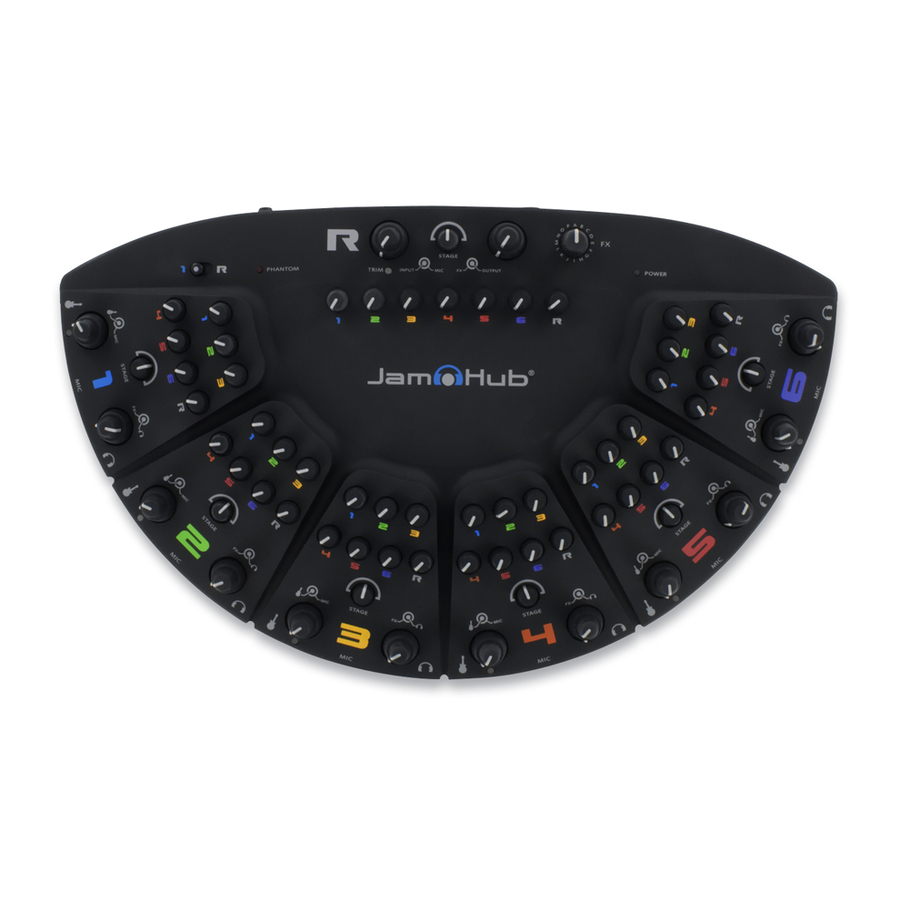
Step 3: Setting the trim levels
trim
1. Use the double knob called "trim" to set your input gain (note: you don't need to put on headphones to do this step). Use the light
under the dual trim knobs to get this right.
2. Speak into the mic and turn the outer/bottom knob up (clockwise) until the LED turns yellow. Then turn it back a little.
3. Play your instrument and turn the inner/top knob up (clockwise) until the LED turns yellow. Then turn it back a little.
4. Watch your trim settings throughout the jam session. Sometimes input levels can change as the band gets warmed up. Use the table
below as your guide.
In summary
Left Brain:
green = signal
yellow = near clipping (-6dB)
red = preamp clipping (+6dB)
Step 4: Pick a virtual location with the stage control
stage for
section 3
Left Brain:
The stage control is simply a pan or balance control to help
ensure that musicians don't crowd the mix. Because our
hearing system has two receptors separated by about 6 inches
(your ears) we have the ability to perceive sounds coming
from different locations. Great audio engineers have known
for a long time that by "moving" things sonically to their own
location, our hearing system is optimized and we experience
greater clarity. (There's a great article on Wikipedia about this
amazing property of our hearing system. Read all about it
@ http://en.wikipedia.org/wiki/Cocktail_party_effect)
8
light
Right Brain:
green = good
yellow = caution
red = bad
stage for
section 4
Right Brain:
Does everyone in your band stand in the middle of the stage
when jamming? Of course not. So spread out sonically with
the Stage Control. The experience will be similar to what
happens when you're playing live. You'll hear things with
greater clarity and the jams will be more enjoyable. If you
want to understand why great recordings have instruments
panned to different locations, check out this article at
Wikipedia @http://en.wikipedia.org/wiki/Cocktail_party_
effect. Learning to spread out will help you as a band in the
studio as well.
Step 5: Turn up the headphone volume
Left Brain:
Start with the headphone output control at zero (100%
counterclockwise) and slowly turn it up. Because every
section of the JamHub has its own individual mix, output
levels will vary even before they get to the headphone amps.
So start low and turn up slowly. Also remember headphones
have a wide variety of impedances. While JamHub is designed
to handle them all, the setting of each headphone volume
knob is going to be different.
(A plea from the JamHub inventor: Please be careful with your hearing. Burning out your ears is dumb. It's kind of like a guitar
player clipping off his fingers little by little. They can't grow back. And trust us, you're going to want to keep playing for a long,
long time.)
Right Brain:
Don't burn out your ears. Bring the volume up s-l-o-w-l-y.
Also, while the JamHub does work with most headphones,
it can't make cheap or poor quality ones sound better.
Sorry, we're gear makers not miracle workers.
9