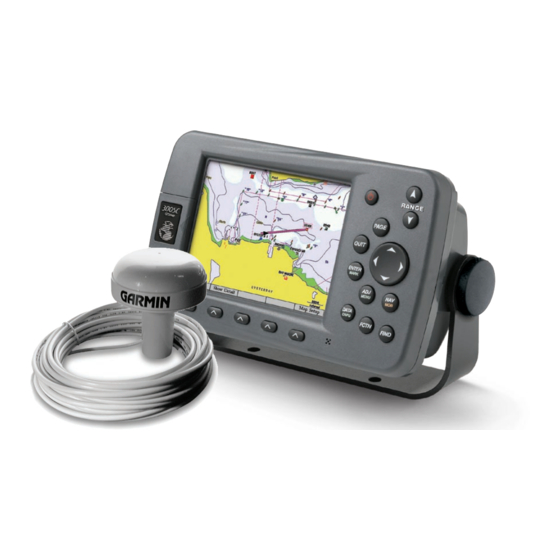
Garmin GPSMAP 3005C Quick Reference - Page 2
Browse online or download pdf Quick Reference for Marine GPS System Garmin GPSMAP 3005C. Garmin GPSMAP 3005C 2 pages. Declaration of conformity
Also for Garmin GPSMAP 3005C: Quick Reference Manual (2 pages), Installation Instructions Manual (10 pages), Template Manual (1 pages), Installation Instructions Manual (17 pages), Declaration Of Conformity (1 pages)

KEYPAD USAGE
POWER/BACKLIGHT—press and hold for two seconds to turn the unit
on or off; press and release to control the screen backlighting.
RANGE—Up (increases) Down (decreases) the range of the Map,
Highway, and other range-related functions.
ROCKER—controls the movement of the pointer, selects options and
positions, and enters data.
PAGE—scrolls the main pages in sequence and returns display from a
submenu page to a main page.
QUIT—restores a data field's previous value, and exits out of menus.
ENTER—activates highlighted fields and confirms menu options and
data entry.
MARK—press and hold for two seconds to capture your present
location and display the Review Waypoint page.
ADJ—shows the available options and features for the current function.
MENU—press and hold for more than one second to display the Main
Menu.
NAV—press and release to activate the navigation options, allowing you
to navigate using a waypoint, route, or track.
MOB (Man OverBoard)—press and hold to mark your present location
and instantly set a return course.
DATA—toggles the display of a Main page with or without function
windows and data fields.
CNFG—press and hold to display the Configuration page, which allows
you to customize the current main page.
FCTN (Function)—cycles through available function windows.
FIND—activates the Find options, allowing a search for user points,
map items, and any optional data card information.
SOFT KEYS—used as shortcuts to select the most commonly used
adjustments for a selected function. Soft Key options vary depending on
the function selected.
DATA ENTRY
To enter data:
1. Highlight a field using the ROCKER.
2. Press ENTER to access the field.
3. Use the ROCKER to select alphanumeric characters. You can change data in fields
such as symbol, name, comment, coordinates, depth, and temperature when marking
a waypoint.
4. Press ENTER to confirm.
BACKLIGHT
To navigate to an MOB:
1. Press and hold NAV/MOB to activate
the MOB waypoint.
To adjust the backlight level:
2. To store the MOB waypoint and begin
1. Press and release the POWER key.
navigation to that point, highlight Yes,
and press ENTER.
2. Press Up or Down the ROCKER to
adjust the backlight level.
3. To stop MOB navigation, press
NAV/MOB, highlight Stop Navigation,
3. Press ENTER to accept.
and press ENTER.
To use the NAV key:
1. Press NAV to activate the navigation selections.
2. Using the ROCKER, select Go To Point, Follow Route, Follow Track, or TracBack, and
press ENTER.
3. Select the point, track, or route from the list, and press ENTER.
4. If you selected a point, highlight Go To, and then press ENTER again. If you selected a
route or saved track, choose from the selections, and press ENTER to begin navigation.
MOB
To mark a waypoint:
1. To capture your present location,
press and hold ENTER/MARK to
display the Review Waypoint page.
2. Press ENTER to save the waypoint.
NAVIGATION
MARKING WAYPOINTS
To graphically mark a waypoint:
1. Move the pointer to the map location.
2. Press and release ENTER/MARK to
display the Review Waypoint page.
3. With OK highlighted, press ENTER to
save the waypoint.
Part Number 190-00531-01 Rev A.
Printed in Taiwan
