Allied Healthcare G180CE Operation & Service Manual - Page 4
Browse online or download pdf Operation & Service Manual for Medical Equipment Allied Healthcare G180CE. Allied Healthcare G180CE 14 pages. Dc portable aspirator

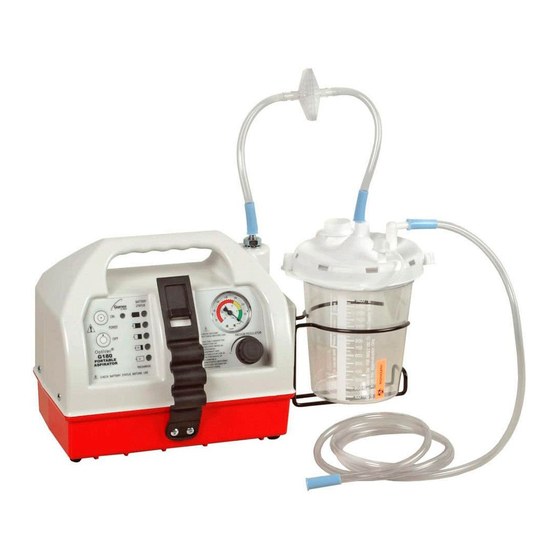
2.0 SET-UP
2.1
Disposable Collection Container: The G180 and G180CE use part number 20-08-0016 a 1500 ml
DCU with a hydrophobic filter shut off. The L190, L190CE, L190-GR, and L190-GRCE use part
Number S1160BA-RPL an 800 ml DCU with a float shut off.
1. Snap the lid onto the container firmly.
2. Check canister and tubing for damage.
3. Insert the container into the canister ring and seat firmly.
4. Connect the 72" length of (1/4" I.D. PVC) tubing to the 90 degree tubing connector in the lid marked
"PATIENT"
5. Connect the 8" length of (1/4" I.D. PVC) tubing to the vertical connector on lid marked "VACUUM".
6. The bacteria filter may now be placed in-line by cutting the 8" length of tubing in half and inserting the
barbed fittings into hose ends, making sure that the side marked "FLUID SIDE" is toward the container.
7. Connect the remaining end of the length of tubing to the short vacuum inlet on top of housing.
WARNING:
2.2 1200 ml (cc) Collection Container (Glass or Polycarbonate)
1. The bottle and cap assembly should be sterilized prior to use.
2. Check that the cap gasket is properly positioned inside the cap cover and that the gasket seals. Check that
the float moves freely.
3. Place the bottle in the bottle holder of the unit.
4. Connect the 72" length of (1/4" I.D.) clear (PVC) tubing to the collection bottle stem marked "To Patient".
5. Connect the 13" length of (1/4" I.D.) clear (PVC) tubing to the collection bottle stem marked " Vacuum
Source".
6. The bacteria filter may now be placed in-line by cutting the 13" length of tubing in half and inserting the
barbed fittings into hose ends, making sure that the side marked "FLUID SIDE" is toward the container.
7. Connect the remaining end of the length of tubing to the short vacuum inlet on top of housing.
CAUTION:
2.3 Activate Battery Connection
The aspirator is shipped with the battery disconnected to prevent the battery from becoming discharged during
storage. To connect the battery, the fuse that is attached to the outside of the aspirator must be installed. Place
the fuse into the fuse holder located on the back of the unit above the AC power connection. Use a flat blade
screwdriver and rotate the fuse holder clockwise approximately 1/8 turn to lock in place. Connect the unit to
one of the approved power sources and allow to fully charge.
WARNING:
3.0 OPERATING PROCEDURE
WARNING:
3.1 Activate unit from one of the three power sources listed:
115 or 230 Volt AC line current
Internal rechargeable battery
External 12 Volt DC automotive supply
3.2 Press power switch "I" to turn unit on and "O" to turn it off.
3.3 To check the degree of vacuum for all models equipped with a gauge and regulator (L190-GR,L190-
GRCE,G180 & G180CE), do the following:
You should not attempt to clean and reuse items which are labeled "SINGLE PATIENT
USE" or "DISPOSIBLE" such as plastic tubing, filters, disposable collection containers,
ect. The plastic and filter material used in these items may degrade when cleaned with
some cleaning agents making the unacceptable for further use. Replacement part
numbers are listed in the "REPLACEMENT PARTS LIST"
Collection containers must be used in a vertical position +/-10˚ so that the float / or
hydrophobic filter shuts off properly.
Do not touch exposed docking station terminals and the patient simultaneously.
Do not use in the presence of flammable anesthetics.
*
4
