Avsl 953.147UK User Manual - Page 5
Browse online or download pdf User Manual for Amplifier Avsl 953.147UK. Avsl 953.147UK 7 pages. Secure wall amplifier with uhf microphone

Operation
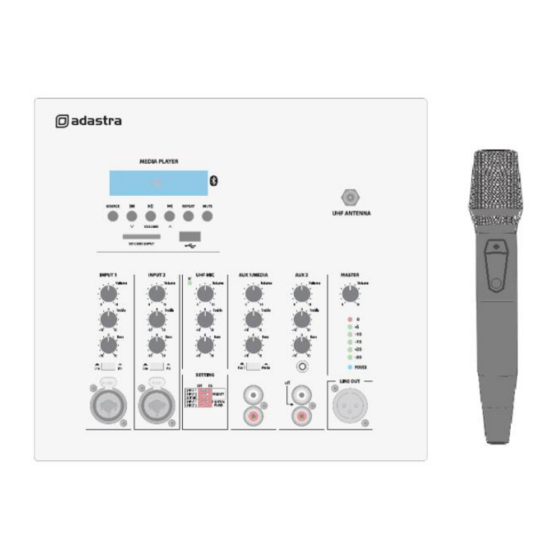
When all connections to the amplifier are made, turn Master (20) and all Volume controls down and switch on
the power (29) and a "POWER" LED will illuminate (23). Turn up the Master control part way for testing.
The supplied UHF wireless microphone is powered by 2 x AA batteries (supplied), which should be installed
into the handheld microphone by unscrewing the base to reveal the battery compartment. Insert the batteries,
taking care to observe the correct polarity, and replace the bottom cover. Press and hold the front button until
the handheld microphone display is lit, which will cause the "RF" LED to light at the top of the UHF
microphone control section to confirm that the wireless signal is present. If not, check batteries and try again.
Note: the internal UHF wireless microphone (or any connected wired microphones) should not be able to
"hear" the speakers, which can cause feedback (squealing or howling). Ensure that microphones are pointed
away from speakers and reduce the volume of any which are causing feedback.
The output of the amplifier is represented on the VU meter LEDs (23) and this indication is to help the user to
avoid overloading the amplifier. If red LEDs are lighting continuously, the Volume levels need to be reduced.
Gradually rotate the UHF Microphone Volume control (16) to the right whilst speaking into the handheld
microphone until it can be heard through the connected speakers. Increase the Master control to a suitable
setting for the environment and then adjust the UHF Microphone Volume until the required level is reached.
Turn Treble and Bass controls (17, 18) to the 12 o'clock position (pointing straight up) and adjust the tone by
rotating left to cut the treble/bass or right to boost the treble/bass.
Adjust Treble and Bass controls to suit the type of audio signal or compensate for the room acoustics.
Pressing and holding the button on the front of the handheld microphone will switch it off.
Remove the batteries if not in use for long periods of time.
Input 1 and Input 2 can accept either a microphone or line level signal (e.g. CD Player, mp3 player, laptop).
Before turning up the Volume, ensure that the Mic/Line level selector (8) is set to the appropriate input type.
For a wired microphone connected to Input 1 or 2 jack (9), gradually increase the Volume control (5) for that
input channel whilst speaking into the microphone until the voice is heard through the speakers. In a similar
way, if a line input is connected to either of these, play the audio source into the input to adjust the Volume.
Turn Treble and Bass controls (6, 7) to the 12 o'clock position (pointing straight up) and adjust the tone by
rotating left to cut the treble/bass or right to boost the treble/bass.
For a line level audio source (or the internal media player), connected to Aux 1 or 2 input (12, 13, 14), play
the audio source whilst gradually increasing the Volume control (19)
Turn Treble and Bass controls (21, 22) to the 12 o'clock position (pointing straight up) and adjust the tone by
rotating left to cut the treble/bass or right to boost the treble/bass.
Media player
To use the internal media player, ensure that the Aux 1/Media source select button (11) is pressed in.
Turn up AUX 1/MEDIA volume control to hear the output from the speakers and increase to the required level.
Pressing the SOURCE button will step through USB, SD card, Bluetooth or FM Tuner playback sources.
SOURCE
PREVIOUS
PLAY/PAUSE
NEXT
REPEAT
MUTE
USB/SD – Bluetooth – FM Tuner input select
Navigate to previous track – hold for volume down
Play or pause current track
Navigate to next track – hold for volume up
Select to repeat one track or all tracks
Mute/un-mute media player output
SA-series User Manual
