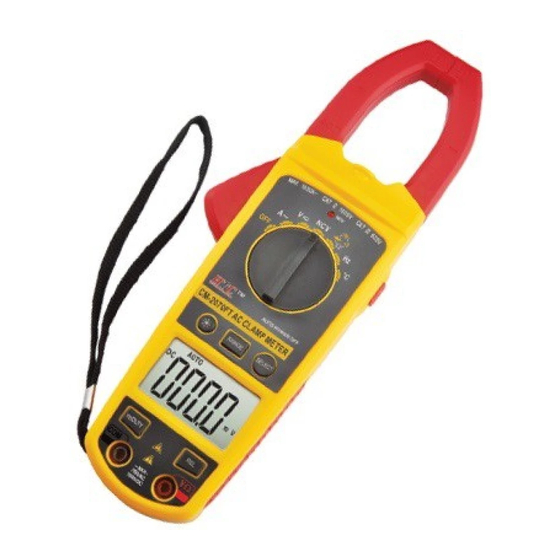
HTC CM-2070FT Manual - Page 3
Browse online or download pdf Manual for Measuring Instruments HTC CM-2070FT. HTC CM-2070FT 5 pages. Digital clamp meter
Function
Description
ACA measurement.
A C V 、 D C V
m e a s u r e m e n t .
Non-contact voltage test.
NCV
Press "SELECT" to turn to Diode 、
Ω
Continuity 、 Capacitance and Resistance
measurement.
Frequency measurement. Press "Hz/DUTY" to
Hz
turn to Frequency/Duty measurement.
Temperature measurement. Press" SELECT" to
/
℃ ℉
turn to
℃
or
℉
.
8) Function key.
LIGHT button: Backlight and Clamp light control key. Press
LIGHT button more than 2 seconds, backlight and clamp light will be
on. Press this button again, the backlight and clamp light will be off.
The backlight will auto turn off after 5 seconds if not pressing it again.
RANGE button: Auto or manual range control key. The meter defaults
to auto range in measurement function and "AUTO" symbol is
displayed. To enter Manual Range mode, press RANGE key. Each press
of RANGE key increases the range. When the highest range is reached,
the meter wraps to the lowest range. To exit the manual range mode,
press and hold the Range key for more than 2 second.
SELECT button: (1) Function selection key. Press this button to select
the measurement mode: Under "
" mode, choose DC or AC. Under
"
Ω" mode, choose "
", "
", "
", "Ω" measurement.
(2) Hz/DUTY button: When measuring AC voltage / AC current, press
this key can turn to Frequency/Duty/Voltage (Current) measurement.
When measuring Frequency, press this key can turn to Frequency/ Duty
(1-99%) measurement.
(3) REL button: Press this key can clear the reading and enter the
Relative Value measurement. "REL" will be displayed on the LCD,
Press this key again can exit Relative Value measurement mode.
9) LCD: Displaying measurement value and unit.
No.
Symbol
Description
1
-
Indicates negative readings.
2
AC
AC measurement.
3
DC
DC measurement.
4
Auto
Auto range.
5
Null.
6
Diode test.
7
Continuity beeper is on.
8
HOLD
Data hold.
9
REL
Relative Value
10
Low battery indication.
hFE
Null.
℃, ℉
℃. ℉ is null.
NCV
Non-contact voltage test.
nF, uF
nF, uF
11
MΩ, kΩ, Ω
MΩ, kΩ, Ω.
mV, V
mV, V.
uA, mA, A
uA, mA, A.
Hz, kHz, MHz
Hz,kHz,MHz
10)V/Ω input terminal: Measurement inputs positive terminal (red
test lead).
COM input terminal: Measurement inputs negative terminal (black
test lead).
11) Carrying belt.
4.2 ACA MEASUREMENT
(1) Turn the rotary switch to ACA range.
(2) Open the clamp jaw and grip one wire and
get the reading directly.
To get the most precise reading, should user
put the wire in the middle of the close jaw
(refer to the picture 3).
Note:
1.
Firstly users should select the highest range, if users are
not sure about the range of current under test, and then select the
proper range based on displaying value.
2.
DO NOT input the current higher than the limit, or it would
damage the meter.
4.3
ACV MEASUREMENT
(1)
Turn the function swift to ACV range.
Insert the black test lead into "COM" terminal,
and the red one into "V/Ω" terminal.
(2)
Connect the test leads into the circuit and
get the measurement value from the LCD. (refer
to picture 4)
Note:
1. DO NOT input a voltage over the limit or It may cause damage
to the circuit of the meter.
2. Be careful while measuring a high voltage circuit. Do not touch
the high voltage circuit.
4.4 DCV MEASUREMENT
(1) Turn the function swift to DCV range. Insert the black test lead
into "COM" terminal, and the red one into "V/Ω" terminal.
(2) Connect test leads to the test point. LCD will display polarity
and voltage of the test point connected by the red test lead.
Note:
1. DO NOT input a voltage over the limit or It may cause damage
to the circuit of the meter.
2. Be careful while measuring a high voltage circuit. Do not touch
the high voltage circuit.
4.5 NCV MEASUREMENT
NCV Static electricity or other sources of energy may randomly
trigger the sensor. The result is only for reference.
4.5.1 Turn the rotary switch to NCV position.
4.5.2 Hold the top of the meter very close to the
voltage
source
under
4.5.3 If voltage is present, the NCV LED will
glow and buzzer will beep.
NOTE:
1. Even no indication when NCV test, there might still voltage be.
Do not use this NCV test function to judge the existence of
voltage.
2. The test result might be affected by many factors such as the
design of the socket and the thickness of insulation material.
3. The LED light might glow when user inputs voltage into the
meter terminal.
4. Flashlight or motor driver and other external sources may cause
(picture 4)
test.