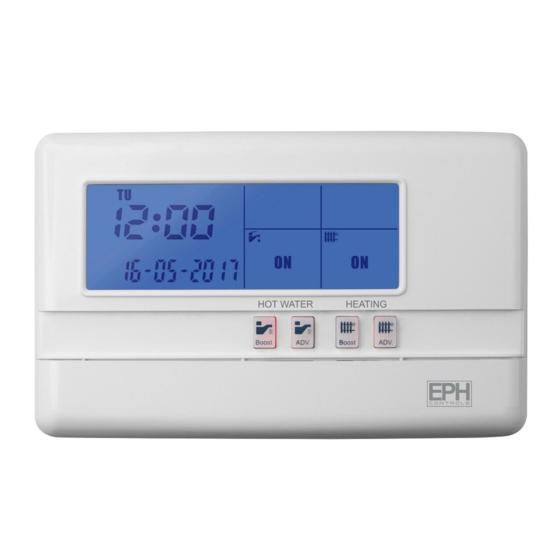
EPH Controls R27-HW Operating Instructions
Browse online or download pdf Operating Instructions for Motherboard EPH Controls R27-HW. EPH Controls R27-HW 2 pages. 2 zone programmer
Also for EPH Controls R27-HW: Operating Instructions (2 pages), Installation Instructions (2 pages)

R27-HW - 2 Zone Programmer
Contents
1.
Factory default settings
2.
Factory program settings
3.
Resetting the programmer
4.
Setting the date and time
5.
ON/OFF period selection
6.
Adjusting the program settings
7.
Copy function
8.
Reviewing the program settings
9.
Boost function
10. Advance function
11. Holiday mode
12. Backlight mode selection
13. Keypad lock and unlock
14. Frost protection function
15. Master reset
1. Factory default settings
Program:
5/2D
Backlight:
On
Keypad:
Unlocked
Frost Protection:
O
2. Factory program settings
P1 ON
P1 OFF
Mon-Fri
Sat-Sun
7:30
10:00
All 7 days
P1 ON
P1 OFF
Everyday
P1 ON
P1 OFF
3. Resetting the programmer
It is necessary to press the RESET button prior to initial programming.
This button is located behind the cover on the front of the unit.
4. Setting the date and time
Lower the cover on the front of the unit.
Move the selector switch to the CLOCK SET position.
Press the
or
buttons to select the day.
Press the
or
buttons to select the month.
Press the
or
buttons to select the year.
Press the
or
buttons to select the hour.
Press the
or
buttons to select the minute.
Press the
or
buttons to select 5/2D, 7D or 24H
The date, time and function are now set. Move the selector switch to the
RUN position to run the program, or to the PROG SET position to change
the program setting.
Important: Keep this document
This 2 zone programmer is designed to
provide ON/OFF control for both Hot
Water and Heating, with the value added
application of in built frost protection.
5/2D
P2 ON
P2 OFF
P3 ON
P3 OFF
12:00
12:00
17:00
7D
P2 ON
P2 OFF
P3 ON
P3 OFF
24H
P2 ON
P2 OFF
P3 ON
P3 OFF
RUN
CLOCK
PROG
SET
SET
Press
Press
Press
Press
Press
Press
EPH Controls Ireland
Sitecast Industrial Estate, Pouladu ,
Cork, T12 W665, Ireland
[email protected] www.ephcontrols.com
5. ON/OFF period selection
There are 4 modes available on this programmer for users to choose for their
individual application.
AUTO
The programmer operates 3 'ON/OFF' periods per day.
ALL DAY The programmer operates 1'ON/OFF' period per day.
This operates from the rst ON time to the third OFF time.
ON
The programmer is permanently on. **ON**
OFF
The programmer is permanently o . **OFF**
Lower the cover on the front of the unit. By pressing the
you can change between AUTO / ALL DAY / ON / OFF for HOT WATER.
23:00
Repeat this process for HEATING by pressing the
6. Adjusting the program settings
Lower the cover on the front of the unit.
Move the selector switch to the PROG SET position.
You can now program the HOT WATER.
Press the
or
Press the
or
Repeat this process to adjust the ON & OFF times for P2 & P3.
Press
SELECT
When completed, move the selector switch to the RUN position.
7. Copy function
Copy function may only be used if the programmer is in the 7d mode.
Lower the cover on the front of the programmer.
Move the selector switch to the PROG SET position.
Set the ON & OFF times for the day of the week you wish to copy from.
COPY
Press the
button for 2 secs. The next day of the week will begin to ash.
Holiday
Press the
button to copy the ON & OFF to this day.
Press the
button to skip a day.
ON & OFF times can be copied to multiple days by using the
Press the
button when copying has been completed.
When completed, move the selector switch to the RUN position.
EPH Controls UK
Unit E4, Welland Business Park, Valley Way, Market Harborough,
Leicestershire, LE16 7PS, United Kingdom
[email protected] www.ephcontrols.co.uk
Page 1 of 2
Operating Instructions
CAUTION!
Before commencing, disconnect the
device from the mains. There are parts that
carry mains voltage behind the cover. Never
leave unsupervised when it is open. (Prevent
non specialists and especially children from
gaining access to it.)
Never remove this product from the
electrical baseplate. Disconnect from mains
supply in the event of any damage to any
buttons. Do not use sharp tools to push any
button.
buttons to adjust the P1 ON time.
buttons to adjust the P1 OFF time.
and repeat the above process to adjust for HEATING.
button,
SELECT
button.
SELECT
RUN
CLOCK
PROG
SET
SET
Press
Press
RUN
CLOCK
PROG
SET
SET
button.
