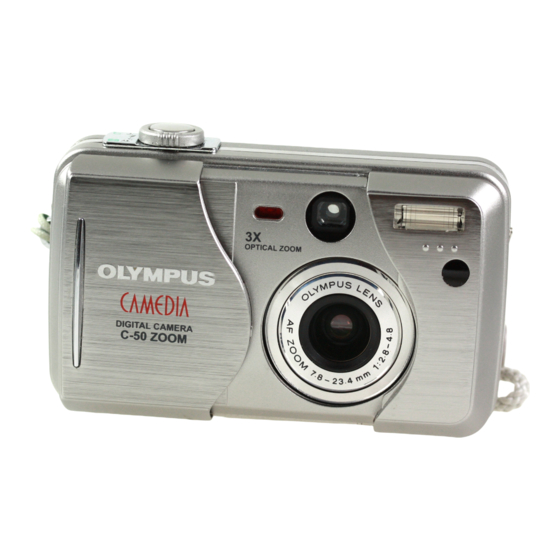
Olympus C-50 - Camedia 5MP Digital Camera Quick Start Manual - Page 2
Browse online or download pdf Quick Start Manual for Digital Camera Olympus C-50 - Camedia 5MP Digital Camera. Olympus C-50 - Camedia 5MP Digital Camera 2 pages. Software installation guide (160 kb)
Also for Olympus C-50 - Camedia 5MP Digital Camera: Quick Start Manual (2 pages), Software Installation Manual (2 pages)
Zoom lever (W/T)/(
/
)
Shutter button
Self-timer/Remote control lamp
Flash
Strap eyelet
Remote control
receiver
Lens barrier
Lens
VIDEO OUT jack
USB connector
DC-IN jack*
* Remove the cover before
connecting the AC adapter.
Connector cover
Tripod socket
Battery/Card compartment cover
An example of how to use the menus
Ññ
1
2
Press
to select a tab and
Press
to display the top menu.
í
í
Press
.
press
.
top menu
CAMERA tab
OFF
DRIVE
MODE MENU
ISO
AUTO
P/A/S/M
P
WB
˙
¥
PICTURE tab
HQ
WB
AUTO
SHARPNESS
NORMAL
CONTRAST
NORMAL
˙
CARD tab
¥
CAM: CAMERA tab
Functions for shooting: selecting drive
CARD SETUP
modes, using digital zoom, etc.
PIC: PICTURE tab
Functions for adjusting images:
selecting record modes, adjusting
˙
white balance, etc.
¥
SETUP tab
CARD: CARD tab
Card functions, such as formatting.
ALL RESET
ON
INFO
OFF
SET: SETUP tab
ON
Functions for changing camera
REC VIEW
ON
settings: date and time, shortcut
MY MODE SETUP
MY MODE SETUP
settings, etc.
Names of parts
Flash mode button (
Erase button (
)
Green lamp
Macro/Spot button (
Orange lamp
Protect button (
Viewfinder
AF target mark
Monitor
Monitor button (Quick View/
)
Arrow pad (ÑñÉí)
Card access lamp
Ññ
3
Press
to select an item and
4
Press
í
press
.
Press
● To go back to shooting, press
again.
ALL RESET
ON
INFO
OFF
ON
REC VIEW
ON
MY MODE SETUP
MY MODE SETUP
˙
É
Pressing
returns to the tab
selection.
¥
ALL RESET
ON
INFO
OFF
ON
REC VIEW
ON
MY MODE SETUP
MY MODE SETUP
The green frame moves to
É
Pressing
or
the selected item.
returns to the
item selection.
Note
● Some menu items may not be available depending on the camera settings or status.
Unavailable menu items cannot be selected.
● If you press the shutter button to take a picture while the menu is displayed, you will
take pictures with the currently selected settings.
● If you want to save the settings after the camera is turned off, set All Reset to OFF.
Moving around the Menu screen
1
)
Press
Note:
)
The Top menu and available
)
menu functions vary
depending on the mode.
(See the Reference Manual
Mode dial
for more details.)
Menu functions during shooting
Selects self-timer shooting or remote control shooting.
DRIVE
Selects a mode from
(sequential shooting),
BKT (auto bracketing).
ISO
Selects ISO sensitivity.
OK/Menu button (
)
P/A/S/M
Exposure mode can be selected from P ( Program auto), A
(Aperture priority auto), S (Shutter priority auto), or M
(Manual mode).
Adjusts the flash intensity.
DIGITAL
Digitally increases the optical zoom range to a maximum of
ZOOM
approximately 12x.
PANORAMA
Allows panorama pictures to be taken with Olympus
CAMEDIA-brand card.
2 IN 1
Combines two pictures taken in succession and stores them
as a single picture.
Sets the record mode resolution.
WB
Sets the appropriate white balance according to the light
source.
SHARPNESS
Adjusts the sharpness of images.
Ññ
to select the setting.
CONTRAST
Adjusts the contrast of images.
to save the setting.
CARD SETUP Formats the card.
ALL RESET
Selects whether to keep the current camera settings when
you turn off the power.
INFO
Changes the amount of information displayed on the
monitor.
Turns off the beep sound (used for warnings, etc.).
ALL RESET
REC VIEW
Selects whether to display the image being recorded onto
INFO
the card.
OFF
MY MODE
Lets you set your favorite camera settings as a custom
REC VIEW
ON
MY MODE SETUP
MY MODE SETUP
SETUP
mode.
˙
SLEEP
Sets the sleep timer.
FILE NAME
Chooses how to name files and folders of images to be
¥
saved.
PIXEL
Checks the CCD and image processing circuit for errors.
ALL RESET
MAPPING
INFO
Adjusts the monitor brightness.
OFF
REC VIEW
ON
Sets the date and time.
MY MODE SETUP
MY MODE SETUP
SHORT CUT
Lets you assign frequently used functions as shortcut menus
on the top menu.
VIDEO OUT
Allows you to select NTSC or PAL according to your TV's
video signal.
Menu functions
2
3
If you select MODE MENU in step 2
top menu
to select
MODE MENU
to select
WB
The top menu functions can be changed to
your liking in the
and
modes
(SHORT CUT setting).
Menu functions during playback
CAMERA
Runs through all saved pictures one after another (slide-show)
(single-frame shooting),
(AF sequential shooting) or
Plays back movies. You can also make indexes of still-shots from movies.
Changes the amount of information displayed on the monitor.
Stores printing information required for DPOF printers.
PICTURE
BLACK&
WHITE
SEPIA
CARD SETUP Formats the card (FORMAT), or erases all images in the
CARD
SETUP
ALL RESET,
"Menu functions during shooting".
4
OFF
DRIVE
to enter each menu
ISO
AUTO
Brings up CAMERA menu
CAM
P/A/S/M
P
Brings up PICTURE menu
PIC
Brings up CARD menu
CARD
Brings up SETUP menu
SET
(still pictures)
.
MOVIE PLAY (movies)
INFO
(still pictures)
PLAY (still pictures)
Rotates recorded pictures 90 degrees clockwise (+90°), or
counter-clockwise (–90°) and displays them.
EDIT (still pictures)
Creates black and white pictures.
Creates sepia-toned pictures.
Makes the file size smaller and saves it as a new picture.
CARD
card (ALL ERASE).
SETUP
Selects the number of frames in the index display. (4/9/16-
frame)
,
,
, VIDEO OUT: Same as described in SETUP under