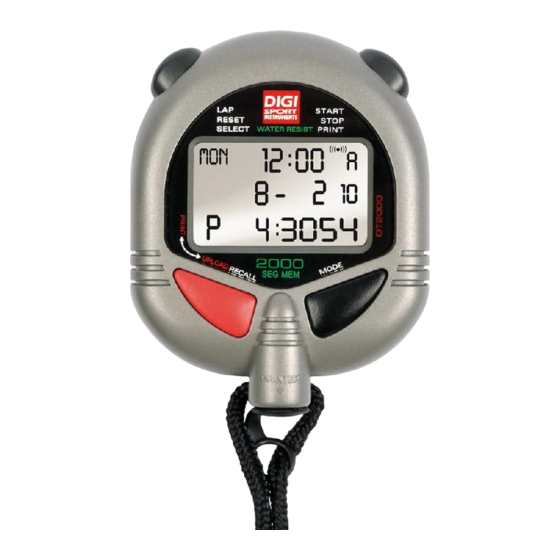
DigiSport DT2000 Instruction Manual - Page 2
Browse online or download pdf Instruction Manual for Watch DigiSport DT2000. DigiSport DT2000 4 pages.

www.digisportinterntional.com
INSTRUCTION MANUAL
DT2000
FEATURES:
- Hour, minute, seconds, month, date, day and alarm 12/24 hour and month/date or date/month display user selectable
- 2000 memories
- Segregated memory (capability to memorize LAP times of different races)
- User Selectable LAP/SPLIT or LAP/SPEED display
- Average and best lap time display
- Automatic release of LAP time after 10 seconds to allow progress monitoring.
- Data can be printed by printer (DT 500P optional) at operation or selectively by race later
- Data can be uploaded to computer through upload cable with software (cable and software optional)
- Dual timers which start one after another for use in training programs
- Can be used as ordinary countdown timer if 2nd timer is not set
TIME SETTING:
1. Press C to go to the TIME MODE (fig 24).
2. Press and hold B button will go into the TIME SET mode with the AL HOUR blinking.
3. Press A to set the AL HOUR.
4. Press B to select digits in the following sequence: AL HR, AL MIN first digit, AL MIN 2nd digit, AL
OFF/ON, YEAR last digit, YEAR 1st digit, MONTH, DATE, 12/24HR selection, HOUR, MIN 1st digit,
MIN 2nd digit, and SECONDS.
5. Press A to set the blinking digits.
6. Pressing C any time during this setting sequence will complete the setting procedure and return to
the normal TIME display. If 12HR option is selected the calendar will be shown as MONTH/DATE/YEAR and time will be displayed in 12 HOUR system. If
24HR option is selected, the calendar will be displayed as DATE/MONTH/YEAR and time will be displayed in 24HOUR system. The calendar automatically
adjusts for weekday and odd and even months including February of leap years up to year 2089.
7. Press D in the TIME mode to arm or disarm the alarm. When the alarm is armed the alarm indicator will be turned on and the alarm will sound at the preset
alarm time.
CHRONOGRAPH OPERATION:
1. Press C to go to the CHRONOGRAPH MODE. The display as shown in Fig. 2.
2. Press A to start.
SPEED DISPLAY:
1. In the CHRONO MODE before the start of a race, push and hold B for 2 seconds will go to the SPEED SET mode as is shown in Fig.14.
2. The first digit in the lowest row is flashing to indicate setting of the thousandth digit of distance.
3. Push A to set and B to select the next digits. The highest setting for distance is 9999.999.
4. After the digits are set press B again to set the TIME unit with the top left corner HR flashing.
5. Use A to set to HR (for /hour), MIN (for /minute) or SEC (for /second).
6. When the distance and time unit are set, press C button to return to the SPEED MODE (Fig. 15). (Pushing C button anytime during the setting will return to
the SPEED mode).
7. Press A to start, the display is as shown in Fig.16.
8. Press B to get the 1st LAP time at the top row and the speed at the middle row, as shown in Fig.17.
9. If for example the distance is set to 200 meters and time unit set is in seconds, the speed calculated from a LAP time of 17.09 seconds is 11.70 m/sec.
[Using the B button the LAP times and their corresponding speeds can be displayed. Recall operations in the SPEED mode are the same as in the
LAP/SPLIT mode.]
SPLIT TIME DISPLAY:
1. Press B to get the 1st LAP time. The LAP time is shown at the top row, the SPLIT time at the middle row and the running total time is shown at the lower
row, as shown in Fig.3.
2. 10 seconds later the display will automatically be released to show the running LAP and SPLIT times to allow the user to keep track of progress, as shown
in Fig. 4.
3. Press B to display the 2nd LAP time.
4. Press A to stop.
5. Press B to reset and be ready for the next race, as shown in Fig. 7. The counter at the top left corner displays the memory left for further races.
6. Further races can be recorded by pressing A and B buttons as above.
Since 5 memories are used for memorizing the date and number of the race, the memory left will be 1993 as shown below.
TIMER OPERATION:
1. Press C button until the stopwatch goes to the TIMER mode. The display is as shown in Fig.18. The top row is the display for the 1st timer and the middle
row is the display for the 2nd timer.
st
2. Press and hold B button for 2 seconds to go into the SET TIMER mode with the hour digit of the 1
timer blinking.
3. Press A button to set to desired hour for countdown.
4. Press B to go to the first digit in minutes and press A to set minutes.
5. Similarly by using B and A buttons the desired countdown times for the 1st and 2nd timers can be set.
