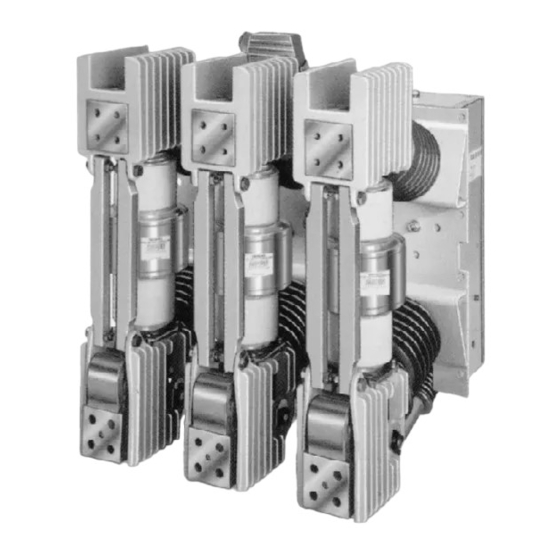
Siemens 3AH Instructions Manual - Page 28
Browse online or download pdf Instructions Manual for Industrial Equipment Siemens 3AH. Siemens 3AH 38 pages. Vacuum circuit breaker operator module
Also for Siemens 3AH: Instructions, Installation, Operation, Maintenance (33 pages), Installation Operation & Maintenance (20 pages)

Overhaul
Introduction
For following procedures along with the troubleshooti ng
charts at the end of this section, provide maintenance per
sonnel with a g u i d e to identifying a n d correcting possible
malfunctions of the circuit breaker.
A WARNING
Hazardous voltages and high speed moving
parts.
Can cause death, severe personal injury, or
property damage.
De-energize circuit breaker and discharge
springs before working on circuit breaker.
Read instruction manual.
Circuit Breaker Overh.aul
Table 6 lists the recommended overhaul schedu l e for 3AH
circuit breakers operating under ANSI usual cond itions.
When actual operating cond itions are more severe, over
haul periods should occur more frequently. The counter on
the front panel of the circuit breaker records the n u mber of
operations.
Table 6. Overhau l Schedu le
ANSI Usual Conditions
Maintenance Based Upon Number of Closing Operations
Circuit Breaker Type
kV
kA(MVA)
5 kV
36kA (250MVA)
15 kV
23kA (500MVA)
All Others
All Others
Replacement at Overha u l
T h e following components a r e replaced d uring a n overha u l
of t h e circuit breaker, when req uired:
• Vacuum interrupters as determined by vacuum integrity
test, contact erosion, or accord ing to Overh a u l Sched u l e
- reference Table 6.
• Close Coil, 52SRC
•Tri p Coil, 52T
•Trip Free Drive Bar M echa nism
When these parts are cha nged, locking devices must a l so be
removed and replaced. These include lock washers, reta in
ing rings, retaining clips, spring pins, cotter pins, etc.
1. Replace Vacuum I nterrupter; instructions follow.
2. Close Coil (52SRC) andTrip Coil (52T).
a. Remove two "push on" terminal con nections
b. Remove two M4 hex head screws and coils.
c) I n stall replacement coils with new M4 x 1 0 hex head
screws (Siemens part # 00-000-443-820) and new lock
washers for M4 (Siemens part # 00-000-288-31 6) .
Number of
Closing Operations
30,000
10,000
d. T h e coil mounting screws must b e installed using
thread locking adhesive ( Loctite #222, Siemens part
1 5-1 33-281-007) and primer ( Loctite primerT, Siemens
part 1 5- 1 33-28 1-005) .
e) Connect wires to coils with new wire terminals
(Siemens part # 1 5- 1 7 1 -600-002)
3. Lubricate operating mechanism according to M a i ntenance
Section.
4. When work is finished operate circuit breaker, close
open, several times, and check that all screw con nec
tions are tight.
Replacement of Vacuum Interru pters
Replacement vacuu m interrupters are furnished as a
complete assembly. They have been completely tested a n d
dielectrically and mechanically conditioned.
For 3000A circuit breaker with flexible current shunts which
are electron-beam welded to the vacu u m i nterrupters, the
vacuum interrupters are not field replaceable. Contact the
nearest Siemens representative.
It is recommended that one vacuum interrupter be removed
and replaced com pletely rather than removing two or more
vacu u m interrupters at a time. The following procedure i n
check l ist format describes the procedure for removing a n d
replacing a vacuum interrupter. Components m a y b e identi
fied by reference to Figures
1. Removing the Vacuum Interrupter
N ote: Special care needs to be exercised in removal
or installation of hardware around the bottom, or mov
able contact end, of the vacuum interrupter.
The movable contact uses metal bellows to maintai n
the vacu um seal while still permitting u p and down
motion of the contact. These bellows a re rugged a n d
reliable, and a r e designed t o withstand years of verti
cal movement. However, care should be exercised
to avoid subjecting the bellows to excessive torq ue
du ring removal and replacement. Twisting the bellows
through careless bolt removal or tightening may dam
age the vacu um interrupter.
1.1 Before starting work, the circuit breaker should be
isolated from all primary and control power sources
and all stored energy discharged by opening,
closing, a n d opening the circuit breaker by h a n d .
Discharge a n y static charge b y grounding all a n d
center metal sections of t h e vacu um interru pter.
Ca refu lly remove exterior a n d interphase barriers.
1.2 Loosen the lateral bolt(s) on terminal clamp (29.2).
Refer to Figure 20 and employ the illustrated proce
d u re to loosen clamp hardware.
19
and 20.
28
