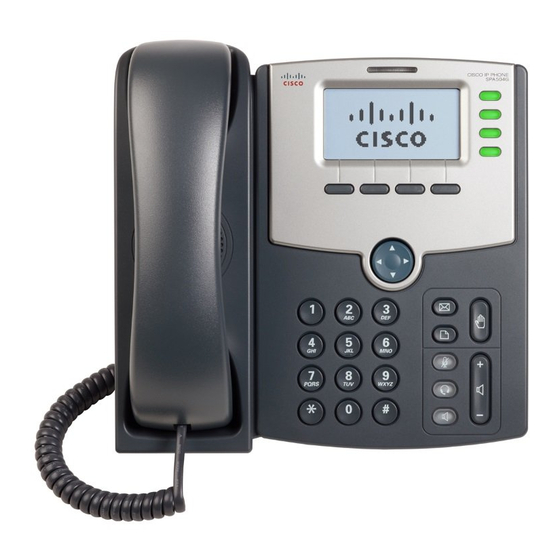
Cisco Small Business Pro SPA 504G User Manual - Page 7

Browse online or download pdf User Manual for IP Phone Cisco Small Business Pro SPA 504G. Cisco Small Business Pro SPA 504G 18 pages. 4-line ip phone
Also for Cisco Small Business Pro SPA 504G: Setup & User Manual (8 pages), Quick Start Manual (2 pages), Quick Start Manual (2 pages), Setup And User Manual (19 pages), Quick Start Manual (5 pages), Setup & User Manual (9 pages), Quick Start Manual (7 pages), User Manual (2 pages), User Manual (8 pages), User Manual (2 pages), Quick Start Manual (14 pages), Quick User Manual (2 pages), Quick Start Manual (18 pages), Quick Start Manual (7 pages), Manual (7 pages), Configuration Manual (12 pages), Configuration Manual (12 pages), User Manual (8 pages), Quick Start Manual (21 pages), User Manual (12 pages), Quick Start Manual (2 pages), Quick Reference Card (2 pages), Manual (5 pages), Quick Reference Manual (4 pages), Quick User Manual (9 pages), Instructions (2 pages), Quick Reference Manual (2 pages), Configuring (8 pages)

Cisco Small Business Pro SPA 504G User Manual
4

Registering Phone

This chapter describes how to identify Cisco SPA phone model, requirements that must
be met and how to register the phone using manual configuration or auto provisioning.
The following topics are covered:
-

Manual Configuration

-
Auto Provisioning
4.1
Manual Configuration
This chapter describes how to set UAD settings, create PBXware extension and register
the phone.
The following topics are covered:
-

UAD Settings

-

Creating Extension

-
Registering Phone
4.1.1
UAD Settings
1. Login to PBXware web administration interface
Open a new browser window and enter the IP address in order to access the
PBXware web administration login screen. Example:
Login to PBXware with your e-mail address and password.
2. UAD settings
Navigate to Settings:UAD.
Make sure Cisco SPA UAD is enabled. To check the UAD status click on the edit
icon corresponding to your Cisco SPA phone.
Make sure Status is set to Active, Auto provisioning is set to No, and DHCP
is set to Yes.
© 2003 - 2012 Bicom Systems
Registering Phone
http://192.168.1.10
5