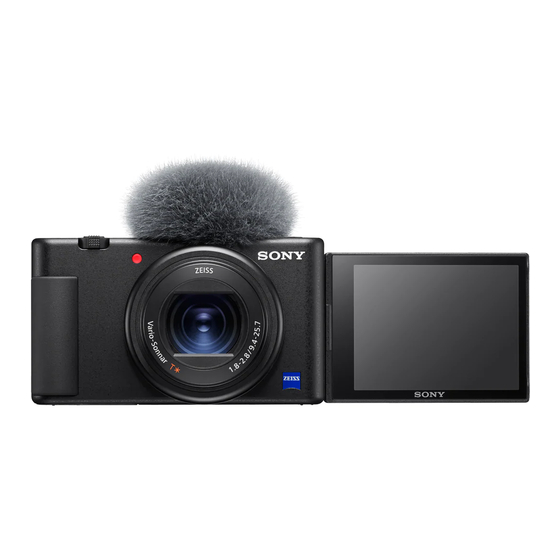
Sony ZV-1 Startup Manual
Browse online or download pdf Startup Manual for Digital Camera Sony ZV-1. Sony ZV-1 2 pages.

Digital Camera
Startup Guide
ZV-1
About the manual for this camera
This guide describes the necessary preparations to start using the
product, basic operations, etc. For details, refer to the "Help Guide"
(web manual).
"Help Guide" (Web manual)
https://rd1.sony.net/help/dc/1910/h_zz/
ZV-1 Help Guide
Looking for valuable information, such as essential points
on shooting
This website introduces convenient functions, ways of usage, and setting
examples.
Refer to the website when you set up your camera.
Tutorials
https://www.sony.net/tutorial/dc/zv1/
Preparations
Checking the supplied items
The number in parentheses indicates the number of pieces.
• Camera (1)
• Wind screen adaptor (1)
• Rechargeable battery pack NP-BX1 (1)
• Shoe cap (1) (attached to the camera)
• Micro USB cable (1)
• Startup Guide (this manual) (1)
• Wind screen (1) (attached to the wind
• Reference Guide (1)
screen adaptor)
©2020 Sony Corporation Printed in China
Inserting the battery pack (supplied)/memory card
5-017-151-11(1)
(sold separately) into the camera
Open the battery/memory card cover, and insert the battery pack and a memory
card into the camera. Then, close the cover.
Lock lever
Battery pack
Battery pack
Make sure that the battery pack is facing in the correct direction, and insert it while
pressing the battery lock lever.
Memory card
Insert the memory card with the notched corner facing as illustrated.
This camera is compatible with SD memory cards or Memory Stick media. For
details on the compatible memory cards, refer to the "Help Guide."
When you use a memory card with this camera for the first time, format the card
using the camera in order to stabilize the performance of the memory card.
Note
• Formatting erases all data, including protected images and registered settings
(M1 to M4). Once erased, this data cannot be restored. Save valuable data to a
computer, etc. before formatting.
Charging the battery pack
Charge lamp
1
Turn the power off.
If the camera is turned on, the battery pack will not be charged.
2
With the battery pack inserted, connect the camera to the computer
using the micro USB cable (supplied).
The charge lamp will light up when charging starts. When the charge lamp turns
off, charging is completed.
Setting the language and the clock
1
Press the ON/OFF (Power) button to turn on the camera.
2
Select the desired language, and then press the center of the control
wheel.
3
Make sure that [Enter] is selected on the screen and then press the
center button.
4
Select the desired geographic location and then press the center
button.
5
Set [Daylight Savings], [Date/Time], and [Date Format], and then select
[Enter] and press the center button.
If you want to reconfigure the date/time or the area setting at a later point, press
the MENU button and select
Memory card
Ensure the notched corner faces
correctly.
ON/OFF (Power) button
Control wheel
Select items: //// /
Confirm : Center button
(Setup) [Date/Time Setup] or [Area Setting].
Shooting
Shooting still images
1
Select the desired shooting mode by
MODE (Mode) button
pressing the MODE (Mode) button
and using the control wheel, and
then press the center.
2
Press the shutter button halfway
down to focus.
3
Press the shutter button all the way
Control wheel
down.
Shooting movies
1
Press the MOVIE (Movie) button to
MODE (Mode) button
start recording.
Movie recording can be started from any
shooting mode in the default setting.
2
Press the MOVIE button again to stop
recording.
Control wheel
Changing shooting modes
Use the MODE (Mode) button to change shooting modes.
Press the MODE button and use the control wheel to select the desired mode, and
then press the center.
Using the wind screen (supplied)
Use the wind screen to reduce wind noise
picked up by the internal microphone when
recording a movie.
Remove the shoe cap from the camera, and
then attach the wind screen to the Multi
Interface Shoe.
Viewing
1
Press the
(Playback) button to
switch to the playback mode.
2
Select an image with the control
wheel.
You can move to the previous image/next
image by pressing the left/right side of
the control wheel.
To start playing back a movie, press the
center button on the control wheel.
Shutter button
MOVIE (Movie)
button
Wind screen
Multi Interface Shoe
Control wheel
(Playback) button
