Crow FW2-SMK Installation Instruction - Page 2
Browse online or download pdf Installation Instruction for Security Sensors Crow FW2-SMK. Crow FW2-SMK 4 pages. Wireless smoke & heat detector
WHERE TO INSTALL SMOKE DETECTORS IN MOBILE HOMES
AND RVs
Mobile homes and RVs built after about 1978 were designed and
insulated to be energy-efficient. In mobile homes and RVs built
after1978, smoke detectors should be installed as described above.
Older mobile homes and RVs may have little or no insulation compared
to current standards. Outside walls and roofs are often made of non-
insulated metal, which can transfer thermal energy flow from outdoors.
This makes the air right next to them hotter or colder than the rest of the
inside air. These layers of hotter or colder air can keep smoke from
reaching a smoke detector. Therefore, install smoke detectors in such
units only on inside walls. Place them 10 - 15 cm (4 - 6 inches) from the
ceiling. If you are not sure how much insulation is in your mobile home
or RV, then install the detector on an inside wall. If the walls or ceiling
are unusually hot or cold, then install the detector on an inside wall.
Install one detector as close to the sleeping area as possible for
minimum security, or install one detector in each room for more security.
Before you install any detector, please read the following section on
"Where Not to Install Smoke Detectors".
WHERE NOT TO INSTALL SMOKE DETECTORS
False alarms occur when smoke detectors are installed where they will
not work properly. To avoid false alarms, do not install smoke detectors
in the following situations:
Combustion particles are by-products of something burning. Do not
install smoke detectors in or near areas where combustion particles are
present, such as kitchens with few windows or poor ventilation, garages
where there may be vehicle exhaust, near furnaces, hot water heaters
and space heaters.
Do not install smoke detectors less than 6 m (20 feet) away from
places where combustion particles are normally present, like kitchens. If
a 20-foot distance is not possible, e.g. in a mobile home, try to install the
detector as far away from the combustion particles as possible,
preferably on the wall. To prevent false alarms, provide good ventilation
in such places.
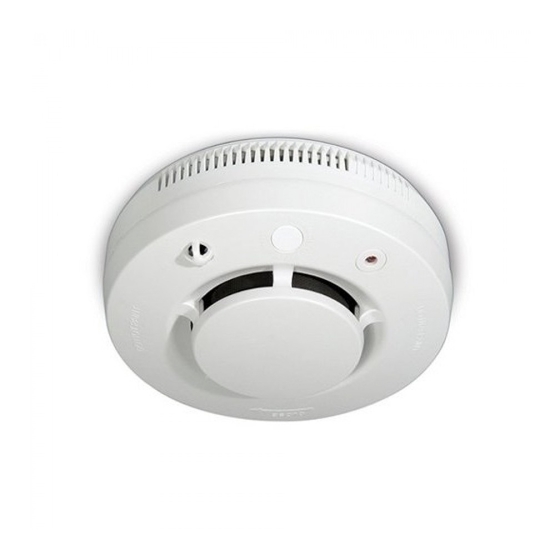
HOW TO INSTALL SMOKE DETECTORS
Remove the red cover from detector body.
Hold mounting base firmly and turn it anti-clockwise to release it from
the detector body.
Hold the mounting base against the ceiling and mark the center of
each slot. Drill 2 holes and install the mounting base with the screws .
Insert the battery according to the polarity into the detector body.
Hold the detector against the mounting base and turn it clockwise
until it fix.
5
7
PREPARE YOUR SMOKE DETECTOR FOR INSTALLATION
Battery Connection
1.
Hold mounting base firmly and push the hinge, turn anti-clockwise
to release the base down.
2.
The FW2-SMK comes with special mechanism within the battery
holder that prevents the cover from closing if there is no battery
inside.
3.
The smoke detector is supplied with a 3V lithium battery.
4.
Insert the battery into the battery compartment with the flexible
contacts on the detector.
ID Registration - "LEARN" Procedure
In order to learn the FW2-SMK detector into the control panel, please
refer to the Installer Manual.
NOTE: It is recommended to power up the detector and let the target
receiver "learn" the transmitter's ID before actual installation.
Refer to the target receiver's installation instructions and follow the
procedure given there for "learning" transmitter IDs.
Make sure that the receiver is at learning mode - according to control
panel installation instruction.
Use the Back Tamper in order to enroll the unit into the Control Panel.
Enroll the detector
Hold mounting base firmly and push the hinge, turn anti-clockwise to
release the base down.
The tamper switch will be activated and issue a tamper event
transmission that is used to enroll the smoke detector.
SETTING UP THE DETECTORS
The FW2-SMK Detector can be set to detect Smoke and Heat or Heat
only.
The default setting is on Smoke & Heat.
If change setting from default is not required - skip this paragraph!
Remove the battery
Open the detector body by releasing 3 plastic snaps at the bottom.
Reassemble the body cover on the base by aligning the snaps against
their holders and pressing them together.
Mode Setting:
Set the Slide switch according the printed on board.
SMK-Smoke & Heat
TEMP- Heat only
When reassembling the body, pay attention not to bend the Heat Sensor.
Insert the battery
Hold the Base against the mounting bracket and turn it clockwise until it
"clicks".
6
8