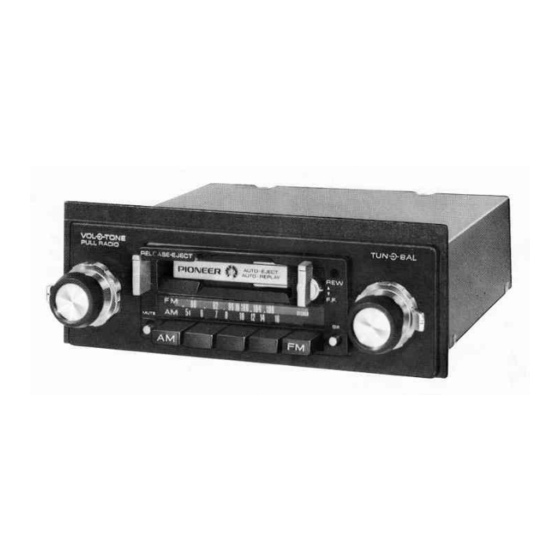
Pioneer KP-8805 Owner's Manual - Page 2
Browse online or download pdf Owner's Manual for Car Receiver Pioneer KP-8805. Pioneer KP-8805 5 pages. Cassette car stereo with am/fm-stereo

:
FEATURES
LOCKING FAST FORWARD
AND
REWIND
SYSTEM
Equipped
with
a
convenient lock
mechanism
for
fast forwarding
or rewinding tape, this model provides
ease
of operation.
You
can simply set
the
knob to fast
forward
or
rewind
and it
will
lock
in
place
until released.
AUTO
REPLAY SYSTEM
Whenever
a
tape is rewound
to
the beginning,
the
locking
r+
wind will automatically
release and the tape
will play
again.
AUTO
EJECT SYSTEM
At
the
end
of
tape
or
with tape wound
up
through fast forward-
ing,
Fast Forward knob
is
unlocked
to let
cassette pop
out
automatically.
At
the
same
time, power is cut off,
permitting
care.free
driving.
LUXURIOUS IN-DASH TYPE
Handsome ln-Dash
type stereo
is flush
mounted
to
the
instrument panel. The functional design
will
add
luxurious_
ness
to
any automobile interior.
INSTALLATION
HEX NUT(smm)
TOOTHED
WASHER(5mm)
SCREW FOR STRAP
SPRING WASHER
(
SPRING
WASHER(4mm)
FLAT
WASHER (5mm)
SPFING
WASHER (Smm)
SCBEW(5x16mm)
SUPERTUNER
Unprecedented
is the only word
to
describe
Supertuner-
Pioneer's latest
car
stereo tuner
which is
designed under
an
entirely new concept.
lt
features
such
advanced features
as
automatic monGstereo switching combined with
a
function to
virtually
eliminate
multiplex noise. Now you
can
really
keep
your eye
on
the road
while
your ear
is
on
the music. An unusual-
ly
high sensitivity
of 1.lp
V
means, compared
to ordinary
car
stereo tuners,
you
can
be
twice
as
far
from
your
favorite
station
and still catch your favorite
program-with
less
noise, more
clarity
and greater
stability.
Muting and special distant
switches
further enhance
this
capability.
PRE.SET
TUNING
Just
press
a
pre-set button, and
the
program
of your
choice
will
be automatically tuned. No
need
to
touch the tuning knob
whiledriving. Two
bands-FM
and
AM-can
be
selected.
HEX. NUT
(4rnm)
I
I
Caution:
You
should always use
the
sup
plied screws and
nuts
for
instal-
ling the set.
How
to
Attach
Front Panel:
Front
panel
is
designed
to
be
attached
to
any kind
of
vehicle.
When the panel
is
too large,
make
it
smaller
by
bending along
V-
groove, file the edge smooth
and
attach
it.
CONNECTION
SHAFT SHOULD PFOTRUDE
JUST 30mm
(1-3/1
6 in )
FFOM
THE DASHBOARD
DASHBOARD
-_,,1-
rRott
covrn
SPACER WASHER
BLUE
LEAD
GBEEN LEAD
(POSITIVE)
PLATE TO
WHICH CAR STEBEO
IS
TO BE
MOUNTED
HEX NUT(1omm)
FRONT PANEL
FLAT
WASHER
(10mm)
HEX
NUT(1Omm)
BALANCE KNOB
TONE KNOB
RED LEAD
ANTENNA CONNECTOR
TO METAL BODY
OR CHASSIS (IF NOT
GROUNDED BY
STRAP)
INSTALL WITH
THIS SCREW
CONNECT TO TEBMINAL
OF
LEAD
WIRE FOR POWEE
AUTO ANTENNA
ANTENNA WILL AUTOMATICALLY GO
UP
AND
DOWN
WITH RADIO ON/OFF
SWITCH
(N/ax 300mA
1
2V DC)
TO
POSITIVE TERI!4INAL
OF
BATTERY
(1
3
8V)
FUSE
2A
GRAY
LEAD /POSI
160mm (6-1/4 in
)--
147mm
(5-3i 4
in
)
Note:
This unit
is
designed
for
mounting in the slot
of
the
dashboard usually occupied
by
a
radio
ln some cases
it
may be necessary
to
enlarge
the
opening.
147mm'.
ln
case
of
FOBD automobile
160mm:
In
case of GM
automobile
Adjustment of
Antenna Trimmer:
After
completion
of
wiring,
ad-
just
the Antenna Trimmer.
With
AM pr+set
button pushed, tune
to
a
weak
station
in
1,000kH2
area, and turn the trimmer
with
a
screwdriver
until
volume
is
obtained
LEFT SIDE SPEAKER
BLACK LEAD
(NEGATIVE)
RIGHT
SIDE SPEAKER
