Pioneer ARP-230-0 Service Manual - Page 3
Browse online or download pdf Service Manual for Receiver Pioneer ARP-230-0. Pioneer ARP-230-0 22 pages.

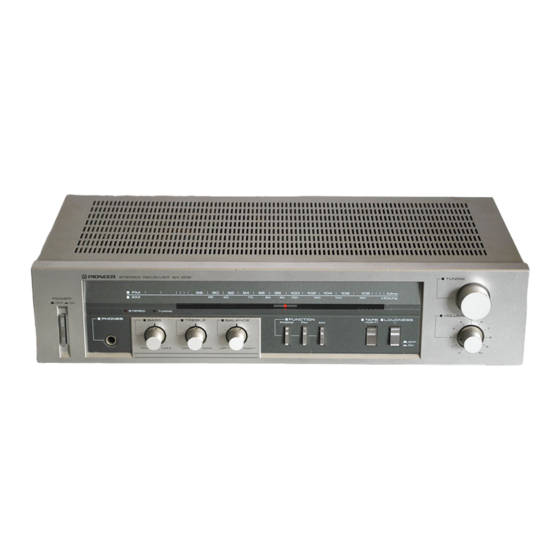
2 . F R O N T P A N E L F A C I L I T I E S
O PowER swtrcH
Push this to s1^ritch on and off the unit's power. Power is
supplied at the depresed ( - ) switch position (ON) and
turned off at the released (I)
position (OFF).
@ HEADPHoNE JAcK
Connect the plug on the stereo headphones to this jack
when listening to sound through headphones.
@ ToNE coNTRoLs
BASS
: The bass is increased when this control is rotated
clockwise from the center position and reduced
when rotated counterclockwise.
TREBLE : The treble is increased when this control is
rotatd clockwise from the center position and
reduced when rotated counterclockwise.
@ BALANcE coNTRoL
This is normally kept at its center position. lt is rotated
when the volume of sound delivered through the left and
right channels of the speakers or headphones differs.
The right channel volume is reduced when the control is
rotatd toward the LEFT from the center position while
the left channel volume is reduced when it is rotated
toward the RIGHT.
O FuNcrtoN swtrcHEs
PHONO : Press when listening to records.
FM
: Press when listening to FM broadcasts.
AM
: Press when listening to AM broadcasts.
@ TAPE (ADPT) SWITcH
This is depresed when using a tape deck or adaptor unit
connected to the rear panel TAPE/ADAPTOR jacks.
@ LOUDNESS SWITcH
Depress this switch to the ON position when listening to
sound at a low level of volume. This will enhance the bass
and treble and give more life to the sound even at a low
volume.
@ voLUME coNTRoL
Use this to adjust the volume of the sound delivered
through the speakers or headphones.
The volume is increased when this control is rotated
clockwise from the minimum "0" position.
@ T U N I N G I N D I c A T o R ( T U N I N G )
This lights up to indicate that an FM, AM station has been
t uned in.
@ srEREo tNDtcAToR (srEREo)
This lights up automatically when an FM station broad-
casting in stereo has been tuned in.
@ SPEAKERS
swrrcHEs
These are used to select the speakers through which you
w il l l i sten to t he s ound.
The selected speakers are now working.
A: The sound is heard from the speakers connected to
the speaker A terminals on the rear panel.
B: The sound is heard from the speakers connected to
the speaker B terminals on the rear panel.
No sound will be heard when SPEAKERS A and B switches
are both released. This is the position at which the sound
can be heard through the headphones.
NOTE:
No sund
will be heard through the geakers
when both the A
and B switches are depressed if only one et of speakerc has been
connected to either the A or B SPEAKERS terminals.
@
FREoUENcY scALE
This indicates the frequency of the broadcasting station
( F M , A M ) .
The top level figures (88 - 108) indicate the FM band.
The bottom level figures (55 - 1601 indicate the AM band.
@
T U N T N G K N o B
Rotate this knob to pick up stations (FM, AM).
@ P o w E R t N D t c A T o R / D t A L p o t N T E R
r6"
L;N t';K t;K
- I F U N C T I O N
l - * ' - '
L FI-EI-E
