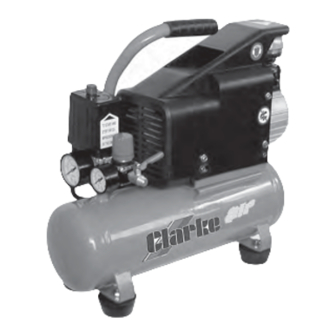
Clarke ZX 500 Operation And Maintenance Instructions - Page 6
Browse online or download pdf Operation And Maintenance Instructions for Air Compressor Clarke ZX 500. Clarke ZX 500 6 pages.

Operation
Before connecting your compressor to the mains supply, check the following:-
1. The Oil Filler Travel plug is removed and replaced with the breather supplied.
2. The machine is located on a level surface in a clean dry environment with adequate
ventilation and plenty of air flow around the unit. DO NOT place any materials
whatsoever on the unit.
3. Check the oil level which should be at the red dot in the oil sight glass. If topping up is
required, refer to 'Maintenance'.
4. Ensure the STOP/START switch is in the STOP position (Pressed fully Down).
5. The pressure regulator should be set to its lowest setting e.g. turned fully anti clockwise.
6. Check that the air receiver drain valve at the base of the receiver is fully CLOSED.
IMPORTANT: When using the compressor for the first time, open the drain cock and run the
compressor for at least 20 minutes, off load, in order for full lubrication to take place.
Now connect the air hose to the air outlet, and at the other end to the air tool - screwed on
directly.
Once the hose connections are complete, plug in and start the compressor by pulling the
STOP/START switch upwards. Pressure will build up in the receiver, as indicated on the gauge,
to a predetermined maximum 116 PSI/8bar, when it will then stop.
At this point, slowly turn the pressure regulator clockwise to reach the desired setting for the
air tool to be used, as indicated on the Air Outlet Gauge.
Open the Air Outlet Tap and check to ensure there are no air leaks. Should leaks be
apparent, they should be rectified before proceeding.
Operate the air tool in the normal way. (Refer to the Air Tool manual). The air compressor
will restart when the pressure has fallen by approximately 20 PSI and this automatic STOP/
START process will then continue as necessary to replenish the receiver.
When you have finished with the compressor, always switch OFF at the STOP/START switch
on the machine, NEVER by switching OFF at the mains.
ALWAYS
close the outlet tap and turn the pressure regulator fully anticlockwise, then operate
the trigger on the air tool BEFORE disconnecting the tool or air hose.
disconnect the tool or air hose before checking to ensure there is no air in the hose.
NEVER
attempt to
- 6 -
THERMAL OVERLOAD
If the machine should overheat, the Thermal Overload will intervene and shut down the
compressor. Should this happen, switch OFF the machine by pushing the STOP/START switch
downwards, and wait for at least 5 minutes before starting again. It may take longer for the
overload to reset, depending upon conditions.
DRAIN VALVE
After a period of use, especially if the weather has been warm and humid, it is quite possible
that water (condensate), will have accumulated in the receiver.
To remove this condensate, first switch OFF the machine after ensuring that there is at least
some compressed air in the receiver.
Simply loosen the drain valve for a few moments allowing the air and any water to escape
- tip the machine over slightly so that the drain is the lowest point, to ensure all condensate
is drained. REMEMBER to ALWAYS Re-tighten the drain valve before storage.
Maintenance
IMPORTANT! Before carrying out any service work, ALWAYS disconnect the compressor
from the mains supply and release any air in the receiver. If necessary allow the
machine to cool down before proceeding.
It is most important to keep the Air Compressor clean, this can be carried out using a small
soft brush and a vacuum cleaner.
In particular the air filter should be inspected periodically, so that it is always kept clean. If
this instruction is not adhered to, a loss of performance could occur, even worse, any dirt
passing through the filter could make its way into the cylinder head and adversely affect
the valves. This could lead to more extensive damage necessitating its dismantling and
replacement parts etc.
BEFORE EACH USE
Drain any condensate which may be present in the receiver, Undo the drain cock and tilt
the machine so that the drain valve is at the lowest point in order to do so.
WEEKLY
1.
Unscrew and remove the air filter assembly. Unclip the cover, remove the foam filter
and wash with warm soapy water. Allow to dry before reassembly. Renew if damaged.
2.
Clean the fins of the compressor cylinder
and the cylinder head to receiver pipe. A
clean compressor will work more efficiently.
3.
With the machine on a flat level surface,
check the oil level, It should be in the centre
of the oil sight glass, at the red spot. If
necessary, top up with SEA20 or SAE30 non
detergent oil, by unscrewing the breather
and using a small funnel to top up. Ensure
the hole in the breather is completely clear
before screwing back in place.
4.
Check to ensure all nuts and bolts are tight.
Check cylinder head bolts which should be
tightened to 10lbf ft.
- 7 -
