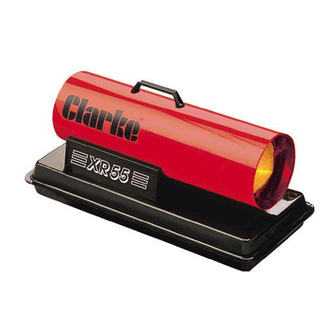
Clarke XR 155 Operating & Maintenance Manual - Page 6
Browse online or download pdf Operating & Maintenance Manual for Heater Clarke XR 155. Clarke XR 155 8 pages. Paraffin/diesel heaters
Also for Clarke XR 155: Operating & Maintenance Instructions (20 pages)

ASSEMBLY
ref. Fig.1
1. Slide the axle (6) through the wheel support frame (3), and install the wheels
on the axle.
NOTE: The extended wheel hubs should be facing inwards.
Position the caps (5) on the axle ends and gently tap with a hammer to secure.
2. Position heater on the wheel support frame assembly, with air outlet end over
the wheels.
3. Use the screws and nuts (7) to attach the handle (2), to the top of the fuel tank
flange. The screws will go through the handles, the fuel tank flange, and the
wheel support frame.
4. Tighten all nuts.
OPERATION
Understanding the basic operation of the heater, will reinforce the need to
maintain the unit in top condition at all times, whilst always observing the safety
precautions.
The heater comprises four basic systems:
1.
The fuel system.
2.
The air system.
3.
The ignition system.
4.
The safety control system.
Fig. 2
6
Fuel Filter
Removal of the fuel filter should it become blocked or contaminated, and require
cleaning, involves the removal of the burner head complete. The fuel pipe,
complete with filter, may then be detached, cleaned, using a good quality
solvent, and dried with compressed air. It is recommended however, that if the
filter becomes blocked, the complete assembly - fuel pipe with filter- should be
renewed.
General
It should be noted that should the heater be used with Diesel oil or 35 second oil,
the interval between servicing will be less, due to the fact that these fuels do not
burn as cleanly as paraffin, and some 'sooting up' will therefore occur.
It is recommended, that paraffin be used wherever possible
Storage
Drain all fuel from tank before storing.
1. Drain the fuel tank completely and add approximately one gallon of clean
paraffin. Attach the fuel cap and move the heater forwards and backwards
to circulate the fuel. Remove fuel cap or drain plug and drain tank completely
2. Replace fuel cap or drain plug and properly dispose of the old and dirty fuel.
3. Store the heater in a dry location free from corrosive fumes and dust.
4. Do not store kerosene over summer months for next seasons usage.
SPECIFICATIONS
Thermal Power (kW)
Thermal Power (BTU/hr)
Air Delivery (m
3
/hr)
Fuel Cons. (Paraffin - ltr/hr - approx.)
Motor Voltage
Power - Watts
Current Rating (Input) - Amps
Length (mm)
Width (mm)
Height (mm)
Please note that the details and specifications contained herein, are correct at the time of going to
print. However, CLARKE International reserve the right to change specifications at any time without prior
notice. Always consult the machine's data plate
XR75
XR105
XR155
19.0
26.7
40.7
79,000
96,000
150,000
400
500
1050
2.3
2.8
4.3
230V 50Hz
230V 50Hz
230V 50Hz
100
160
250
0.68
0.95
2
830
860
930
430
485
560
465
530
615
11
