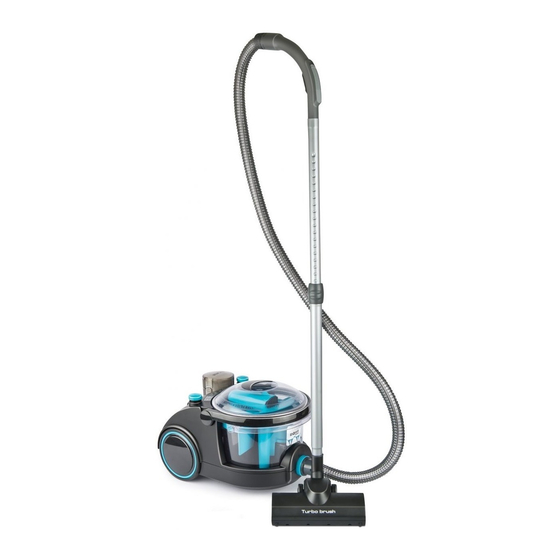
Arnica BORA 5000 Operating Manual - Page 11
Browse online or download pdf Operating Manual for Vacuum Cleaner Arnica BORA 5000. Arnica BORA 5000 12 pages. Dry vacuum cleaner with water filter
Also for Arnica BORA 5000: Manual (13 pages), Operating Manual (12 pages)

PREPARING FOR USE
•ATTENTION – Do not insert the main plug into the wall socket
unless the appliance is completely ready for use.
•Check the parts and accessories in the Operating Manual with
ones you take out of the box . Check whether they are missing or
damaged.
WET Vacuuming with Floating Buoy Group
•Lift the Water Tank Group and put aside by holding from its handle.
•Place the Motor Protective S Filter to its place on the base. Please
do not forget to place S filter on the base unit. Otherwise you vacuum
cleaner won't work properly.
•Place the Floating Buoy Group into the Transparent Water Tank.
•Place the Cover on the Water Tank.
•Replace the Transparent Water Tank Group on the main Body tightly.
•For wet cleaning purposes, you can use the Small Wet vacuum
nozzle and crevice nozzle. The brush on the small wet vacuum
nozzle can be taken out if needed.
DRY Vacuuming with Water Filter Group
•Lift the Water Tank and put aside by holding from its handle.
•Remove the Water Filter Group by pulling after you open the
Water Tank Cover.
•Add water in the Transparent Water Tank in accordance with the
maximum level (Maximum 1.2 liter) indicated on the Tank.
•Place the Motor Protector S Filter to its place on the base.
Please do not forget to place S filter on the base unit. Othewise
your vacuum cleaner won't work properly.
•Drop 2 or 3 drops of perfume supplied with your vacuum cleaner
into the water for a nice smell in your room.
•Place the Water Filter Body in the Transparent water tank.
Place the water tank Cover.
•Place the Transparent Water Tank on the main Body tightly
•WARNING: Do not ever vacuum wet floors or water from sink
when water filter group is placed in the Water Tank. Only perform
dry vacuuming with your vacuum cleaner with water filter group.
WARNING:
You can only suck water if Floating Buoy Group is
placed. You can vacuum max 2,7lt water into the Water Tank.
OPERATING THE APPLIANCE
•Choose the most appropriate accessories for your purpose and affix
these accessories directly on the handle or telescopic tube.
•For an effective cleaning, use the accessories as mentioned ibelow;
•For wet vacuuming , you can only use crevice nozzle and small wet
vacuuming nozzle.
•Main brush for vacuuming carpets, rugs and hard grounds.
•Crevice nozzle for cleaning the dusts, chips and etc. At radiators,
drawers and etc. Narrow sections.
•You can use Telescopic Tube for cleaning soil, debris, chips, feathers etc.
•The Wet Vacuuming Small Nozzle; for cleaning racks, clothes, electronic
device, lampshades, furniture, curtains and etc.
•Round brush for cleaning curtains or dusting.
•The hard ground brush for cleaning dust and etc on the hard floor such
as parquet.
•Plug in your vacuum cleaner and start it by pressing the On-Off
Button. You can adjust your vacuum cleaner's suction power
turning the On-Off Switch to right or left.
•After completing the vacuuming process, turn off your vacuum
cleaner by pressing the On-Off Button. Unplug your vacuum
cleaner and press the Cord Rewinder Button . For some models,
it will be sufficient to hold and pull the cord lightly to rewind the
cord . This specification can vary in accordance with the model.
•When vacuuming wet floors or sucking water , the floating buoy
will go up and block the motor immediately if the water tank is full.
It can vacuum up maximum 2,7 lt of water into the water tank.
In such cases, press on off button immediately and unplug the
device. Empty the Water Tank and clean .
CLEANING AND MAINTENANCE
•You have to unplug your device, before beginning any Cleaning
or Maintenance processes.
•After every use, empty the water in the Transparent Water Tank
and clean and dry the tank.
•Do not ever leave your vacuum cleaner with liquid and dirty in it
for hygienic purpose and extending the life of your vacuum cleaner.
•Pull and remove the Water Filter Body or Floating Buoy Group.
The Water Filter Body and Floating Buoy Group can be washed
with warm and soapy water or under tap water. Dry after you wash
these parts before replacing them.
•The cleanness of hepa filter should be checked periodically.
The Filter can lose its characteristics after a certain usage period
and requires replacing.
•Cleaning of motor protective S filter which is placed under the
transparent water tank must be checked periodically and must be
cleaned with warm water, if necessary. Before using it again,
make sure the filter is dry. It must be changed every 6 months
at least depending on the frequency of usage.
•Carry your vacuum cleaner by holding from its Body Handle.
•Use only original parts and accessories for efficient cleaning and
lifecycle and warranty of your device. Provide the accessories and
parts from the closest Authorized Service when it is required.
11
