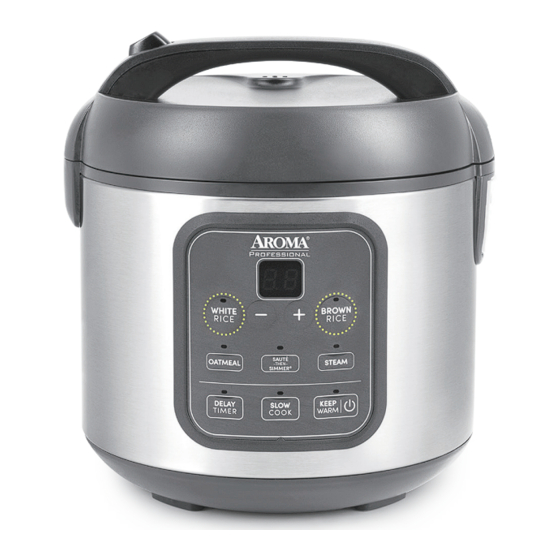
Aroma Professional ARC-994SG Instruction Manual - Page 5
Browse online or download pdf Instruction Manual for Kitchen Appliances Aroma Professional ARC-994SG. Aroma Professional ARC-994SG 11 pages. Rice & grain multicooker

Delay Timer
1. Using the provided measuring cup, add rice or
grain to the inner pot.
2. For white or brown rice, rinse for 10 seconds and
drain the water. Repeat this process at least 2
times, or until the water runs clear. For other
grains, see the package instructions.
3. For white or brown rice, fill with water to the line
that matches the number of cups of rice being
cooked. For other grains, see "Grain & Water
Measurement Table" on page 13.
4. Place the inner pot into the cooker and close the lid
securely.
5. Plug the power cord into an available 120V AC wall
outlet.
6. Press ( ) to turn on the cooker.
7. Press Delay Timer. Press (+) or (-) to increase or
decrease the delay time by one hour increments.
It may be set to have grains ready in 1 to 15 hours
for White Rice or Oatmeal and 2 to 15 hours for
Brown Rice.
8. Once the desired time is selected, press the White
Rice, Brown Rice, or Oatmeal button, depending
on the type of grain being cooked.
9. The cooker will beep and the digital display will
stop flashing to indicate that the time has been
successfully set.
10. The cooker will begin counting down from the
selected delay time. Once the cooking cycle starts,
the digital display will switch to a chasing pattern.
11. The digital display will count down the final 10
minutes of cook time.
12. Once the cycle has completed, the cooker will
beep and automatically switch to Keep Warm.
13. When finished, turn the cooker off by pressing ( )
twice and unplug the power cord.
8.
Note:
1. Using the provided rice measuring cup, add
· Food should not be left
in the cooker on Keep
2. Fill the inner pot with water according to
Warm for more than 12
hours.
· Due to the longer
3. Place the inner pot into the cooker and close the lid
cooking time needed,
Brown Rice may only
be delayed for 2 hours
4. Plug the power cord into an available 120V AC
or more.
· The delay timer includes
5. Press ( ) to turn the cooker on.
cooking time. Once the
delay timer elapses, rice
6. Press Oatmeal. The cooking indicator light will
or grains will be cooked
and ready to serve.
7. Once the cycle has completed, the cooker will
8. When finished, turn the cooker off by pressing ( )
Helpful
Hints:
1. Place the inner pot into the cooker.
For approximate grain
cooking times and
2. Plug the power cord into an available 120V AC wall
suggested grain/water
ratios, see "Grain &
Water Measurement
3. Press ( ) to turn the cooker on.
Table" on page 13.
4. Press Sauté-then-Simmer
The provided rice
measuring cup is
5. Add oil if desired for sautéing then close the lid
equivalent to a 3/4
standard U.S. cup.
6. Once preheated, add in ingredients to sauté.
7. When finished sautéing, stir in any other desired
8. The cooker will automatically reduce its heat and
9. Once all liquid has been evaporated, the cooker
10. When finished, turn the cooker off by pressing ( )
13.
Oatmeal
oatmeal to the inner pot.
packaging instructions. When an oatmeal to water
ratio is not available, use a ratio of 1:2.5.
securely.
outlet.
illuminate and the digital display will show a
chasing pattern as the cooker begins heating.
beep and automatically switch to Keep Warm.
twice and unplug the power cord.
Sauté-Then-Simmer
outlet.
. The cooking indicator
®
light will illuminate as the cooker begins to heat.
securely and allow the inner pot to preheat for 2–4
minutes.
ingredients including liquid and close the lid
securely.
switch to simmer mode once liquids are added.
will beep and automatically switch to Keep Warm.
twice and unplug the power cord.
Caution:
The cooker will not
switch to Keep Warm
mode until all liquid has
evaporated. Follow your
recipe carefully and do
not leave the cooker
unattended.
Do not attempt to
cook more than 1 cup
of oatmeal in this
appliance at one time.
Do not use the
provided serving
spatula to stir
ingredients while
using the Sauté-Then-
Simmer
or Slow Cook
®
functions. It is not
intended to be used
in contact with high
temperatures. Instead,
use a long-handled
wooden or heat-safe
®
utensil to stir while
cooking.
9.
