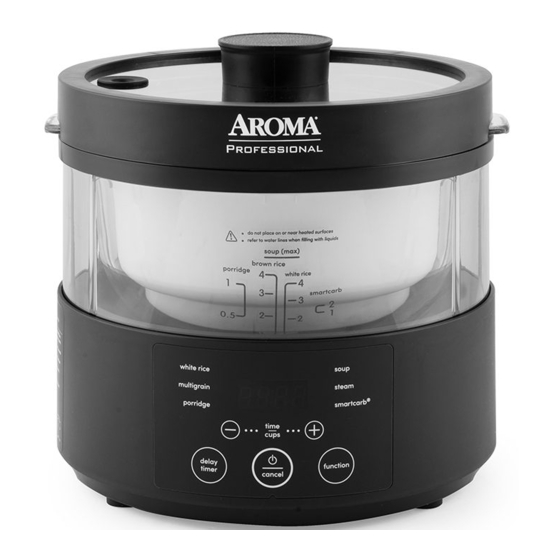
Aroma Professional SmartCarb AMC-800 Instruction Manual - Page 7
Browse online or download pdf Instruction Manual for Kitchen Appliances Aroma Professional SmartCarb AMC-800. Aroma Professional SmartCarb AMC-800 14 pages. Multicooker, food steamer

Delay Timer
12. Press ( ) to initiate the selected function and
the Delay Timer. The digital display will begin
counting down from the input delay time.
13. When the delay time has elapsed, the selected
function will begin its cooking cycle.
14. Once the cycle has completed, the cooker will
beep and automatically switch to Keep Warm.
15. When finished serving, turn the cooker off by
pressing and holding ( )/Cancel for more than 3
seconds and unplug the power cord.
Porridge
1. Using the provided rice measuring cup, add 1/2 cup
or 1 cup of rice to the glass inner pot.
2. Fill the glass inner pot with water to the porridge
line that matches the number of cup of uncooked
rice added.
3. Place the glass inner pot into the cooker then close
the lid securely.
4. Fill the water tank with purified water above the
MIN line.
5. Plug the power cord into an available 120V AC
outlet.
6. Press Function until Porridge is selected. The
digital display will show a default cooking time of 1
hour 5 minutes.
7. If desired, use (-) or (+) to decrease or increase the
cook time by 5 minute increments, between 40
minutes and 11/2 hours.
8. Press ( ) to initiate the selected function. The
digital display will begin counting down from the
allotted cooking time.
9. Once the cycle has completed, the cooker will
beep and automatically switch to Keep Warm.
10. When finished serving, turn the cooker off by
pressing and holding ( )/Cancel for more than 3
seconds and unplug the power cord.
12.
( CONT.)
Helpful
Hints:
For approximate
grain cooking times
and suggested grain/
water ratios, see the
"Rice/Grain & Water
Measurement Tables"
on pages 16-17.
Caution:
Do not attempt to cook
more than 2 cups of
porridge or oatmeal in
this appliance at a time.
The provided serving
spatula is not
intended to be used
in contact with high
temperatures. Use a
long-handled wooden
or heat-safe utensil to
stir ingredients while
cooking.
Soup
1. Add desired ingredients to the glass inner pot,
ensuring the contents do not exceed the soup
MAX line.
2. Place the glass inner pot into the cooker then close
the lid securely.
3. Fill the water tank with purified water above the
MIN line.
4. Plug the power cord into an available 120V AC wall
outlet.
5. Press Function until Soup is selected. The digital
display will show a flashing "2:00" to represent 2
hours of cook time.
6. Use (-) or (+) to decrease or increase the cook time
by 10 minute increments, between 11/2 and 3 hours.
7. Press ( ) to initiate the selected function. The
digital display will begin counting down from the
allotted cooking time.
8. Once the time has been input, the cooker will beep
and the digital display will stop flashing to indicate
that the time has been successfully set.
9. The cooker will now begin heating and the digital
display will begin counting down from the input
cook time.
10. Using caution, open the lid occasionally and stir
the ingredients with a long-handled wooden or
heat-safe utensil if desired.
11. Once the time has elapsed, the cooker will beep
and automatically switch to Keep Warm.
12. When finished serving, turn the cooker off by
pressing and holding ( )/Cancel for more than 3
seconds and unplug the power cord.
Note:
· Food should not be left
in the cooker on Keep
Warm mode for more
than 6 hours.
· Automatic Keep Warm
mode will be canceled
once the water in the
water tank is completely
depleted. If additional
Keep Warm time is
desired, we recommend
monitoring the water
level as the cooking
cycle progresses and
adding more water as
needed.
Helpful
Hints:
For suggested steaming
times, see the "Meat &
Vegetable Steaming
Tables" on page 15.
13.
