Altronix TMV2 Installation Manual - Page 3
Browse online or download pdf Installation Manual for Enclosure Altronix TMV2. Altronix TMV2 4 pages. Access & power integration
Also for Altronix TMV2: Installation Manuals (16 pages), Installation Manuals (16 pages), Installation Manual (20 pages)
HID VertX
®
Access Controllers:
1.
Fasten standoffs (provided) to pems which match the hole pattern for HID VertX
(Fig. 2, pg. 3).
2. Mount boards to standoffs (Fig. 2, pg. 3) utilizing 7/8" pan head screws (provided).
3. Fasten backplane to Trove2 enclosure door utilizing lock nuts (provided).
Altronix Sub-Assemblies and/or Adapters:
1. Fasten nylon / snap on standoffs to pems which match the hole pattern for Altronix Sub-Assemblies (Fig. 1, 1a, pg. 2).
2. Mount boards to standoffs utilizing pan head screws provided with the product or by depressing board onto snap on standoff
(Fig. 1, pg. 2).
Note: For GB1 please use standoffs supplied with the adapter.
Access Controller
V100, V200, V300, V1000 or V2000
Sub-Assembly or Adapter
ACM4(CB), MOM5, PD4UL(CB), PD8UL(CB), PDS8(CB), VR6, GB1 (Genetec Synergis Cloud Link adapter plate)
Fig. 2
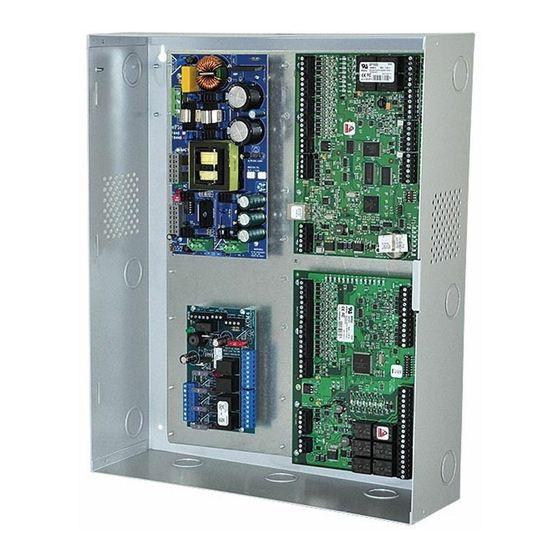
TMV2 - Altronix / Mercury / HID VertX Door Backplane
TMV2: Configuration of HID VertX
Access Controller Position Chart for the Following Models:
A
A
A
®
and/or Altronix Boards
HID VertX
®
Altronix
B
A
B
A
B
A
V100, V200, V300, V1000 or V2000 boards
®
Access Controller
Pan Head
or Sub-Assembly
Screw
Pem Mounting
A
Pem Mounting
B
Fig. 2a
Pem
Standoff
Backplane
- 3 -