Custom Dynamics CD-LR-04-R Installation Instructions
Browse online or download pdf Installation Instructions for Motorcycle Accessories Custom Dynamics CD-LR-04-R. Custom Dynamics CD-LR-04-R 3 pages. Luggage rack led light bar
Part Number: CD-LR-04-R
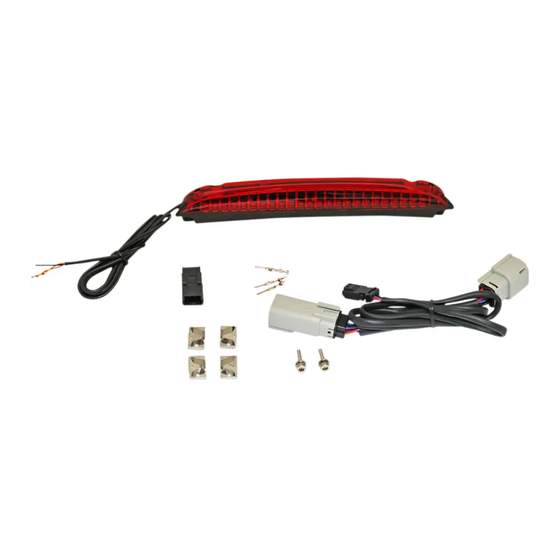
Package Contents:
- Luggage Rack LED Assembly (1)
- Luggage Rack Adapter Harness (1)
- Allen Head Bolt with Washer (2)
- Male JAE Connector (1)
- Nylon Wire Guide (1)
- Wire Clips (4)
- Tie Wraps (6)
- Foam Mounting Pads (2)
Fitment: 2015-2020 Harley-Davidson® Free-
wheeler® models with Air Wing Tour Pak Luggage
Rack PN 5030097.
ATTENTION
Please read all Information below before Installation
Warning:
Disconnect negative battery cable
from battery; refer to owner's manual. Failure
do to so may result in electrical shock, injury,
or fire. Secure negative battery cable away
from positive side of battery and all other posi-
tive voltage sources on vehicle.
Important: Motorcycle should be secured on a
level surface for installation.
Important: This product is designed to be used
specifically with the Harley-Davidson® brand
Air Wing Luggage Rack (P/N 79179-08 or
53000063).
Questions? Call us at: 1 (800) 382
Custom Dynamics® Luggage Rack LED Light Bar
We thank you for purchasing the Custom Dynamics® Luggage Rack LED Light
Bar! Our products utilize the latest technology and high quality components
to ensure you the most reliable service. We offer one of the best warranty
programs in the industry and we back our products with excellent customer
support, if you have questions before or during installation of this product
please call Custom Dynamics® at 1(800) 382-1388.
CD-LR-04-S
Installation:
1. Remove motorcycle seat and Tour Pak Liner from Tour Pak. Con-
sult your owners manual if unsure of this process.
2. Disconnect the negative [-] battery cable from the battery.
3. On the left side of the bottom rear rail, remove the black rubber
plug from the hole. See Figure 1.
4. Insert loop end of the provided Nylon Wire Guide through the for-
ward hole in the rail and out through the rear hole. Allow the
straight end to remain outside the forward hole. See Figure 2.
1
Installation Instructions
10/2019