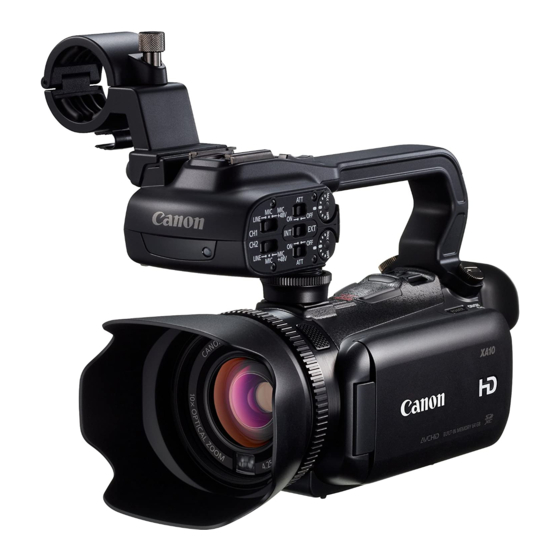
Canon XA10 Beknopte handleiding - Pagina 2
Blader online of download pdf Beknopte handleiding voor {categorie_naam} Canon XA10. Canon XA10 2 pagina's. Canon xa10 hd camcorder
Ook voor Canon XA10: Brochure & specificaties (2 pagina's), Gebruikershandleiding (2 pagina's), Brochure & specificaties (2 pagina's), Studiehandleiding (12 pagina's), Basisinstellingen (4 pagina's)

Canon XA10 Quick Guide
Location, Location, Location
The Video Files
Specs:
MXP , 1920x1080
Frame Rate: 60i or 24p
Audio:
compression: Dolby Digital 2ch
encoding: Linear PCM
sampling: 48 kHz, 16 bits
File:
AVCHD/MPEG-4 AVC/H.264
Saved on the memory card to:
\CANON\PRIVATE\AVCHD\BDMV\STREAM
the file is named '#####.MTS'
The Image Files
Specs:
1920x1080 pixels
File:
Baseline JPEG
Color sampling:
4:2:2 or 4:2:0
Saved on the memory card to:
\DCIM\101CANON
the file is named 'IMG_####.JPG'
Using the Viewfinder
With the camera on pull
out the viewfinder. and
adjust the viewfinder
using the dioptric
To remove the
battery pack
1] Slide BATTERY RELEASE toward the lens
and hold down.
2] Slide the battery pack over the battery
release slider and pull it out.
Saving Menu Settings to slot B
Settings already on the card will be
overwritten.
With a memory card in slot B.
OPEN: [FUNC.] > [MENU] >
(Backup Menu Settings B]
1] Select [Save] and then select [Yes] will
save the current setting to the SD card
in slot B.
2] Select [OK] and then touch [X].
Profile Saving/Loading Notes: (It's not 100% true.)
The manual states that the camcorder can load
settings from canon XA10 and VIXIA HF G10 that are
common to both types of camcorders. Settings that
are not common to both types will be reset to
default values,"
Manual Focus
Use the focus ring to focus manu-
ally. You can also use peaking to
help you focus more accurately.
1] Open the focus controls.
[FUNC.] > [
To switch to autofocus without
opening the focus controls,
press [AF/MF]. In such case,
Touch AF (step 3) will not be
available.
2] Touch [MF].
3] Touch a subject that appears
inside the
AF mark
focusing distance will be
adjusted automatically. You can
further adjust the
focus manually if necessary.
4] Turn the focus ring to adjust
the focus.
The center of the screen will
be magnified to hep you focus
more easily. Turn this setting
on/off with the [Focus Assis-
tance].
[FUNC.] > [MENU] >
> [Focus Assistance]
Other Focus Options:
[FUNC.] > [MENU] >
> [Distance Units]
> [Focus Ring Responce]
> [Focus Ridn Direction]
Playback
Press the
between recording and playback modes.
Selecting SD Card for Recordings
Select to location to record your movies
and photos. The SD card slot [B] is the
default for Media Pool menu profile.
OPEN: [FUNC] > [MENU] >
[Rec Media for ....]
Touch the icon for
(built-in memory),
(slot A) or
(slot B)
and then touch [X].
Slot [A] must be slected before [Double
>
Slot Rec] or
be chosen.
[Double Slot Rec] records duplicate data
to bot card slots - this setting can be set
in the profile.
[Relay Recording] records on the
slot [A] card then the slot [B] card -
cannot be saved in the profile.
In this menu option you can also check the available
recording time/number of photos, based on
currently used settings and memory card capacity.
Initializing the Memory
The camera prefers memory cards to be
fromated as exFAT . You may need to initialize
memory cards when you use them with the
camcorder for the first time. Initializing
Focus]
memory will permanently delete all the files
it contains.
Connect the AC Adapter and power the
camcocder. Do not disconnect the power
source until the initialization is completed.
Open the initialization screen for the desired
frame. The Touch
memory.
will flash and the
OPEN: [FUNC.] > [MENU] >
In the initialization screen, touch [Complete
lnitialization] to physically erase all the data.
Press [OK] and then touch [X].
Factory Reset:
Remove the battery pack and disconnect all
power sources. Then, press the RESET button
with a pointed object to reset all the
camcorder' s settings to default values.
Condensation
Moving the camcorder rapidly between hot
button to switch the
and cold temperatures may cause condensa-
tion (water dropletts) to form on its internal
surfaces. Stop usng the camcorder if conden-
sation is detected. Continued use may
damage the camcorder.
Condensation may form:
>
• When the camcorder is moved quickly from
• When the camcorder is left in a humid room
• When a cold room is heated rapidly
To avoid condensation:
• Do not expose the camcorder to sudden or
• Remove the SD card(s) and battery pack.
[Relay Recording] can
When condensation is detected:
The camcorder automatically shuts off. The
precise time required for water droplets to
evaporate will vary depending
on the location and weather
conditions. As a general rule,
wait 2 hours before resuming.
[Initialize
] >
(built-in memory),
(slot A) or
(slot B)
and then press [Initialize]
cold to warm places
extreme changes in temperature.
Then, place the camcorder in an airtight
plastic bag and let it adjust gradually to
temperature changes before removing it
from the bag.
>
