3M PELTOR HRXD7A-01 Gebruiksaanwijzing - Pagina 8
Blader online of download pdf Gebruiksaanwijzing voor {categorie_naam} 3M PELTOR HRXD7A-01. 3M PELTOR HRXD7A-01 19 pagina's. Radio dab+ fm headset

protection, proper care of hearing protection, and other
variables will impact performance. To learn more about
hearing protection for impulse noise, visit
www.3M.com/PELTOR
• This hearing protector limits the entertainment audio signal
to 82 dB(A) effective to the ear.
• This earmuff is provided with electrical audio input.
The wearer should check correct operation before use.
If distortion or failure is detected, the wearer should refer
to the manufacturer's advice.
• Operating temperature range:
–4°F (–20°C) to 131°F (55°C)
• Storage temperature range: –4°F (–20°C) to 131°F (55°C)
•
This product contains electrical and electronic
components and must not be disposed of using standard
refuse collection. Please consult local directives for disposal
of electrical and electronic equipment.
APPROVALS
Hereby, 3M Svenska AB declares that the radio equipment
type Radiobroadcast receiver is in compliance with Directive
2014/53/EU and other appropriate directives to fulfill the
requirements for the CE marking. The full text of the EU
declaration of conformity is available at the following internet
address: www.3M.com/PELTOR/DOC.
Upon request, type in your part number. The part number of
your earmuffs can be found at the bottom of one cup as seen
in the picture below.
A copy of the declaration of conformity and additional informa-
tion required in the directives can also be obtained by contact-
ing 3M in the country of purchase. For contact information,
see last pages of this user instruction. The product has been
tested and approved in accordance with EN 352-1:2002/EN
352-3:2002, EN 352-8:2008.
Notified Body Statement of Opinion offered by:
FIOH, Finnish Institute of Occupational Health,
Topeliuksenkatu 41 b, FI-00250, Helsinki, Finland.
Notified body #0403.
LABORATORY ATTENUATION
WARNING! 3M strongly recommends individual fit testing
of hearing protectors. If the SNR is used to estimate
typical workplace protection, 3M recommends that the
noise reduction value be reduced by 50% or in
accordance with applicable regulations.
Explanation of attenuation tables EN 352-1/ EN 352-3
A:1 Frequency (Hz) (ƒ)
A:2 Mean attenuation (dB) (M
A:3 Standard deviation (dB) (s
A:4 Assumed protection value, APV (dB)
A:5
1 FP3828 revA_8-sidigt omslag_A5.indd 2
)
f
)
f
H = Hearing protection estimation for high frequency sounds
(ƒ ≥ 2000Hz).
M = Hearing protection estimation for medium frequency
sounds (500Hz < ƒ < 2000Hz).
L = Hearing protection estimation for low frequency sounds
(ƒ ≤ 500Hz).
Compatible Industrial Safety Helmets EN 352-3
These earmuffs should be fitted to, and used only with, the
industrial safety helmets listed in Table B. These earmuffs
were tested in combination with the following industrial safety
helmets, and may give different levels of protection if fitted to
different helmets.
Explanation of the industrial safety helmet attachment table:
B:1 Helmet manufacturer
B:2 Helmet model
B:3 Helmet attachment
B:4 Head size: S = small, M = medium, L = large
COMPONENTS
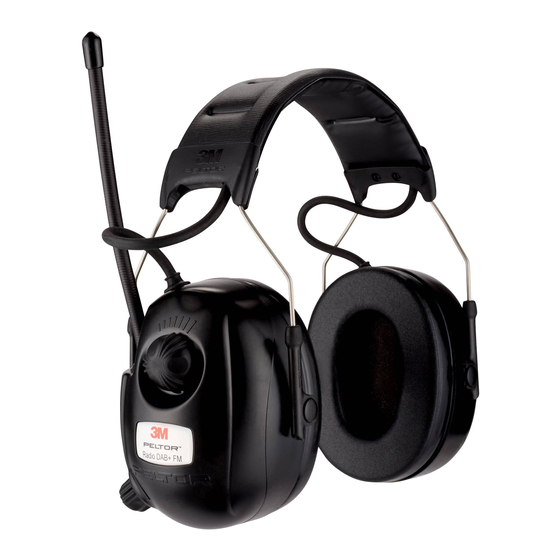
Headband HRXD7A-01
(D:1) Headband (PVC, PA)
(D:2) Headband wire (stainless steel)
(D:3) Two-point fastener (POM)
(D:4) Cushion (PVC foil and PUR foam)
(D:5) Foam liner (PUR foam)
(D:6) Cup (ABS)
(D:7) Antenna (PE, ABS, TPE)
(D:8) Auxiliary Port (Brass) Max 500 mV RMS
(D:9) Volume knob/channel knob(PP/TPE)
(D:10) Battery cap (PP/stainless steel)
Helmet attachment/Hardhat HRXD7P3E-01
(D:11) Cup supporting arm (stainless steel)
FITTING INSTRUCTIONS
Headband
E:1 Slide out the cups and tilt the top of the shell out, as the
cable must be on the outside of the headband.
E:2 Adjust the height of the cups by sliding them up or down
while holding the headband in place.
E:3 The headband should be positioned across the top of the
head as shown and should support the weight of the headset.
Safety Helmets Attachment
E:4 Insert the hard hat attachment in the slot on the hard hat
and snap it into place (E:5).
E:6 Work mode: Press the headband wires inwards until you
hear a click on both sides. Make sure that the cups and the
headband wires do not press on the edge of the safety helmet
when in work mode as this could reduce the noise attenuation
of the earmuff.
E:7 Ventilation mode: To switch the unit from work mode to
ventilation mode, pull outward on the ear cups until you hear
a click. Avoid placing the cups against the hard hat (E:8) as
this prevents ventilation.
GB
2
2017-02-08 11:39:46
