Contemporary Research 232-ATSC 4 Installatiehandleiding
Blader online of download pdf Installatiehandleiding voor {categorie_naam} Contemporary Research 232-ATSC 4. Contemporary Research 232-ATSC 4 2 pagina's.
232-ATSC 4 Installation Guide
There are 3 ways you can change the settings:
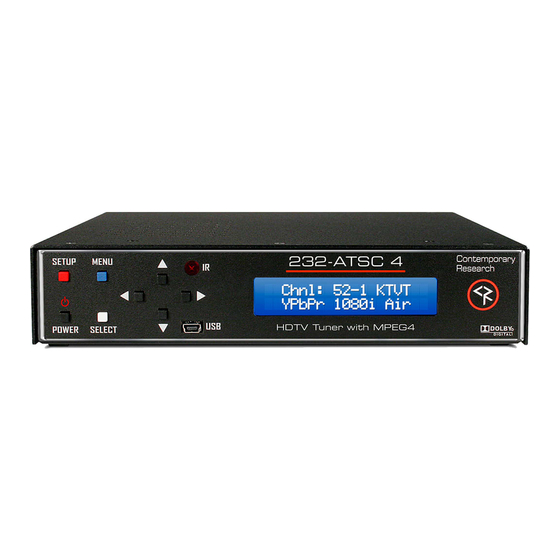
Front Panel. Press the SETUP button use the Up/Down buttons to move through menus,
Left/Right to change settings, then press SELECT to store the changes at each step.
Press SETUP to access the front-panel menus
o
Use the Up and Down arrows to step through each menu
o
Use the Left and Right arrows to choose and option
o
Click Select to save the change for each menu
o
IR. Use the included IR remote to turn on/off, scan for channels and access on-screen
menus. All the IR functions can be accessed from the front-panel buttons
Ethernet. Access the onboard Web pages. Helpful for remote access when system is fully
integrated with site Ethernet.
The front panel LCD shows the current channel and name, if the HD analog output is set to
RGBHV or YPbPr, resolution of the channel, and if it's on Air or Cable.
Quick Front-panel Setup
RGB or Component
HD Resolution
Air or Cable Tuning
Select Scan Mode
Channel Scan
Contemporary Research
Click the SETUP button, use Up or Down to HD Output menu, use Left or Right
keys to choose input, press SELECT to choose. HDMI is always active.
Go to the next menu down, and cycle through the list of resolutions. Press SELECT
to choose. Note that our Component port supports 1080p – we've found a
number of TVs that support that resolution.
Go to the next menu and select CATV, Air, IRC, HRC, or CATV Auto. Press SELECT
to choose. IRC has the same channel map as standard CATV, except for 5 and 6.
The HRC channel map uses completely different frequencies than the others. CABLE
AUTO looks at the first few channels to determine the right format. If there are no
channels between 2 and 6, you may have to set the tuning mode manually.
Page down a number of menus to the Scan Mode menu. The Left or Right keys
will select several options
Analog+Digital (standard full scan)
Digital – Delete Analog (scan for digital, delete any analog channels)
Digital – Keep Analog (scan for digital, but keep all analog channels)
Analog – Delete Digital (scan for analog, delete any digital channels)
Analog – Keep Digital (scan for analog, but keep all digital channels)
Once you do the next step, scan from the front-panel menu, the tuner will always
scan this way from the panel or on-screen menu – until you change the mode later
on.
The next menu starts the Channel Scan, just press SELECT to start scanning. You
can watch the scan progress from a pop-up window on the video outputs from the
tuner. You can watch the scan process if the output of the tuner is fed to a display.
A Cable analog/digital scan will take 7 minutes, only digital 6 minutes (the analog
scan is faster).
Support 888-927-2728
232-ATSC 4 Install Guide