CookTek SinAqua IHW061-34 Installatie-, Bedienings- en Gebruikshandleiding - Pagina 7
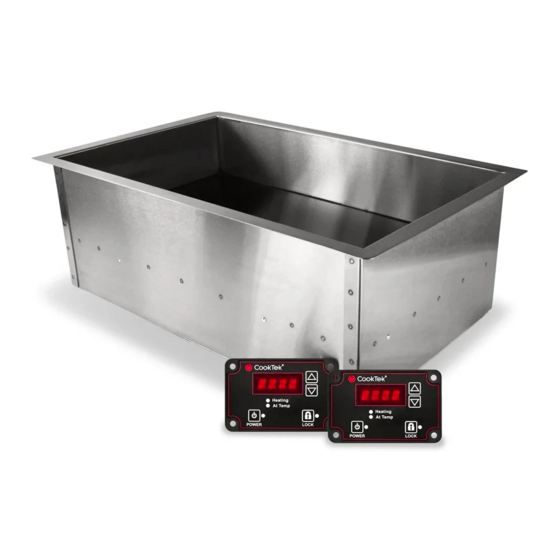
Blader online of download pdf Installatie-, Bedienings- en Gebruikshandleiding voor {categorie_naam} CookTek SinAqua IHW061-34. CookTek SinAqua IHW061-34 11 pagina's. Induction holding well
Ook voor CookTek SinAqua IHW061-34: Installatie-, Bedienings- en Gebruikshandleiding (11 pagina's)
Turvallisuussyistä älä koskaan leikkaa, irrota tai pura sähköliitoksia (maadoitusjohtoa)
pistokkeesta. Älä koskaan käytä keittotason kanssa sovitinpistoketta tai jatkojohtoa.
VAROITUS: Väärin maadoitettu pistoke voi aiheuttaa sähköiskun. Neuvottele
valtuutetun sähköasentajan kanssa, jos sinulla on kysyttävää näistä
maadoitusohjeista.
Ennen kuin aloitat:
Varmista, että tämä virtajohto on tiukasti kiinnitetty CookTek:iin ENNEN laitteen
pistokkeen työntämistä pistorasiaan ja ennen käyttökokeilua.
• Älä koske keraamista levyä (keittotason päällä) heti käytön jälkeen. Astian kuumuus
siirtyy keraamiseen levyyn kuumentaen sen liian kuumaksi koskettaa.
• Tätä tuotetta saa huoltaa ainoastaan valtuutettu huoltopiste tai CookTekin
henkilökunta. Älä yritä avata laitetta ja suorittaa sille minkäänlaisia huoltotoimia.
Tietoja huollosta saat soittamalla CookTekiin numeroon +1 214-379-6000.
• Tämä laite täytyy suojamaadoittaa. Liitä ainoastaan oikein suojamaadoitettuun
pistorasiaan. Ennen käyttöä lue maadoitusohjeet ja sähköasennusvaatimukset
tämän lehtisen sivulta 2. Älä käytä jatkojohtoa.
Avant d'utiliser l'appareil Cooktop, effectuer les opérations suivantes :
• Retirer tous les matériaux d'emballage.
• Placer l'appareil sur une surface sèche, plane, solide, stable et non inflammable.
• Placer l'appareil à distance de toute autre sources de chaleur et laisser un espace
libre d'au moins 5 cm (2 pouces) des deux côtés, à l'avant et à l'arrière de celui-ci
pour permettre la circulation de l'air.
Pour votre sécurité, ne jamais couper, déconnecter ou désactiver le raccordement
électrique (terre) de la prise de courant. Ne jamais utiliser un adaptateur ou une
rallonge électrique avec l'appareil Cooktop.
MISE EN GARDE : Une prise de courant incorrectement raccordée à la terre
engendre un risque de choc électrique. Pour toute question concernant ces
instructions de mise à la terre, consulter un électricien qualifié.
Avant de commencer :
S'assurer que le câble d'alimentation est solidement fixé à l'appareil CookTek AVANT
de raccorder l'appareil à une prise de courant et d'essayer de le faire fonctionner.
• Ne pas toucher la plaque de céramique (ou la partie supérieure de l'appareil
Cooktop) immédiatement après utilisation. La chaleur de la casserole se transmet à
la plaque de céramique, aussi celle-ci est chaude au toucher.
• L'entretien de cet appareil ne peut être effectué que par un réparateur agréé ou
• par un membre du personnel de CookTek. Ne jamais essayer d'ouvrir l'appareil ni
de le réparer. Pour des informations concernant l'entretien, contacter CookTek au
+1 214-379-6000.
• Cet appareil doit être raccordé à la terre. Le brancher exclusivement à une prise de
courant correctement raccordée à la terre. Avant utilisation, lire les instructions de
raccordement à la terre, ainsi que les exigences en matière d'installation électrique
figurant à la page 2 du présent manuel. Ne pas utiliser de câble de rallonge.
fRENCH
13
TIMER OPERATION
• To enable/disable the timer feature, see "Setting the Timer" below.
• If the timer is enabled, the timer will start counting when a pan is
placed on the unit and the Heating or At Temp LED will turn on.
• The timer will count up to the preset interval (in minutes). When the
interval is reached, the unit will start to beep once per second to alert
the operator and flash "DonE" on the display. The unit will continue to
maintain the temperature of the pan when the timer is expired.
• The timer is reset when the pan is removed from the unit and the
Heating or At Temp LED turns off. The next time a pan is placed on
the unit the timer will start again from the beginning.
• To view the elapsed time from when the pan was place on the unit,
press the Lock button once. This will display the time (in minutes)
from when the pan was placed on the unit for 5 seconds. After 5
seconds the normal temperature display will return.
SETTING THE TIMER
The IHW units are equipped with a timer alarm that can be set to alert the operator
when a pan has been in the unit for a period of time up to 240 minutes (4 hours).
To enable/disable the timer:
• Starting with the unit off, hold the Down Arrow while pressing the
Power Button.
• Release the buttons when the display comes on. Use the Up and
Down Arrows to toggle through the options until "t En" is shown on
the display. Press the Lock Button once to select the enable option.
• Press the Up and Down arrows to toggle between the two setting
options "on" and "off." When the desired option is displayed, press
the Lock Button once to enter this option. The display will flash three
times to indicate the option has been saved.
• Press the Power Button to exit this mode.
To set the timer interval:
• Starting with the unit off, hold the Down Arrow while pressing the
Power Button.
• Release the buttons when the display comes on. Use the Up and
Down Arrows to toggle through the options until "t Int" is shown on
the display. Press the Lock Button to select the interval option.
• Press the Up and Down Arrows to increase or decrease the
amount of time desired for the timer interval. When the desired
time (displayed in minutes) is shown, press the Lock Button to enter
this option. The display will flash three times to indicate the option
has been saved.
• Press the Power Button to exit this mode.
6
Heating
At Temp
Heating
At Temp