Dynamite PROPHET PLUS LCD Gebruiksaanwijzing - Pagina 3
Blader online of download pdf Gebruiksaanwijzing voor {categorie_naam} Dynamite PROPHET PLUS LCD. Dynamite PROPHET PLUS LCD 6 pagina's. Ac/dc–powered peak prediction charger for 4–7 cell ni-cd and ni-mh battery packs
Ook voor Dynamite PROPHET PLUS LCD: Gebruiksaanwijzing (4 pagina's), Gebruikershandleiding (2 pagina's)

5
7
8
4
6
9
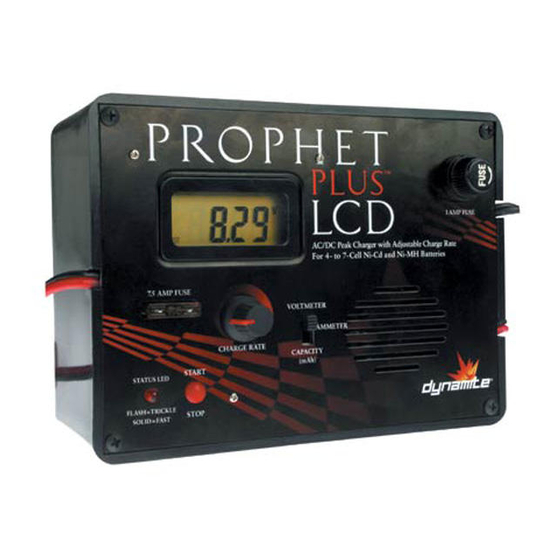
1. 110V AC power cord
2. 12V DC power cord with alligator clips
3. Adjustable charge rates from 100mA–5000mA
(5 amps)
4. LED and beeper indicate when charge is
complete
5. LCD display shows charge capacity, charge
current and battery voltage
6. Start/Stop fast charge button
CAUTION: Attempting to charge batteries different that those specified in this manual can result
in excessive heat and other related product malfunctions, which can lead to user injury
or property damage. Please contact Horizon Hobby or an authorized retailer with
compatibility questions.
CONNECTINg ThE INpuT pOWER SOuRCE
This charger can be powered by connecting it to a 12V DC power source, such as a 12V sealed battery
(HAN102) or an automobile battery.
CAUTION: If you choose to power your charger with an automobile battery, never do so with the
automobile running as fluctuation in power can cause product malfunction and possibly injury.
CAUTION: Never connect the AC and DC input cords to an active power source at the same time. This
will void the warranty, cause product damage and possibly injure the user.
AC Power
To power the Prophet Plus Charger, connect the AC power cord into a standard 110V wall outlet.
NOTICE: Always consult 12V battery collateral materials or Horizon Hobby before using with sources
other than standard AC wall outlet.
fEaTuRES
7
3
1
2
7. Input and output fuse protection
8. Tamiya-style output connector
9. Includes receiver battery adapter
Additional Features
• Limited 3-year warranty
• Advanced peak prediction circuitry
• Auto trickle charge (150mA)
4
DC Power
If you power the charger by using DC power, connect the red (positive) end of the alligator clips to the red
terminal of the DC power source and the black (negative) end of the alligator clips to the black terminal of
the DC power source.
WARNING: Always make sure that you follow proper polarities at all times or electrical shock will occur.
Fail-Safe
If the power source has been interrupted or drops below a usable voltage level, the Prophet Plus™ au-
tomatically goes into a Fail-Safe mode to let you know that the battery has not been fully charged. In this
mode, the charge status LED flashes "RED" and the beeper sounds, indicating the loss of proper source
power. To reset, disconnect the battery being charged and reconnect a fully charged power source of 12–14
volts DC or AC power.
Charging 6/7-Cell Ni-Cd or Ni-MH Car Packs
1. When power is supplied to the charger, the LCD will enter the self test
mode, counting from "1111" to "9999" then the charger will beep
indicating it is ready for operation.
2. Connect the battery to the charge lead. The charger will beep and the
LED will flash until you begin the fast charging process.
3. Push the Start button to begin the charge process.
4. Move the LCD selector switch to the "ammeter" position.
5. Adjust the current rate to match the battery type.
Note: Charge sport packs and older batteries at lower rates (below 3
amps). Higher quality (matched) battery packs can be charged at
higher rates to shorten charge times. (See figure 1)
Once you have begun to charge the battery pack, the beeper will sound once and the LCD will display
"Fast." The charge status LED will go from flashing to solid red.
6. When the battery pack has peaked, the charger will repeatedly beep, the LED will flash red and the
charger will automatically transition to trickle charge. The LCD will display "Trickle." (See figure 2)
Charging 4/5-Cell Ni-Cd or Ni-MH Receiver Packs
1. When power is supplied to the charger, the LCD will enter the self test
mode, counting from "1111" to "9999" then the charger will beep
indicating it is ready for operation.
2. Connect the receiver battery adapter to the charger. For some batteries,
you may need to use the included charge lead adapter. (See figure 3)
3. Connect the receiver battery to the charge lead. The LED will flash until you begin the fast
charging process.
Figure 1
Figure 2
Figure 3
5
