Afidus ATL-200S Snelle installatiehandleiding - Pagina 2
Blader online of download pdf Snelle installatiehandleiding voor {categorie_naam} Afidus ATL-200S. Afidus ATL-200S 2 pagina's.

First Installat ion
Install mSD Card,keep contact pins side up,
and insert with arrow angle
*Sandisk™ brand mSD card recommended
*Format the card before rst use
*Push the mSD cover closely or you will
lose product warranty protection.
Push the power button until you hear the beep
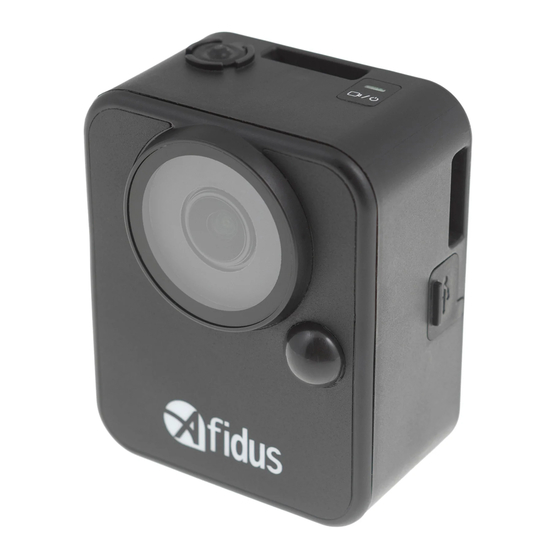
Camera Parts
Shutter & Power Button
LED Indicator
Lens
*please remove lens
*protection lm
PIR detector
※ For indoor use, do not use under uorescent light
Camera Icons:
1
2 3
7
8
12
11
14
15
4
5
6
1.Settings
6.Snap Shot
7.Parameter info
2.Battery/USB
8.Grid
3.mSD
9.AF
4.Gallery
10.Zoom
5.Shutter Button
11.FPS
Install Camera Battery(AA*4pcs)
Or rechargeable battery 1.2V
*Lithium battery or any battery
voltage higher than 1.7 volts are
not recommended
Insert desiccant sheets into the
bottom gap
Renew desiccant sheet before
recording
Micro USB Socket
Strap Eyelet
*Power input
recommend: DC5V 1A
Tripod Mount
(1/4")
2
9
10
18
13
17
16
20
21
12.Interval Time
18.AWB
13.Quality
19.Contrast
14.Scene
20.Sharpness
15.Resolution
21.Saturation
16.Aspect Ration
17.AE
22.HDR
4
Company Address:7F-4, No. 186, Jian 1st Rd.,Zhonghe Dist.,New Taipei City 235, Taiwan (R.O.C)
www.afidus.com
Connect ing
On your phone setting
Step 1: Turn on your mobile phone WI-FI. In WI-FI SSID select the time lapse camera
ATL200S_xxxxxxxxxx. Default password is 12345678
Step 2. Open A dus Time Lapse APP. Click "Camera" icon to
connect to the ATL-200S.
Step 3: Set up new password.
Step 4: Forget camera Wi-Fi in mobile phone Wi-Fi list, and
reconnect it with new password.
Step 5: Reopen camera APP.
Step 6: Click " Camera" again.
Step 7: Set up camera parameter and enjoy time lapse after click"Record"
Main Screen:
Connect your smartphone to
Af idus camera
Album:
Snap shot photo will
be stored in this album
5 Video Recording Modes:
Record when
combine pictures into
infrared detected
time lapse video
To Start/Stop recording with APP
To Start Recording:
1.Press power button on time lapse camera until you hear a beep and LED green color
2.On smart phone apps, select "camera" and "record"
3.APP shows current setting, tap "ok"
4.Enjoy it instantly
To Stop Recording:
Press power button on time lapse camera for 2 seconds, after LED indicator ashing
and you hear a beep, recording will stop automatically, Time Lapse Video will be
generated immediately
Replay & Download Time Lapse Video
from Camera to APP:
(Snap shot photo will save to smart phone photo album automatically)
19
1.On smart phone apps, reconnect camera Wi-Fi
2.Tap "camera" Icon
3.Tap "gallery" icon
22
4.Select camera icon
5.Select document
6.Tap download icon on your video
Download Time Lapse Video from APP to SmartPhone:
1.Tap "gallery" icon at homepage than select Time Lapse Camera or Select
smartphone icon at camera page
2.Select le document(Snapshot, Timelapse, PIR)
3.Select & play Time Lapse Video
4.Tap "share" icon and select download.
Share Time Lapse Video:
Tap "share" icon at the top-right corner to share videos to social media or someone through communi-
cation APP.
LED Indicator:
rmware upgrade: ash/1 sec.
hardware reset: ash 3 times
power on: Green on
No SD cared : Red
System breakdown : RedFlash/1 sec.
Battery Low: Red Flash/10 sec.
Recording: Green/6 sec.
Schedule, Snapshot On Demand, StepVideo: ash 0.2s x1
PIR,Hybrid: ash 0.2s x2
+886-2-8226-9857
Download time lapse video
Current Version and
in app for replay
update info
Time lapse video will be
PIR Video will be stored
in this album
stored inthis album
Start to record
Time lapse
by schedule
video with PIR
3
5
+886-2-8226-9800
Video lapse
Recording
