GAM SB66 Installatie, bediening en onderhoud - Pagina 7
Blader online of download pdf Installatie, bediening en onderhoud voor {categorie_naam} GAM SB66. GAM SB66 17 pagina's. Electric pizza ovens

Monofase
7 INDICAZIONI USO APPARECCHIATURA.
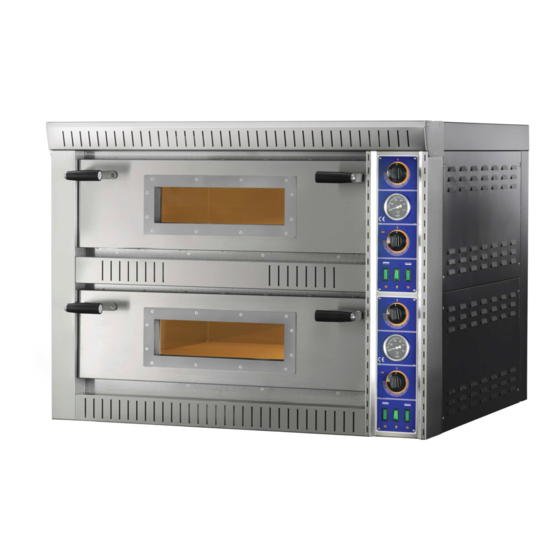
I comandi principali, posizionati come da figura 4, sono i seguenti:
A - Pomello del termostato di controllo della temperatura del forno.
(2 termostati per camera di cottura);
B - Spie segnalanti l'accensione delle resistenze di ciascun vano di
cottura (1 spia per termostato);
C - Porta;
D - Interruttore luminoso di accensione dell'illuminazione del vano di
cottura.
E - Pirometro per il controllo della temperatura del vano di cottura.
8 MESSA IN FUNZIONE DEL FORNO.
Prima di procedere all'utilizzo del forno per la cottura degli alimenti,
occorre effettuare un'adeguato preriscaldamento del vano di cottura.
- Agire sul termostato del vano di cottura, impostando una
temperatura di circa 250 ° C e mantenere questa temp eratura per
circa un'ora.
- Durante il preriscaldamento del forno si produrrà una emissione di
vapore acqueo con odore sgradevole. Quest'ultimo è determinato
dall'ossidazione superficiale delle resistenze corazzate.
- Terminato il primo ciclo, il metallo risulterà stabilizzato e non si
produrrà più alcun odore sgradevole. Sorvegliando personalmente il
forno, aprire il portello anteriore e tenerlo aperto per alcuni minuti al
fine di accelerare il ricambio di aria nel forno, indi chiudere il portello.
- Dopo la fase di preriscaldamento, tutti i componenti metallici e
refrattari del vano di cottura avranno raggiunto la temperatura di
stabilizzazione ed il forno potrà essere utilizzato nei modi consueti.
Per l'uso successivo del forno, non sarà più necessario eseguire il
ciclo di preriscaldamento sopra descritto.
9 UTILIZZO PERIODICO DEL FORNO.
Prima dell'uso eseguire i seguenti controlli e predisposizioni.
- Inserire la spina nella presa posta sulla cassetta di derivazione.
- Accertarsi che l'interruttore generale del forno si su O/Off.
- Verificare che l'interruttore magnetotermico e quello differenziale
siano entrambi inseriti.
- Ruotare su I/ON l'interruttore/sezionatore di linea della presa di
corrente.
Trifase
7 DIRECTIONS FOR USING THE EQUIPMENT
The main controls, located as from figure 4, are the following:
A – knob of the thermostat of control of the oven's temperature. (2
thermostats for each cooking chamber);
B – Indicator lights that signal when the heating elements of each
cooking chamber are on (1 indicator light per thermostat);
C – Door ;
D - Switch for turning on the light that illuminates the cooking
compartment;
E - Pyrometer for checking the temperature in the cooking
compartment
A
C
B D
8 PREPARING THE OVEN FOR USE
Before proceeding to use the oven for cooking food, it is necessary
to adequately preheat the cooking compartment.
- Use the cooking compartment's thermostat to set a temperature of
approximately 250° C and
approximately one hour
- While the oven is being preheated, it will emit steam with an
unpleasant smell. This is due to the surface oxidation of the
annealed heating elements
- When the first cycle is completed, the metal will be stabilized and
will no longer produce any unpleasant odor. While personally
supervising the oven, open the front door and keep it open for
several minutes so as to change the air in the oven more quickly,
then close the door
- After the preheating phase has been performed, all the metal and
refractory components in the cooking compartment will have
reached the stabilization temperature and it will then be possible to
normally use the oven.
For subsequent use of the oven it will not be necessary to perform
the above preheating cycle again.
9 PERIODIC USE OF THE OVEN
Before using the oven carry out the following check-outs and
arrangements.
- Insert the plug in the socket located on the shunt box
- Make sure that the oven's main power switch is in the O/Off
position
- Make sure that the magnetothermic switch and the differential
switch are both on.
Figura 3
Abb. 3
Figure 3
E
Figura 4
Abb. 4
Figure 4
maintain this temperature
for
7
