Gama Sonic GS-16LD Gebruiksaanwijzing - Pagina 4
Blader online of download pdf Gebruiksaanwijzing voor {categorie_naam} Gama Sonic GS-16LD. Gama Sonic GS-16LD 4 pagina's. Light my shed 3
4. Lamp Installation
A. Select the desired location for the lamp inside the shed. Ensure the solar
module cord reaches the lamp.
B. Use the lamp base sides to mark and drill two holes.
C. Get the two screws through the plastic shed from the outside; and then put the
lamp hang on the screws; as shown in figure 5-1.
D. Put the two knobs lock on the screws; as shown in figure 5-2.
Figure 5-1
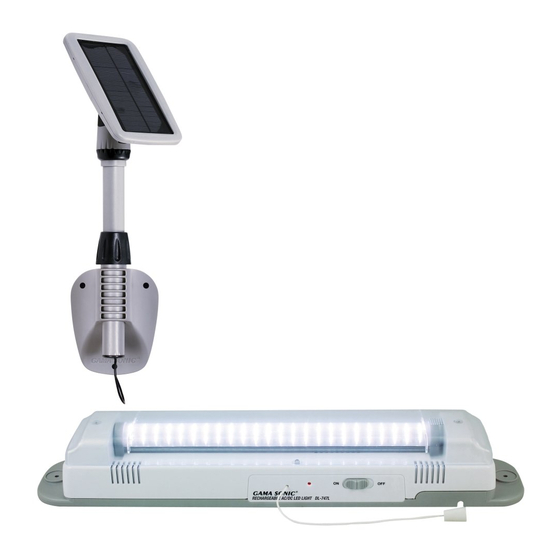
5. Operation
1. Plug the solar module cord into "DC-IN" Socket located on top of the lamp.
Charge for 2 days for best performance.
2. Place the 24/OFF/48 Switch located on side of the lamp to either "24" or "48"
position to start the operation.
3. Pull the pull cord once to switch On the light, pull again to switch Off the light.
REMEMBER TO SHUT OFF THE LAMP WHEN LEAVING
THE SHED TO PRESERVE BATTERY CHARGE
6. Maintenance
Clean the solar module with a damp towel to guarantee optimum performance of
the solar panel. Do not use any type of solvent for cleaning and be careful not to
put too much pressure on the module while cleaning.
7. How to replace battery
1. Unscrew the battery door and take the cover out (Fig. A).
2. Replace it with NI-MH 4 pcs battery Pack 4.8V/2000 mA and reassemble in reverse
procedures (Fig. B).
NOTE: You have an option to use in future 4 pcs AA 1.2V/2000 mA
Rechargeable NI-MH batteries for replacement (See Fig. C).
NOTE: The performance of "Light my Shed™ 3" will vary with the time of year.
The duration of the light will be longer when the solar panel has had a full day in
the sun rather than a day in overcast weather.
WINTERTIME TIPS: Keep snow and debris off the solar panel so the batteries can
recharge. If the solar panel is covered with snow for an extended period of time,
after the snow melts, allow all the batteries to charge in full, direct sunlight for at
least 6 hours to their maximum capacity.
WARNING: Please keep out of reach of children.
Figure 5-2
Figure 5-3