Green Energy GECI Gebruikershandleiding - Pagina 8
Blader online of download pdf Gebruikershandleiding voor {categorie_naam} Green Energy GECI. Green Energy GECI 15 pagina's. Black diamond charger
GECI
CONNECTION OF THE BATTERY, AUTOMATIC START
Connect the Battery to the charger, using a connector of adequate
size. When the battery is correctly connected, the charger visualizes
the following message:
WIRELESS CONNECTION TO BATTERY IDENTIFICATION MODULE (OPTIONAL)
If the Battery Identification Module is enabled, a few seconds after
the connection of the battery, the charger will try to establish a
wireless connection. And the display will visualize the message:
When the wireless connection is active the charger is ready to start
the charging cycle. The display visualizes the message:
At this point, the battery information are transferred to the charger
and are visualized on the display. The charger is now ready to start.
Depending on the programmed start time window (Parameter 8),
the charger may enter in stand-by mode, and the display visualizes
the message:
Where (hh.mm)A represents the real time at that moment, and
(hh.mm)B represents the programmed start time.
When the charge begins, the display visualizes the message:
BATTERY VOLTAGE TOO HIGH
If the battery voltage is higher than a maximum threshold, the
charge will not start and the display visualizes the message:
If this message appears, it's recommended to verify that the nominal battery voltage matches the nominal voltage of
the charger. Probably a wrong battery has been connected.
BATTERY VOLTAGE TOO LOW
If the battery voltage is lower than a minimum threshold, the charge
will not start and the display visualizes the message:
If this message appears, it's recommended to verify that the nominal
battery voltage matches the nominal voltage of the charger. Probably a wrong battery has been connected.
It's also possible that the battery has been deeply discharged, bringing the voltage below the minimum value
required for the automatic start the charge. In this case, it's possible to start the charge manually, by pushing
the button DOWN for 5 seconds.
CHARGE CYCLE
When the preliminary controls are complete, the charge starts automatically, and the display visualizes the following
information:
•
Battery Voltage
•
Charging Current
•
Time of Charge
•
Capacity Returned
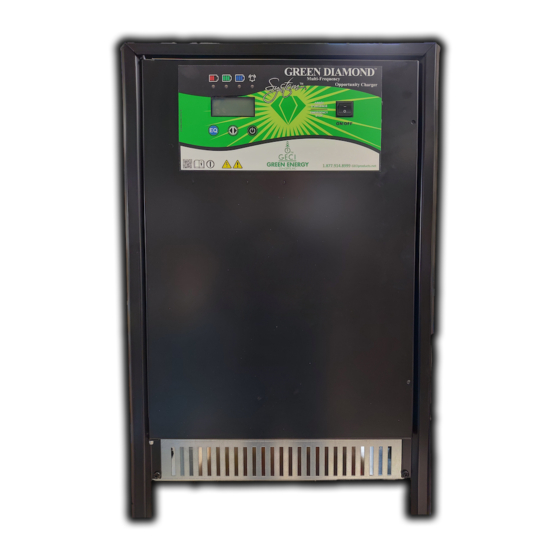
BLACK DIAMOND CHARGER
™
[Volt]
[Amps]
[hours.minutes]
[Ah]
5. OPERATION
5. OPERATION
Connect the Battery to the charger, using a connector of adequate size.
WIRELESS CONNECTION TO BATTERY IDENTIFICATION MODULE (OPTIONAL)
CONNECTION OF THE BATTERY, AUTOMATIC START
When the battery is correctly connected, the charger visualizes the following message:
If the Battery Identification Module is enabled, a few seconds after the connection of the
CONNECTION OF THE BATTERY, AUTOMATIC START
battery, the charger will try to establish a wireless connection. And the display will visualize
Connect the Battery to the charger, using a connector of adequate size.
the message:
When the battery is correctly connected, the charger visualizes the following message:
Connect the Battery to the charger, using a connector of adequate size.
When the battery is correctly connected, the charger visualizes the following message:
WIRELESS CONNECTION TO BATTERY IDENTIFICATION MODULE (OPTIONAL)
If the Battery Identification Module is enabled, a few seconds after the connection of the
battery, the charger will try to establish a wireless connection. And the display will visualize
WIRELESS CONNECTION TO BATTERY IDENTIFICATION MODULE (OPTIONAL)
the message:
When the wireless connection is active the charger is ready to start the charging cycle. The
WIRELESS CONNECTION TO BATTERY IDENTIFICATION MODULE (OPTIONAL)
display visualizes the message:
If the Battery Identification Module is enabled, a few seconds after the connection of the
battery, the charger will try to establish a wireless connection. And the display will visualize
If the Battery Identification Module is enabled, a few seconds after the connection of the
the message:
battery, the charger will try to establish a wireless connection. And the display will visualize
the message:
When the wireless connection is active the charger is ready to start the charging cycle. The
At this point, the battery information are transferred to the charger and are visualized on the
display visualizes the message:
display.
The charger is now ready to start.
When the wireless connection is active the charger is ready to start the charging cycle. The
display visualizes the message:
When the wireless connection is active the charger is ready to start the charging cycle. The
Depending on the programmed start time window (Parameter 8), the charger may enter in
display visualizes the message:
stand-by mode, and the display visualizes the message:
At this point, the battery information are transferred to the charger and are visualized on the
display.
The charger is now ready to start.
(hh.mm)A →
At this point, the battery information are transferred to the charger and are visualized on the
display.
When the charge begins, the display visualizes the message:
Depending on the programmed start time window (Parameter 8), the charger may enter in
At this point, the battery information are transferred to the charger and are visualized on the
stand-by mode, and the display visualizes the message:
display.
Where (hh.mm)A represents the real time at that moment, and (hh.mm)B represents the
When the charge begins, the display visualizes the message:
The charger is now ready to start.
programmed start time.
When the charge begins, the display visualizes the message:
The charger is now ready to start.
Depending on the programmed start time window (Parameter 8), the charger may enter in
stand-by mode, and the display visualizes the message:
Depending on the programmed start time window (Parameter 8), the charger may enter in
(hh.mm)A →
stand-by mode, and the display visualizes the message:
BATTERY VOLTAGE TOO HIGH
Where (hh.mm)A represents the real time at that moment, and (hh.mm)B represents the
BATTERY VOLTAGE TOO HIGH
(hh.mm)A →
If the battery voltage is higher than a maximum threshold, the charge will not start and the
programmed start time.
display visualizes the message:
BATTERY VOLTAGE TOO HIGH
(hh.mm)A →
If the battery voltage is higher than a maximum threshold, the charge will not start and the
Where (hh.mm)A represents the real time at that moment, and (hh.mm)B represents the
display visualizes the message:
If the battery voltage is higher than a maximum threshold, the charge will not start and the
programmed start time.
Where (hh.mm)A represents the real time at that moment, and (hh.mm)B represents the
display visualizes the message:
programmed start time.
If this message appears, it's recommended to verify that the nominal battery voltage
matches the nominal voltage of the charger. Probably a wrong battery has been connected.
If this message appears, it's recommended to verify that the nominal battery voltage
BATTERY VOLTAGE TOO LOW
matches the nominal voltage of the charger. Probably a wrong battery has been connected.
If this message appears, it's recommended to verify that the nominal battery voltage
BATTERY VOLTAGE TOO LOW
If the battery voltage is lower than a minimum threshold, the charge will not start and the
matches the nominal voltage of the charger. Probably a wrong battery has been connected.
display visualizes the message:
BATTERY VOLTAGE TOO LOW
If the battery voltage is lower than a minimum threshold, the charge will not start and the
display visualizes the message:
If the battery voltage is lower than a minimum threshold, the charge will not start and the
display visualizes the message:
If this message appears, it's recommended to verify that the nominal battery voltage
matches the nominal voltage of the charger.
If this message appears, it's recommended to verify that the nominal battery voltage
Probably a wrong battery has been connected.
matches the nominal voltage of the charger.
If this message appears, it's recommended to verify that the nominal battery voltage
Probably a wrong battery has been connected.
It's also possible that the battery has been deeply discharged, bringing the voltage below the
matches the nominal voltage of the charger.
minimum value required for the automatic start the charge.
Probably a wrong battery has been connected.
It's also possible that the battery has been deeply discharged, bringing the voltage below the
minimum value required for the automatic start the charge.
In this case, it's possible to start the charge manually, by pushing the button DOWN for 5
It's also possible that the battery has been deeply discharged, bringing the voltage below the
seconds.
minimum value required for the automatic start the charge.
In this case, it's possible to start the charge manually, by pushing the button DOWN for 5
seconds.
In this case, it's possible to start the charge manually, by pushing the button DOWN for 5
CHARGE CYCLE
seconds.
CHARGE CYCLE
When the preliminary controls are complete, the charge starts automatically, and the display
CHARGE CYCLE
visualizes the following information:
When the preliminary controls are complete, the charge starts automatically, and the display
visualizes the following information:
Battery Voltage
•
When the preliminary controls are complete, the charge starts automatically, and the display
Charging Current
•
visualizes the following information:
Battery Voltage
•
Time of Charge
•
Charging Current
•
Capacity Returned
•
Battery Voltage
•
Time of Charge
•
Charging Current
•
Capacity Returned
•
Time of Charge
•
The Black Diamond Charger performs an exclusive charge cycle that is composed by stages
Capacity Returned
•
at constant current and stages at pulsed current, with cool down pauses in between.
OPERATION
BATTERY
CONNECTED
BATT ID MODULE
BATTERY
SEARCHING...
CONNECTED
BATTERY
CONNECTED
BATT ID MODULE
BATT ID MODULE
SEARCHING...
CONNECTED
BATT ID MODULE
SEARCHING...
BATT ID MODULE
SEARCHING...
BATT ID MODULE
CONNECTED
BATT ID MODULE
CONNECTED
[V.140 – January 2011]
BATT ID MODULE
DELAYED START
CONNECTED
[V.140 – January 2011]
(hh.mm)B
[V.140 – January 2011]
PREPARING
TO CHARGE
PREPARING
DELAYED START
TO CHARGE
PREPARING
(hh.mm)B
TO CHARGE
Page 15/28
DELAYED START
(hh.mm)B
DELAYED START
(hh.mm)B
BATTERY VOLTAGE
TOO HIGH !!!
BATTERY VOLTAGE
Page 15/28
TOO HIGH !!!
BATTERY VOLTAGE
TOO HIGH !!!
Page 15/28
Page 15/28
BATTERY VOLTAGE
TOO LOW !!!
BATTERY VOLTAGE
TOO LOW !!!
BATTERY VOLTAGE
TOO LOW !!!
[V.140 – January 2011]
[Volt]
xx.x V
xxx A
[Amps]
[Volt]
xxx Ah
x.x t
[hours.minutes]
[Amps]
[Ah]
[Volt]
[hours.minutes]
[Amps]
[Ah]
[hours.minutes]
Page 16/28
[Ah]
Page 16/28
IBCI BLACK DIAMOND
User's Manual
IBCI BLACK DIAMOND
User's Manual
IBCI BLACK DIAMOND
User's Manual
IBCI BLACK DIAMOND
User's Manual