Gannet Pro Handmatig - Pagina 3
Blader online of download pdf Handmatig voor {categorie_naam} Gannet Pro. Gannet Pro 5 pagina's.
Ook voor Gannet Pro: Gebruikershandleiding (19 pagina's)
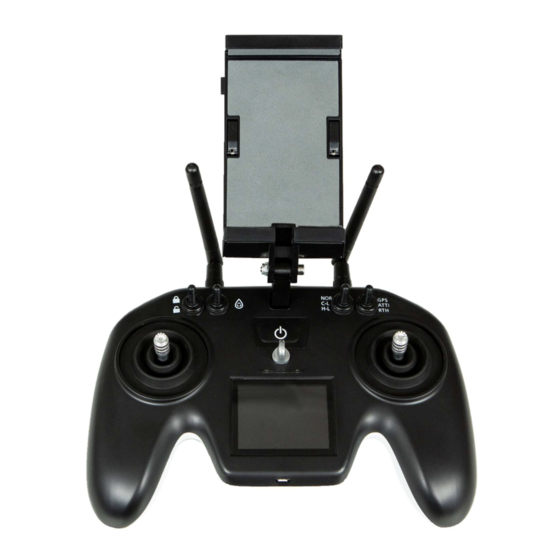
Top right outer button, GPS, ATTI, RTH (picture above)
This is to set the flight mode,
GPS; fully automated flight control, this means the flight controller will maintain position, attitude,
altitude and height and will also correct for wind.
ATTI; semi automated flight control, the flight controller will maintain attitude but the pilot will be
required to correct for wind and height.
RTH; return to home position, this will cause the drone to climb to the preset RTH height and the fly
to the take off position, hover and auto land.
(PLEASE note this is an emergency use only, it is not recommended by Gannet or DJI (NAZA) as the
normal way to return your drone after a drop.)
Top right inner button; NOR, CL, HL (IOC)
The following is from the MV2 quick start guide.
A3Intelligent Orientation Control (IOC)Flight(with GPS module)
Definition of Forward Direction:
Multi -rotor will fly along this direction when you push the elevator stick ( ).
Step1 Before You Start
Usually, the forward direction of a flying multi-rotor is the same as the nose direction. By using IOC,
wherever the nose points, the forward direction has nothing to do with nose direction. The red and
blue arrows on the transmitter are corresponding to pitch and roll operations in the following
diagram.
In course lock flying, the forward direction is the same as a recorded nose direction. All the
following requirements are met: the autopilot system is in ATTI. Mode or GPS ATTI. Mode.
Normal flying
Course Lock Flying