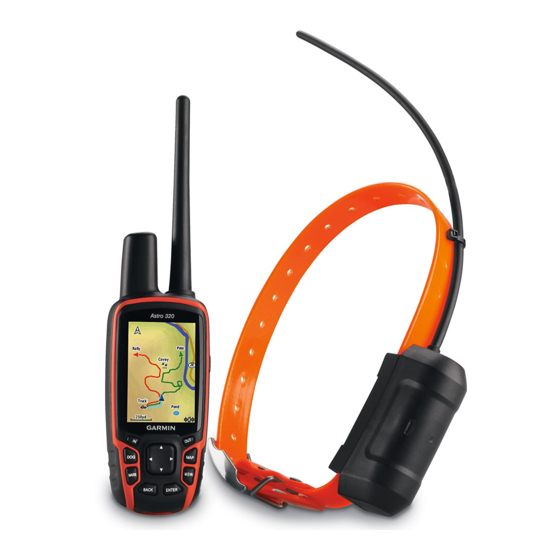
Dog Tracking
The handheld device allows you to track your dog, up to 9 miles
(14.48 km) away, using the dog tracking compass or map. The
map displays your location and your dog's location and tracks.
On the dog-tracking compass, the pointer indicates the direction
of the dog's current location.
NOTE: Both the collar and the handheld device must acquire
satellites before you can track the dog on the handheld device.
Tracking Your Dog on the Map
Before you can track a dog on the map, you must add them to
the handheld device
(page
You can view the dog's location on the map.
1
Select MAP.
2
Select IN and OUT to zoom in and out of the map.
Navigating to Your Dog
1
Select Dog List.
2
Select the dog.
3
Select Show Info > Go.
The map opens.
4
Follow the magenta line to the dog.
Viewing Dog Status
You can view your dog's status, such as the direction and
distance to the dog from the handheld device. To determine if
your dog is barking, you must first enable bark detection
(page
8).
1
From the main menu, select DOG to view the dog tracking
page.
2
If you have additional dogs, scroll through the list to find the
dog.
The handheld device can track up to 10 dogs.
3
Select ENTER.
Dog Status Icons
Sitting
Running
On point
Treed
Unknown*
*The unknown status icon indicates that the collar has not
acquired a satellite signal and that the handheld device cannot
determine the location of the dog.
Dog Information
The handheld device assigns a default name, "Dog," to the dog
collar device if it was packaged with the handheld device.
Resetting a Dog's Statistics and Track
You might want to clear the dog statistics and track before a
new hunt.
1
Select Dog List.
2
Select a dog.
3
Select Show Info > Reset > Yes.
Changing the Length of the Dog's Track
You can adjust the length of the dog's tracks shown on the map.
Showing less tracks on the map can help to declutter the map
view. Changing the length of the track shown on the map does
not affect the tracks stored in the internal memory.
Dog Tracking
3).
1
Select Setup > Dogs > Dog Track Length on Map.
2
Select an option to show more or less of the tracks on the
map.
Changing a Dog Name
1
Select DOG > ENTER.
The dog information appears.
2
Select the name field.
The on-screen keyboard appears
3
Enter the name of the dog.
Changing the Color of the Dog's Track
You can change the track color of the dog. It is helpful to have
the track color match the color of the collar strap, if possible.
1
Select Dog List.
2
Select a dog.
3
Select Show Info.
4
Select the colored square next to the dog's name.
5
Select a color.
Changing the Dog Type
Before you can change the dog type, you must turn on the dog
collar device and bring it within 10 feet (3 m) of the handheld
device.
You can assign a dog type so the appropriate dog status
symbols appear.
1
Select DOG > ENTER > MENU.
2
Select Change Dog Type.
3
Select a type.
Setting Dog Alerts
You can adjust how the handheld device alerts you to certain
actions of the dog.
1
Select Setup > Dogs > Dog Alerts.
2
Select an alert.
3
Select the handheld device action for the specific alert.
4
Repeat steps 2 and 3 as needed.
Removing a Dog
1
Select Dog List.
2
Select a dog.
3
Select Remove.
Adding a Dog
The handheld device can track up to 10 dogs with dog collar
devices. If you purchase additional dog collar devices, you can
link them to the handheld device. To link, the handheld device
must be close enough to the dog collar device to touch it, or you
must know the dog collar device ID number.
1
Select DOG.
2
Select Add Dog.
3
Follow the on-screen instructions.
By default, the new dog is named "Dog" and an ID number is
randomly assigned.
An error message could appear if there is a conflict with the
ID number of another dog.
Assigning a Dog ID Manually
Before you can assign a dog ID manually, you must turn on the
dog collar device and bring it within 10 feet (3 m) of the
handheld device. You must assign a new ID number to the dog
and change the update rate.
1
Select DOG.
2
Select a dog.
(page
2).
3

