Brother QL-580N Installatie- en bedieningshandleiding - Pagina 3

Blader online of download pdf Installatie- en bedieningshandleiding voor {categorie_naam} Brother QL-580N. Brother QL-580N 43 pagina's. Label printer
Ook voor Brother QL-580N: Gebruikershandleiding voor netwerken (42 pagina's), Gebruikershandleiding voor de software (40 pagina's), Gebruikershandleiding voor netwerken (48 pagina's), Gebruikershandleiding voor de software (48 pagina's), Gebruikershandleiding (26 pagina's), Gebruikershandleiding (40 pagina's), Installatie- en bedieningshandleiding (43 pagina's), Gebruikershandleiding (41 pagina's)
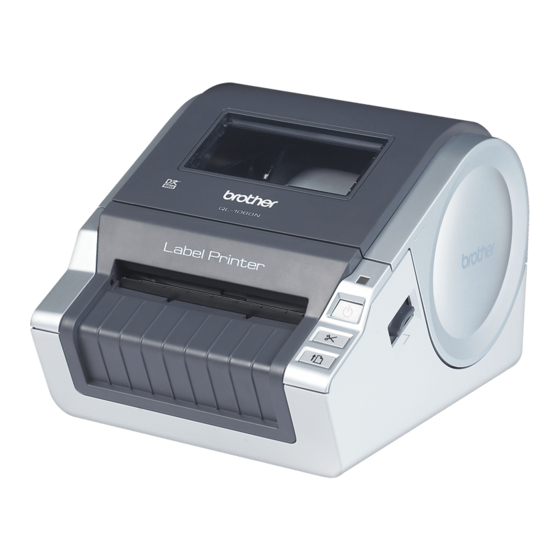
Brother QL-580N Installatie- en bedieningshandleiding

Introduction

Contents

Introduction •••••••••••••••••••••••••••••••••••••••••••••••••••• 1
Contents ••••••••••••••••••••••••••••••••••••••••••••••••••••••••••••••••••••••••• 1
General Information ••••••••••••••••••••••••••••••••••••••••••••••••••••••••••• 2
Safety Precautions •••••••••••••••••••••••••••••••••••••••••••••••••••••••••••• 3
General Precautions •••••••••••••••••••••••••••••••••••••••••••••••••••••••••••••••••••• 5
1
Getting started ••••••••••••••••••••••••••••••••••••••••••••••••• 7
1
STEP
1
Unpacking the QL-570/580N •••••••••••••••••••••••••••••••••••••••••••••••• 7
2
Parts Description••••••••••••••••••••••••••••••••••••••••••••••••••••••••••••••• 8
Main Printing Unit•••••••••••••••••••••••••••••••••••••••••••••••••••••••••••••••••••••••• 8
3
Connecting the Power Supply••••••••••••••••••••••••••••••••••••••••••••••• 8
4
Removing Protection Sheet•••••••••••••••••••••••••••••••••••••••••••••••••• 9
5
Setting the DK Roll •••••••••••••••••••••••••••••••••••••••••••••••••••••••••••• 9
6
Using Interface Cable ••••••••••••••••••••••••••••••••••••••••••••••••••••••••• 11
Installing the software •••••••••••••••••••••••••••••••••••••••• 13
2
2
STEP
1
Installing the Software for QL-570•••••••••••••••••••••••••••••••••••••••••• 13
2
Installing the Software for QL-580N•••••••••••••••••••••••••••••••••••••••• 17
3
Label Overview ••••••••••••••••••••••••••••••••••••••••••••••••• 29
3
STEP
1
Label Variety•••••••••••••••••••••••••••••••••••••••••••••••••••••••••••••••••••• 29
2
General Procedures••••••••••••••••••••••••••••••••••••••••••••••••••••••••••• 30
3
Start P-touch Editor Help••••••••••••••••••••••••••••••••••••••••••••••••••••• 31
4
Reference••••••••••••••••••••••••••••••••••••••••••••••••••••••• 33
4
STEP
STEP
1
LED Lamp ••••••••••••••••••••••••••••••••••••••••••••••••••••••••••••••••••••••• 33
2
Maintenance •••••••••••••••••••••••••••••••••••••••••••••••••••••••••••••••••••• 34
3
Troubleshooting •••••••••••••••••••••••••••••••••••••••••••••••••••••••••••••••• 36
4
Main Specifications•••••••••••••••••••••••••••••••••••••••••••••••••••••••••••• 38
Accessories••••••••••••••••••••••••••••••••••••••••••••••••••••••••••••••••••••••••••••••• 39
5
For Australia Only:••••••••••••••••••••••••••••••••••••••••••••••••••••••••••••• 40
®
®
••••••••••••••••••••••••••••••••••••••••••••••••••••••••••••••• 15
®
®
••••••••••••••••••••••••••••••••••••••••••••••••••••••••••••••• 23
®
•••••••••••••••••••••••••••••••••••••••••••••••••••••••••••••••••••••••••••• 31
®
•••••••••••••••••••••••••••••••••••••••••••••••••••••••••••••••••••••••••••••••••• 32
®
•••••••••••••••••••••••••••••••••••••••••••••••• 13
®
•••••••••••••••••••••••••••••••••••••••••••••••• 17
1
1
STEP
2
3
4