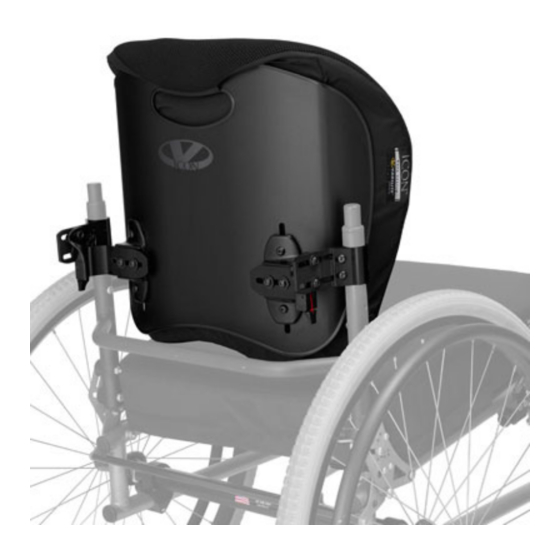
ALLIED MEDICAL Varilite Icon Mid Back Installatiehandleiding - Pagina 5
Blader online of download pdf Installatiehandleiding voor {categorie_naam} ALLIED MEDICAL Varilite Icon Mid Back. ALLIED MEDICAL Varilite Icon Mid Back 5 pagina's.

3. Tips & Tricks
Easy Set-up
•
Mount the brackets first.
•
When mounting the brackets, ensure that the hardware is mounted parallel to the seat rails.
This will make it much easier when you are removing and inserting the seat back.
•
Then attach back to the brackets and make height adjustments through the sliding shell
brackets.
*When making adjustments only loosen the adjustment screws by ¾ of a turn.
Trouble Shooting
If the back system is "sticking" or "binding". Allow slide brackets to "self centre".
•
Loosen off the slide bracket screws on both sides.
•
Allow brackets to move so that there is room in the holsters.
•
Retighten slide brackets.
Check cane brackets
•
Make sure they are installed at same height on canes.
•
The flag portions should be parallel.
Check angle adjustment
•
Holsters to make sure the angle is same on each side.
•
To correct:
- Loosen top adjustment screw ¾ turn
- Press backrest backwards
- Tighten screw while holding backrest backward
- Repeat slide bracket self centering
3. Checklist
What to check
Brackets are mounted parallel to the seat rails on both sides
Mounting brackets are mounted at the same height
Back height has been set to the top of the users shoulders
Check that seatback can be removed and inserted without sticking
or binding
Ensure all adjustment screws have been tightened at the end of the
setup
www.alliedmedical.co.nz | 0800 31 61 81 | [email protected]
Done
