diatesse XPER TD-4289B Gebruikershandleiding - Pagina 5
Blader online of download pdf Gebruikershandleiding voor {categorie_naam} diatesse XPER TD-4289B. diatesse XPER TD-4289B 15 pagina's. Blood glucose & ketones monitoring system

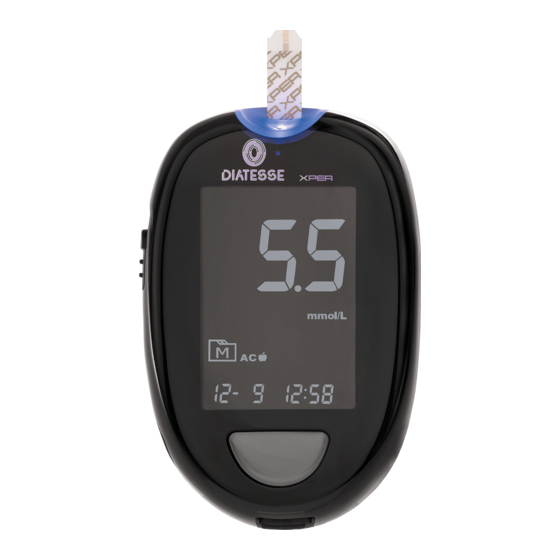
Meter overview
Test strip slot and strip indicator light
1
Insert your test strip, the section containing the contact points, into this slot
(so that it is firmly in place) in order to turn the meter on for your test.
Bluetooth® indicator light
2
(Bluetooth® can be optionally activated).
Ejecting the test strip
3
Eject the test strip by pushing this button upwards.
Mains button (M)
4
Open the memory of the meter and turn off the reminder.
Display
5
Data port
6
Download the test results to your computer using a USB cable.
SET button (S)
7
Input the selected meter settings and confirm them.
The SET button is located in the battery compartment.
Battery compartment
8
8
Display
Test result
1
Measuring mode
2
Gen – at any time
AC – before meals
PC – after meals
Automatic quality
3
control mode
QC = Quality control test using
the control solution
Average over a number of days
4
Memory symbol
5
Date/Time
6
Error warning
7
Alarm symbol
8
Measurement unit
9
Ketone symbol
10
Absorbent opening
1
Test strip grip
3
PLEASE NOTE: The front of the test strip must be facing
upwards when you insert the test strip.
The test results could be incorrect and/or inaccurate if that part of the test strip containing the
contact points is not fully and correctly inserted into the test slot.
NOTE: Only Diatesse XPER test strips may be used with the Diatesse XPER meter.
Using other test strips with this device could produce inaccurate results.
Low battery warning
11
Test strip symbol
12
Blood drop symbol
13
Glucose (blood sugar) symbol
14
Code
15
Control window
2
Contact points
4
9
