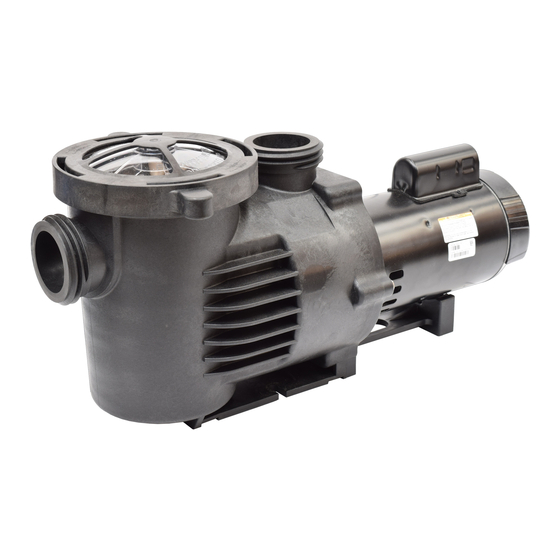
EasyPro PCA500 Installatie- en onderhoudshandleiding - Pagina 2
Blader online of download pdf Installatie- en onderhoudshandleiding voor {categorie_naam} EasyPro PCA500. EasyPro PCA500 6 pagina's. High flow, self priming centrifugal pumps

WARNINGS
1. This pump and motor unit should be installed by a qualified electrician or serviceman in accordance with all applicable state and local codes and
ordinances, and in accordance with the National Electrical Code. Improper installation may create a mechanical or electrical hazard which could
cause damage to property and which could result in serious injury or death. Always follow the schematic on the motor for all electrical connections!
2. In order to avoid serious injury or death, always disconnect power to the motor before servicing the pump.
3. Never run the pump dry. You must fill the priming pot (volute) with water before starting the motor.
4. Never start the pump when the motor shaft is turning. To prevent unwanted motor rotation, install a swing type check valve.
5. If you are not competent to install the pump, get help from a qualified source.
6. Maintain a minimum flow rate of two gallons per minute.
7. Visually inspect the pump and motor once a month. If there is any leakage from the shaft seal, replace it at once. The seal faces wear (just like car
tires) and must be replaced periodically. For critical applications, replace the shaft seal yearly.
8. For 3 phase motors, insure correct motor r otation. See item 7 in electrical for details.
INSTALLATION
General
Proper installation of your PCA Series pump will help insure years of trouble free service.
1. Position the pump as near to the water and as low as is practical. This will help reduce priming time, avoid cavitation and maximize your pumps
performance. Do not allow pump to become submerged.
2. Minimize friction losses by using large diameter pipe, reducing the length of runs and minimizing the number of elbows and fittings as much as
possible.
3. Protect the motor from excessive heat. It is best to provide shade from direct sun, and insure that it has proper ventilation. Excessive heat will
shorten the motors life and void the warranty.
4. Protect the motor against dirt, water and all foreign matter. If the motor has been flooded, do not operate it until it has been checked by an
authorized motor technician and has been found to be safe to operate. If the motor is damaged by dirt, moisture or corrosion it voids the warranty.
5. Mount the motor to a stable base where it will not get submerged.
6. The pump ports are 3" on both the inlet and discharge ports. PVC fittings are available to accommodate 2", 2
unions are included with each pump. All plumbing lines should be self supported and properly aligned. This will prevent undue stress to the
housing. Use a suitable PVC primer and cement to connect your pipe to the fittings.
7. Installations in which the discharge pipe is elevated above the pump must use a swing type check valve to prevent back flow and possible reverse
rotation.
Electrical
1. If you are not competent to wire an electric motor, hire someone who is!
2. Make sure the power is disconnected at the breaker before wiring the motor.
3. Make sure that the motor is wired internally so that it matches the supply voltage. If they do not match, it will damage your motor and void the
warranty (i.e. if you are connecting it to a 115v breaker, make sure the motor connections match the 115v (low) wiring diagram found on the motor).
Always follow the schematic on the motor for all electrical connections.
NOTE: Baldor motors have sepeate wiring schematics for low 115v and high 230v applications. Both schematics are shown for dual voltage motors.
AO Smith Motors use a switch to change between low 115v and high 230v on dual voltage motors. This switch is located under the rear cover on the
back of the motor. The wiring schematic is the same for these motors since the switch determines the voltage selected.
4. Use a supply wire of adequate gauge to prevent electrical line losses. The use of heavier gauge wire will allow the motor to run cooler and more
efficiently by eliminating excessive line voltage loss.
5. Make sure all connections are clean and tight. Properly ground the motor. (There is normally a green ground terminal located inside the motor
connection box.) Make sure the ground wire is properly connected to an electrical service ground.
6. Connect the pump permanently to an adequately sized circuit. It is best to have a dedicated circuit that will not suffer a voltage drop from other loads.
7. When using three phase power the motor leads must be energized in the correct sequence to provide proper motor rotation. When viewed from
the shaft end the motor must rotate counterclockwise. Incorrect rotation will destroy the pump and motor and void the warranty. If you are not sure
of the sequence of your incoming supply lines, remove the volute (front housing) and diffuser from the pump, then connect the power and check
rotation. If it is incorrect exchange any two of the connected leads and retest. When the rotation is correct reinstall the diffuser and volute.
*Never test rotation by bumping a connected electrical switch. This will destroy the pump and void the warranty!
PCA SERIES PUMPS
Reliability You Can Count On!
www.easypro.com • 800-448-3873
/
" and 3" pipe. Quick connect
1
2
© 2019 EasyPro, Inc
— Pg. 2
5730 • 10/19
