Olympus BH-NRE Handmatig - Pagina 9
Blader online of download pdf Handmatig voor {categorie_naam} Olympus BH-NRE. Olympus BH-NRE 17 pagina's. Modular revolving nosepiece
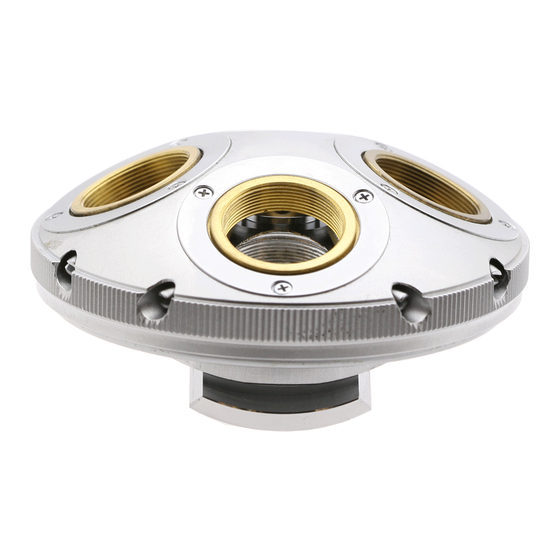
Figure 18 – Loosen the threaded retaining ring
Once the threaded retaining ring has broken loose, use
the punch, or a suitable lens spanner tool (item T3 of
Appendix
2) to continue loosening and remove it, being
careful that the perimeter bearing balls beneath the
threaded retaining ring do not fall out and become lost
in the process (see
Figure
Figure 19 – Remove the threaded retaining ring
Remove the Perimeter Bearing Balls
Carefully remove the 3/32" bearing balls (there are 80
of them) from the perimeter of the stationary base. A
small magnet can come in handy here (see
Figure 20 – Remove the perimeter bearing balls
Complete Teardown, Cleaning, and Reassembly of the Olympus BH-NRE Modular Revolving Nosepiece
19).
Figure
Remove the Stationary Base from the Turret
Once the perimeter bearing balls have been removed,
lift the stationary base free of the recess in the
revolving turret and remove it (see
Figure 21 – Lift and remove the stationary base
Clean Grease from the Various Components
Use a suitable solvent (e.g., acetone) to thoroughly
clean all the old grease from the stationary base,
revolving turret, threaded retaining ring, perimeter
bearing balls, center-pivot ball, mechanical-detent stop,
pivot-adjustment screw, and the slotted lock ring, in
preparation for reassembly. The various parts of the
BH-NRE modular revolving nosepiece are shown in
Figure
22.
20).
Figure 22 – All parts cleaned and ready for reassembly
Apply Grease to Perimeter of Stationary Base
Apply a ring of fresh grease (item S1 of
the step edge around the outer perimeter of the
stationary base (see
Figure
21).
Appendix
Figure
23).
Page 9 of 17
Revision 3
2) into